

Side Quest: Finding A Vintage Sewing Machine For My Mom
When my mom immigrated to the United States, she sewed a lot. Many of my childhood dresses were made by her. I even have many of the patterns that she used for them today. She dropped actively sewing when she got deep into her profession. Now that she’s retired and loves clothes, she’s picked up sewing again. She recently called me and said that she wanted a new machine.
I believe she’s sewing on a late 1980s / early 1990s Kenmore. After hearing what she wants to do, it honestly sounds like she just needs some attachments. Like a ruffler for example. However, she mentioned that she sewed some denim and when you into the heavier materials it’s best to have a strong motor on your machine. While I’ll get her some attachments for her current machine, I did poke around my collection to see what might work for her.
I asked my friends over on Instagram what would they offer up if they were me. I had some good suggestions, two actually mentioned a Singer 401A. Which was one I did consider. However, after thinking about it for a bit I think my mom would have some trouble changing the fashion discs. Not that it’s hard to do, I just know that my mom isn’t in tune with machines and I can see her getting frustrated with changing discs.
She needs:
A straight and zigzag stitch.
A couple decorative stitches would be nice.
A strong motor for sewing heavier fabrics.
Easy dial and setting adjustments without any removable parts.
As a collector, I have an assortment of machines that would fit her needs. One machine I am considering is this Viking.
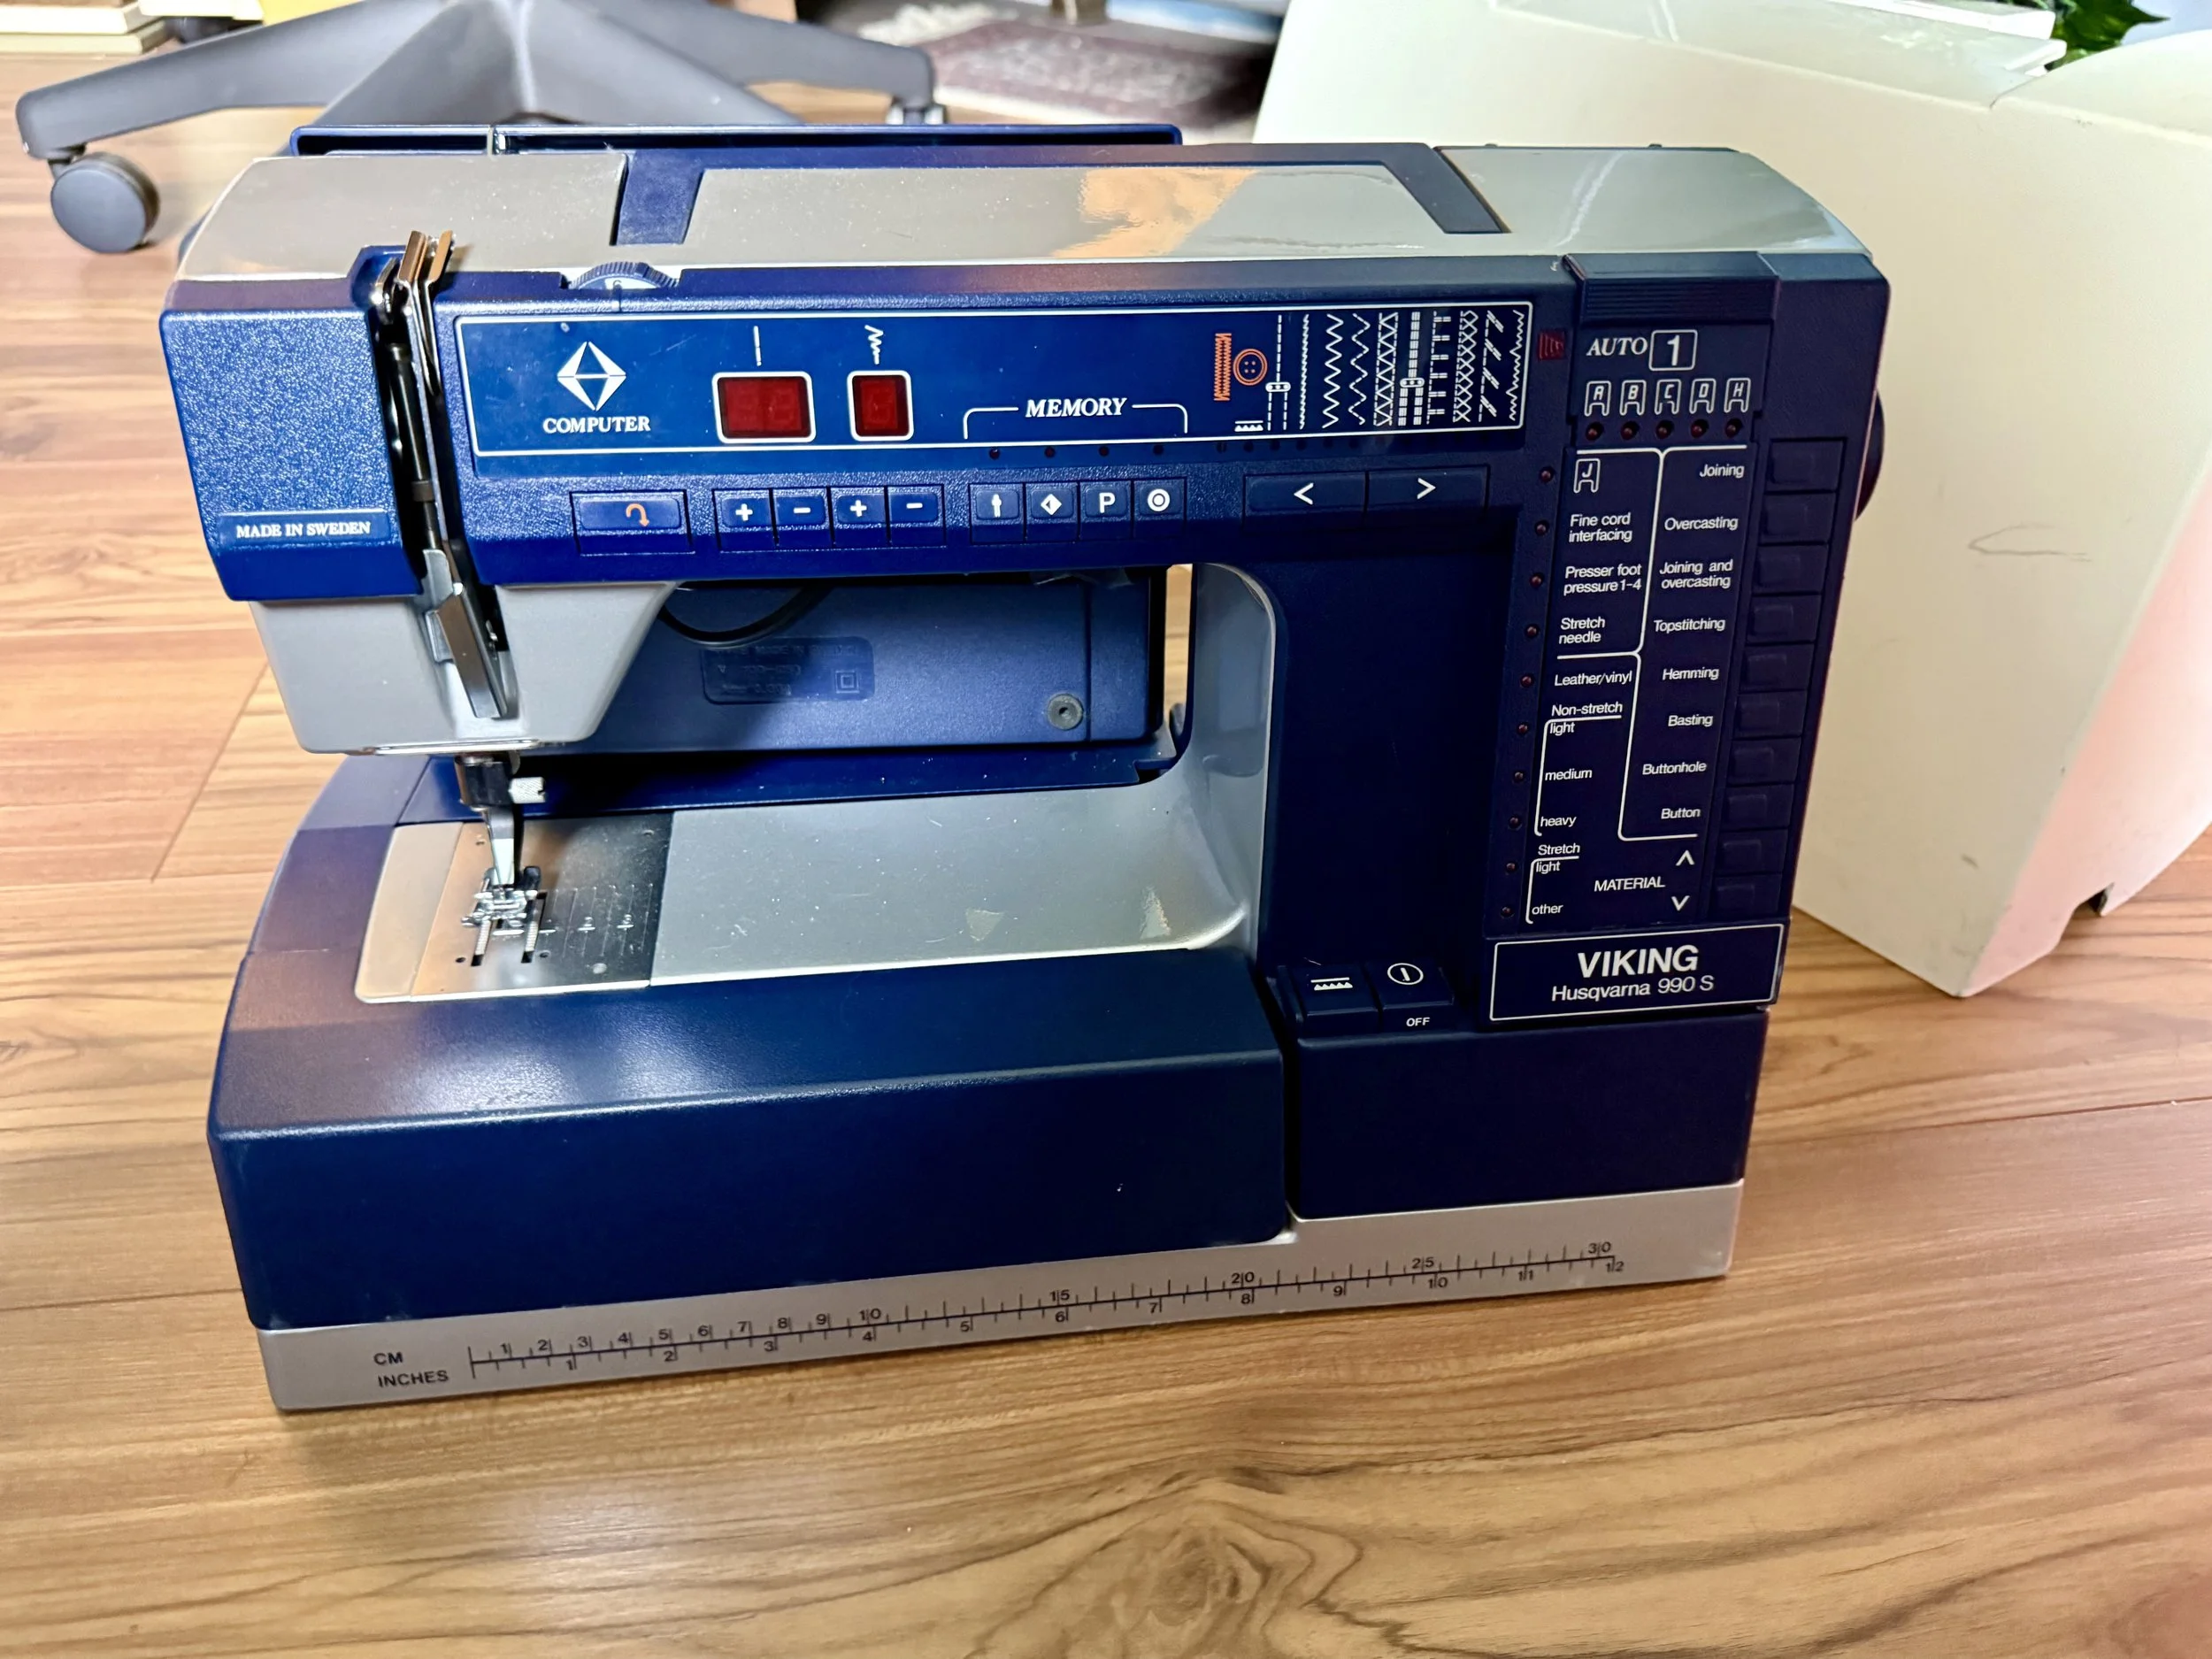
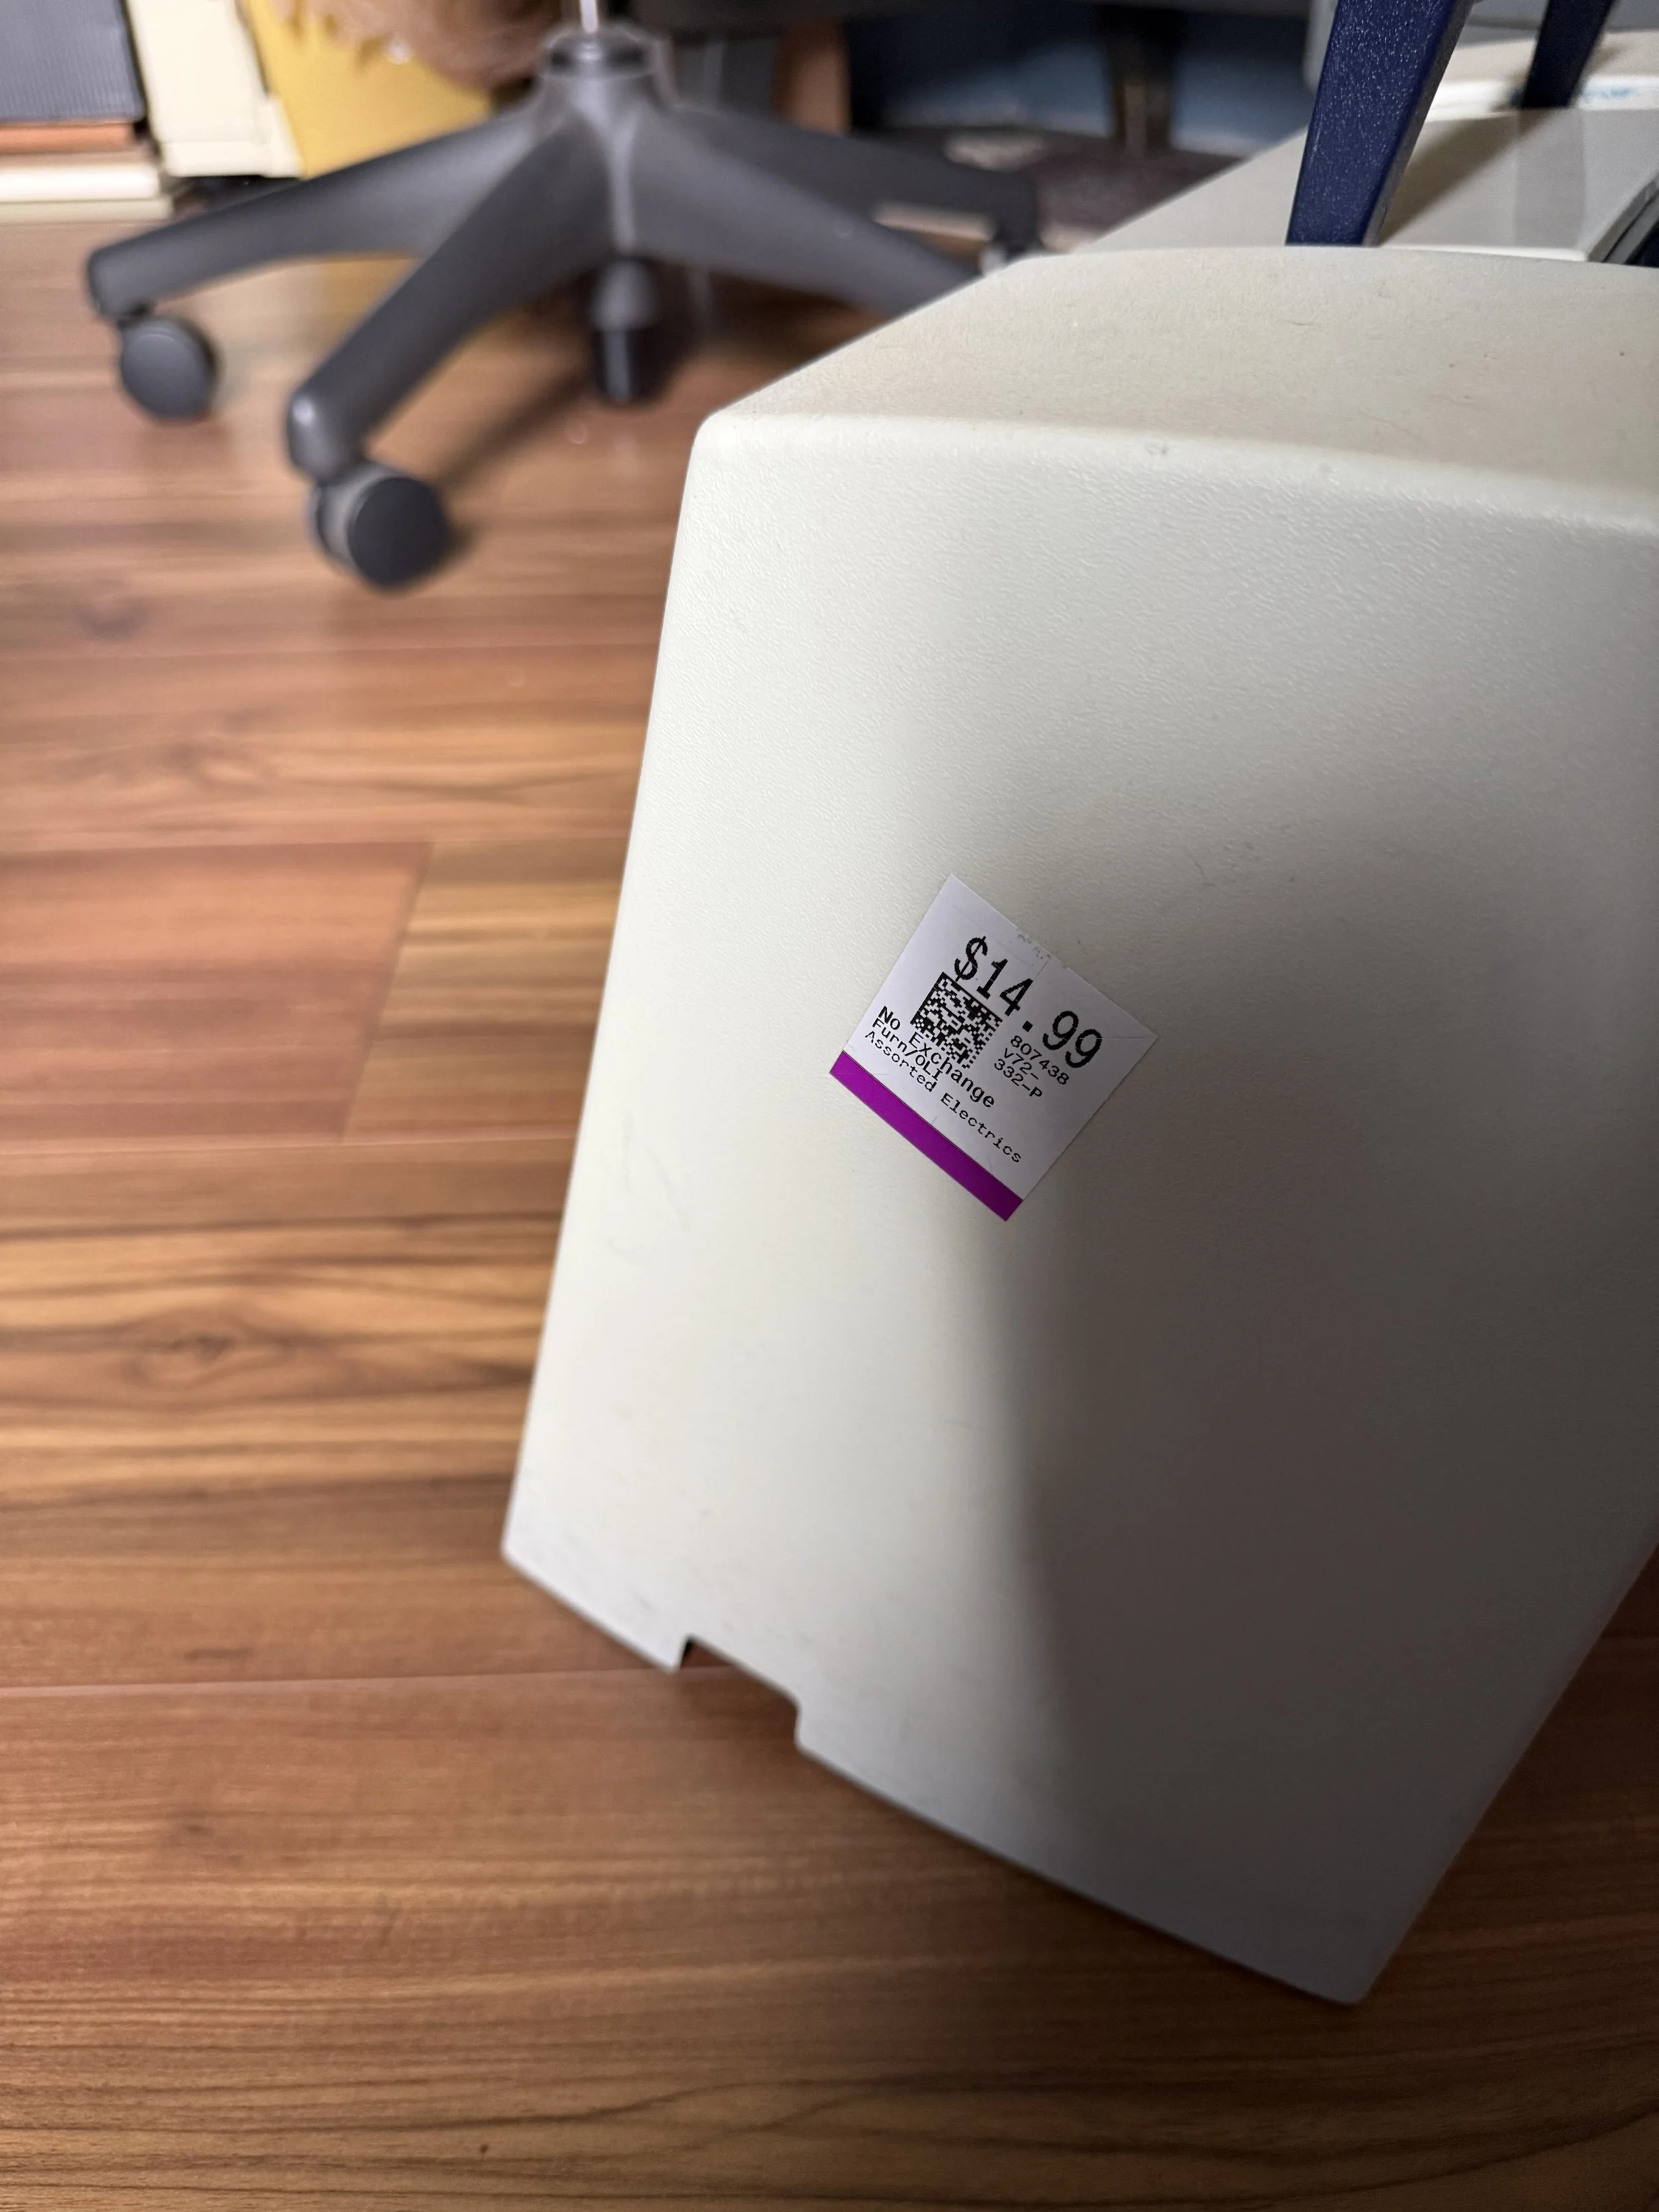
It's a mid to late 1980s Husqvarna Viking 990 S. I paid $15 USD for it at a thrift store. It has ton of attachments and the largest foot pedal for a sewing machine that I’ve seen. I am a little weary of Vikings, since my first experience with them was a bit “hot”. Also, there’s a lot of buttons on this rig and I’m not sure how easy it is to use. I wish I had a PFAFF Hobby line to part with because I think that would be a great fit.
So, lots of testing is going to happen with this one before I give it to my mom. I plan to do an overview video on it, so stay tuned for that.
xo - Thea
Upcycled Sweater To Tote My Chicken Around In
Ha. The projects one can “create”.
I’ve shown my chickens a few times before here and in my videos. I have one chicken in particular that is very close to me. She likes to be held and cuddled and will “ask” for that. Her name is Miss Piggy Lou and she is an 3 year old Easter Egger chicken.
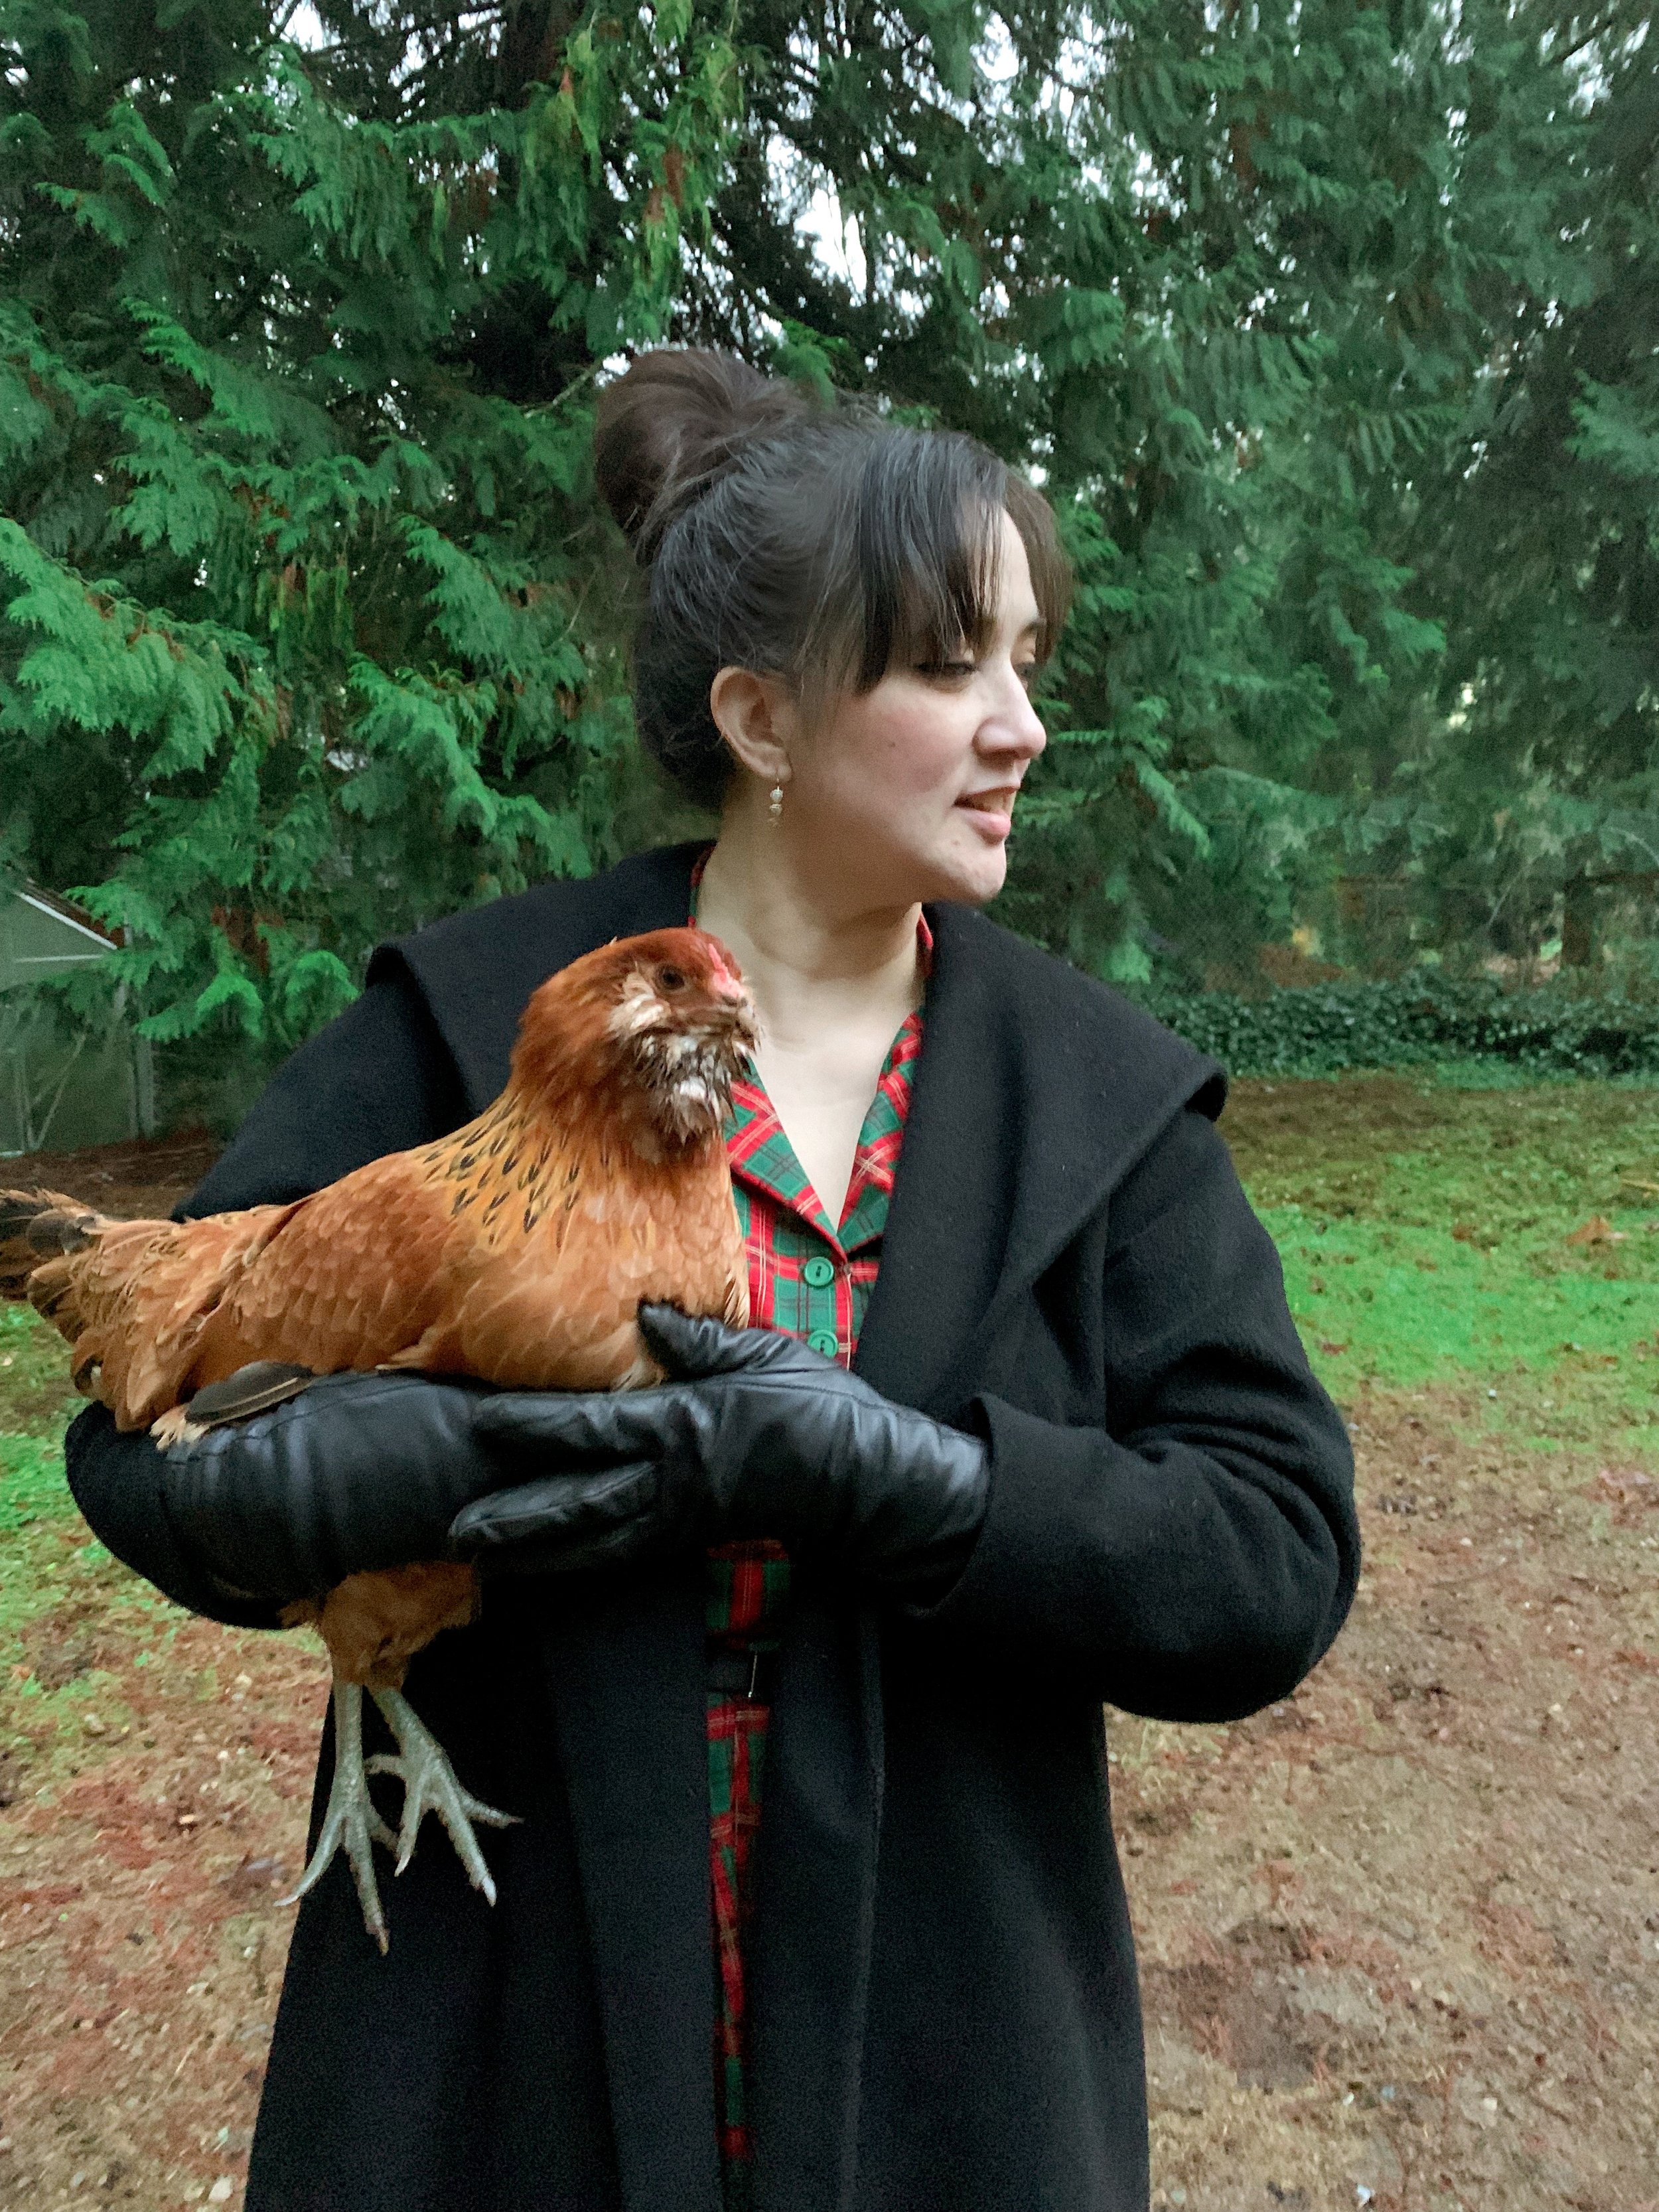
Thea & her chicken Piggy Lou - 2024
Piggy is the youngest from my original flock of chickens, I don’t count Gonzo Paul - my rooster in that. He’s special because he’s a boy and I had to do extra steps into integrating him into the established flock.
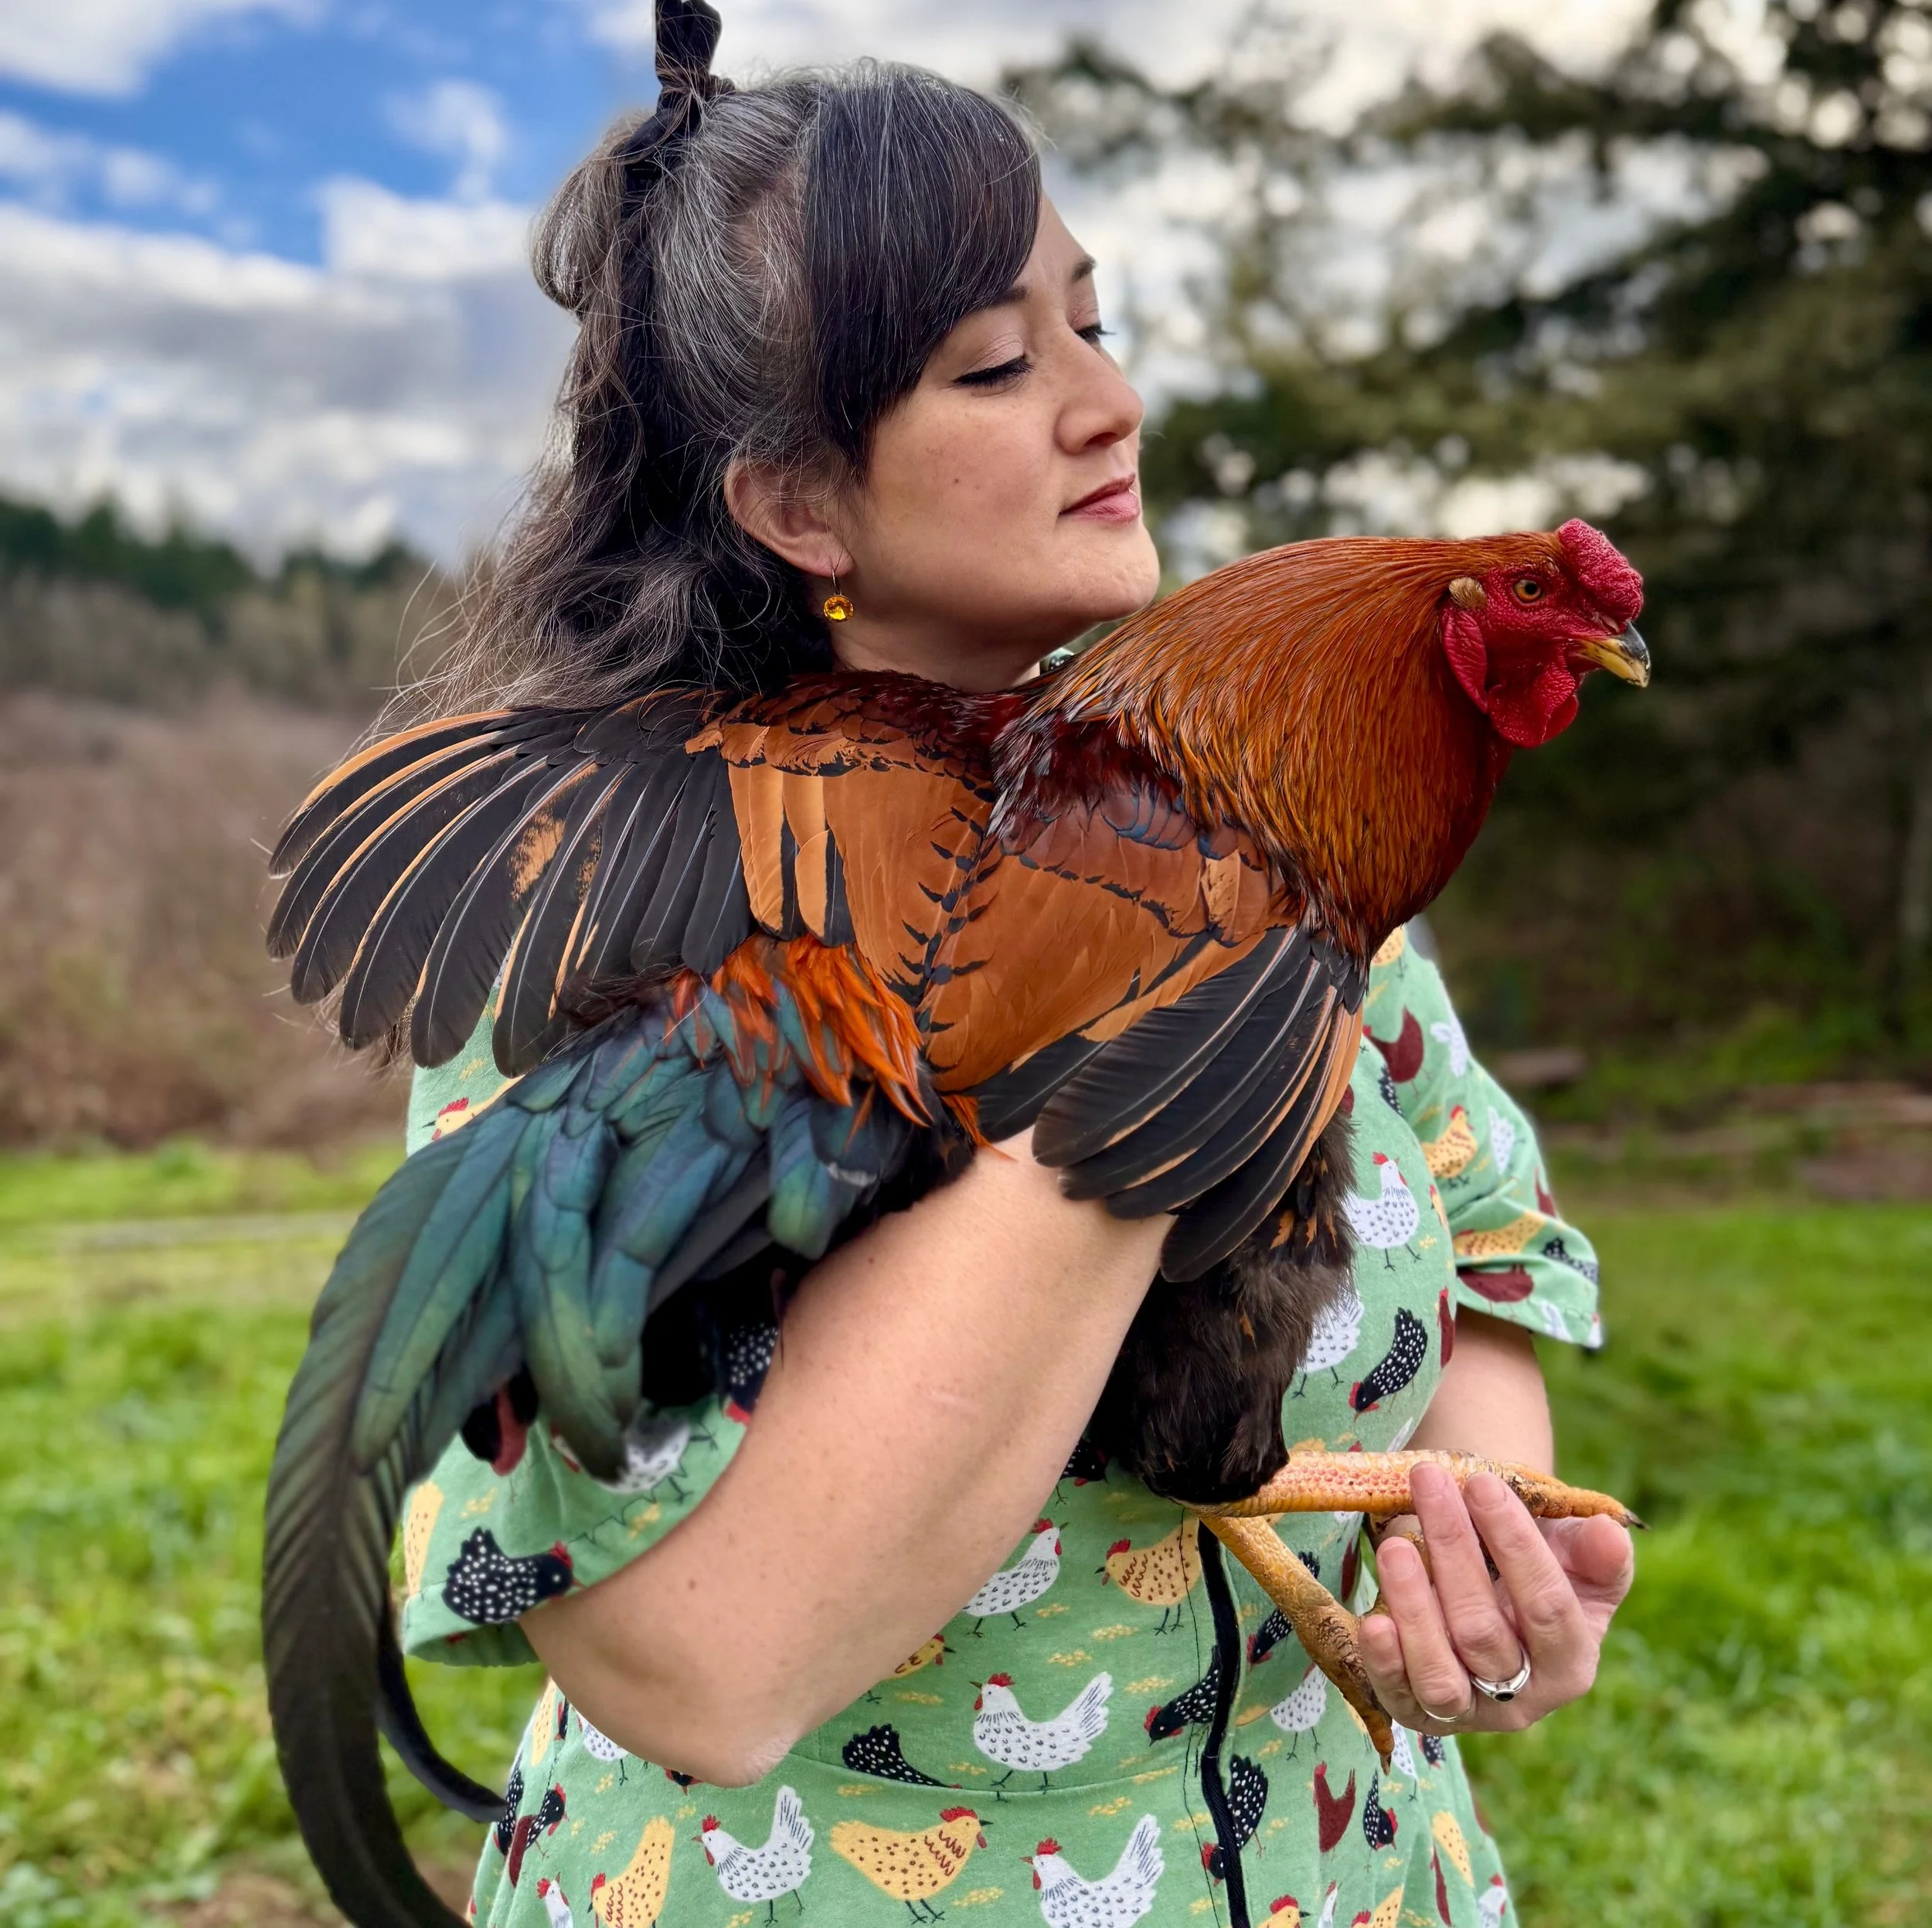
Thea and her rooster Gonzo Paul. - 2026
While I had experience going up around chickens in a rural island town, it’s a different game when you are raising your own. My husband John and I now have a 20 acre homestead, but when we first got chickens we were on an acre plot in the Seattle suburbs. There were rules and limits we had to abide by. We were also fairly close to our next door neighbors in the backyard area where John built our coop. And we have one hen in particular that is very loud when she sings her egg song. I’d often rush outside to thank /hush her up when the neighborhood was quiet. Needless to say, we’re very close to our first flock. I didn’t think it would be like that. Most chickens I’ve experienced just exist out on their own on a farm. Even now, my chickens do not get to free range unsupervised. I’m always outside walking around and watching them. Which has been great to have an afternoon break everyday outside. (I work from home - so it’s a nice reprieve routine.) Piggy Lou does see that as her opportunity for cuddle time of course. She will pull my pant leg or skirt to let me know she wants “up”.
So I’m toting Piggy around a lot. She’s a medium sized hen and isn’t heavy at all. But restoring a homestead and building a big garden, I need both hands free to use. I’ve joked about making a sling to carry her around in. Similar to a baby sling. However, I follow a “chicken influencer” (yes - and there are many of them out there) Purely Chickens /Nikki Husted - and she posted that she purchased a sweater that was designed to carry around a cat or a small dog. She toted around one of her chickens in it. I priced it out and decided that I could make my own. That’s what my most current video is all about. I know it’s not my typical video, but like I said it was a real project I had on my list. I did use two of my vintage sewing machines for the project.
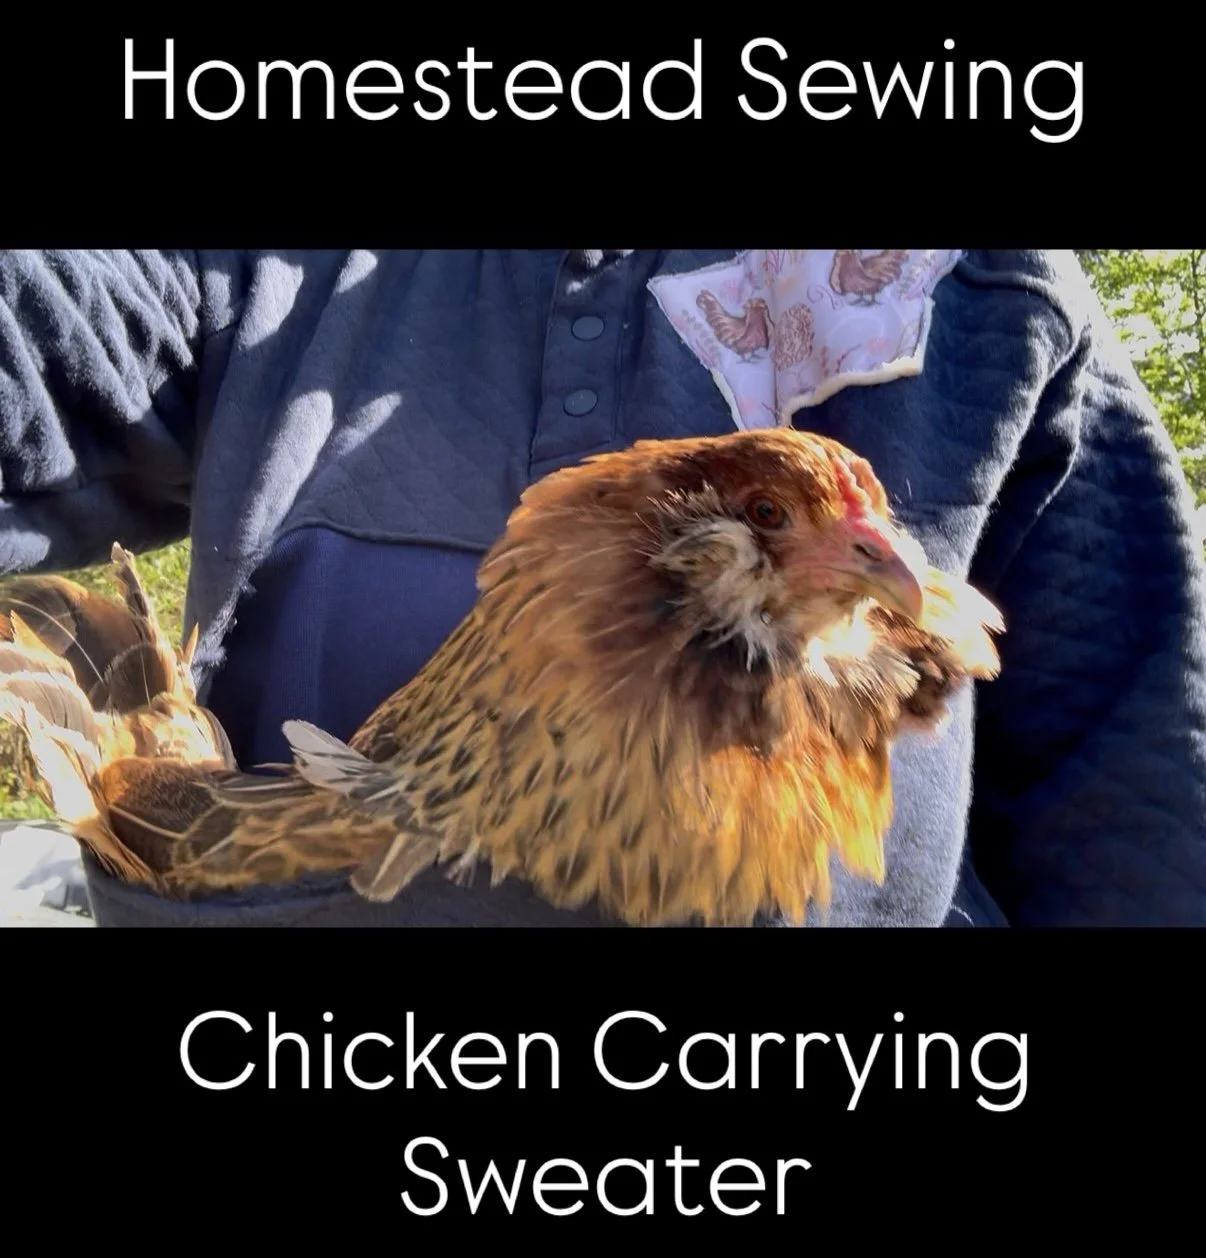
Spoiler: She loves it.
xo-Thea
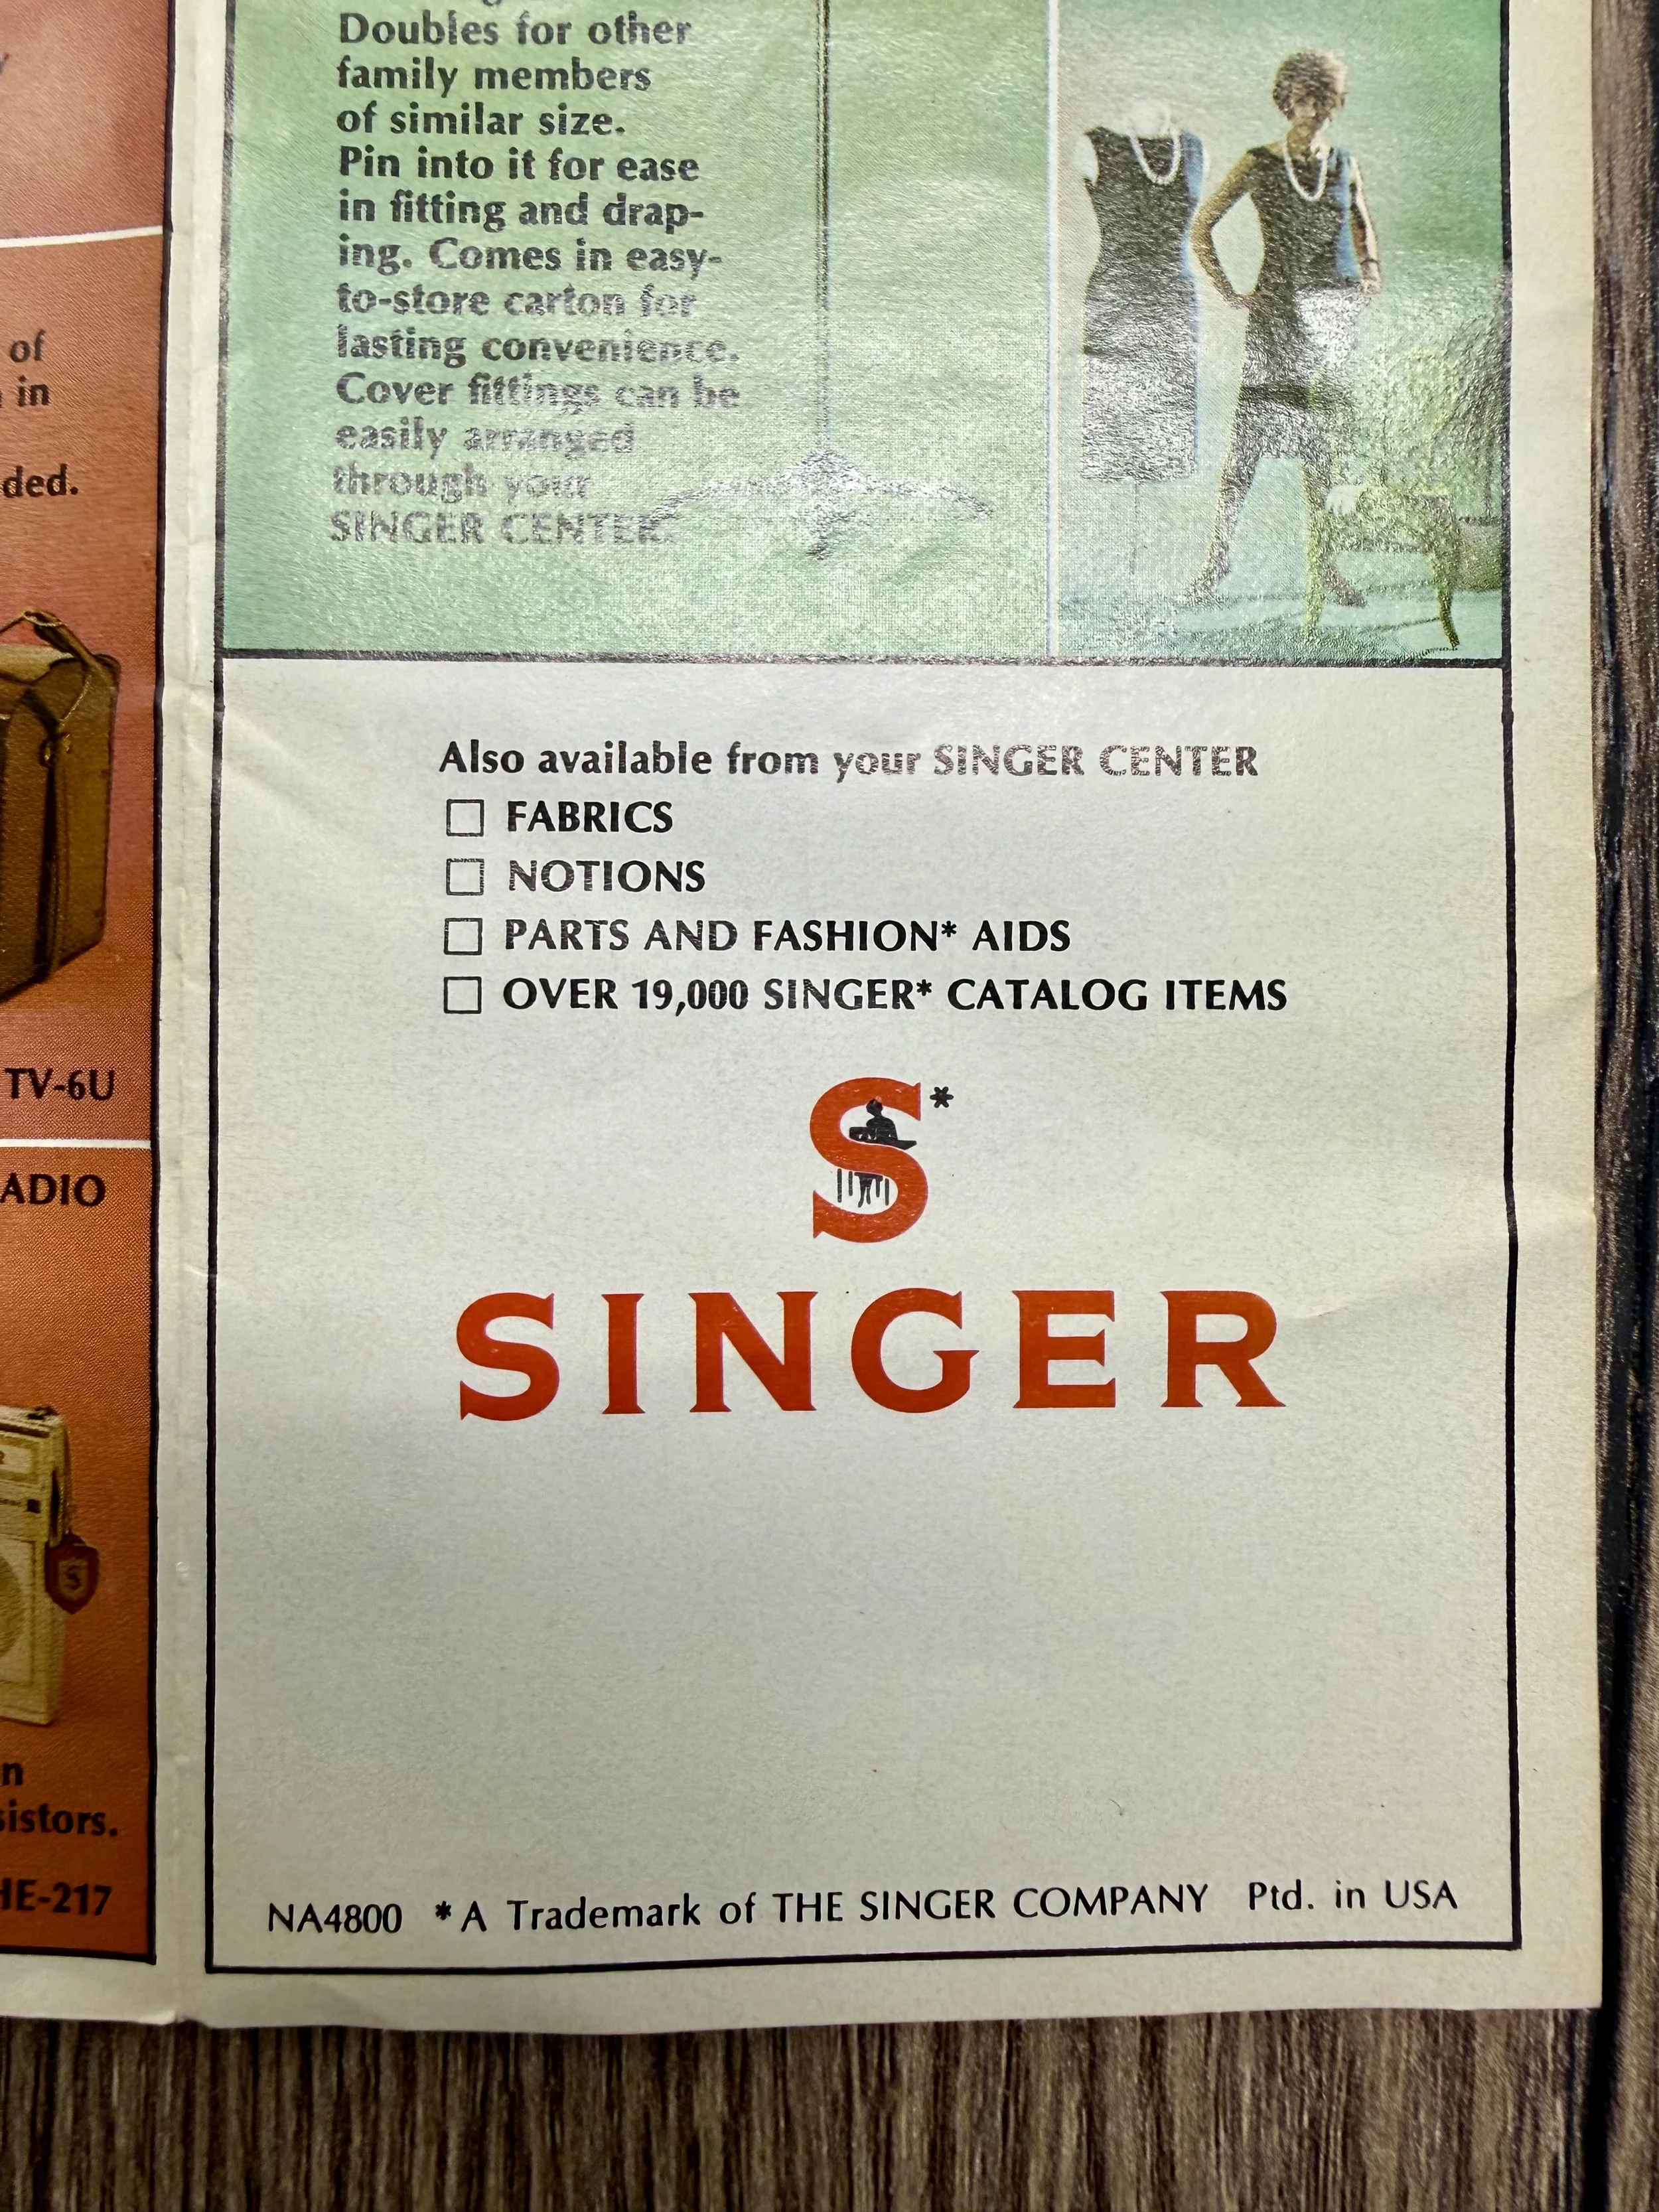
Vintage Singer Center Ad/Pamphlet (1965)
As mentioned yesterday, I ended up finding something cool in my Singer 328k’s manual. It was a neatly folded Singer Center Ad/pamphlet.
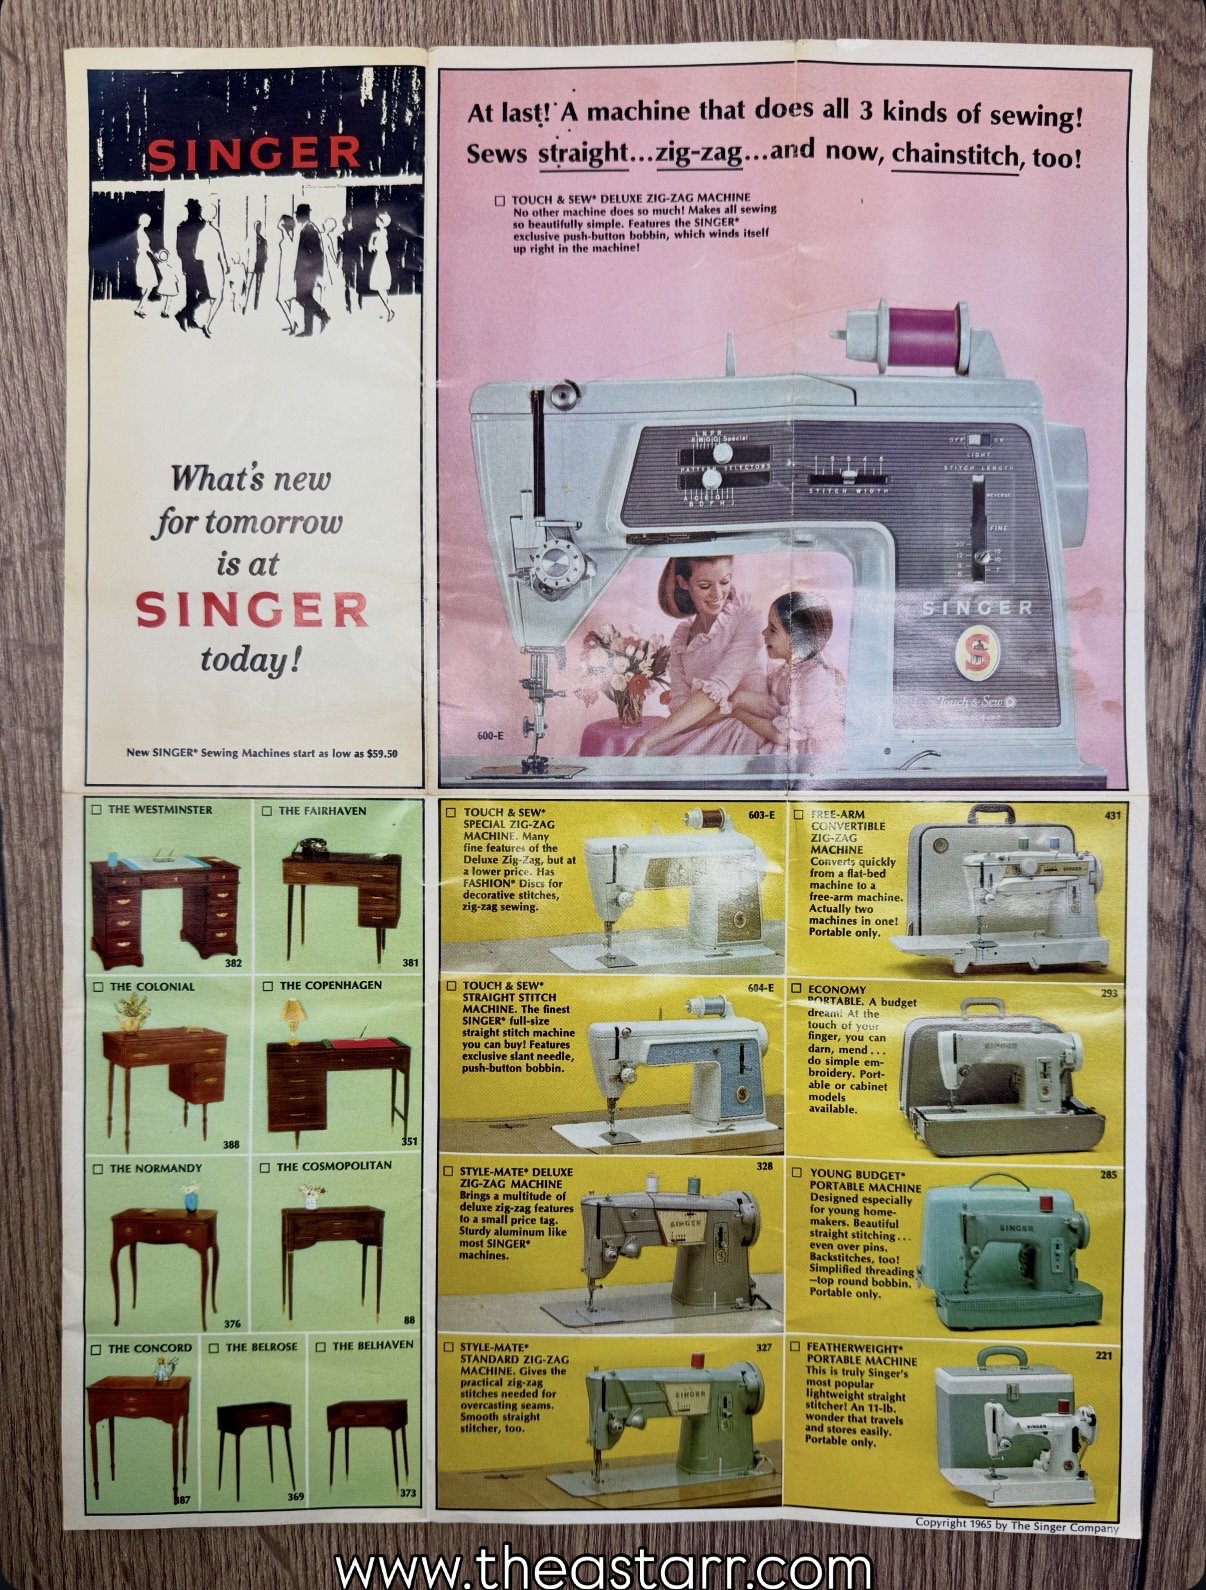
Singer Center Ad from 1965
Just like I tell everyone, if your vintage machine came with a physical manual - be sure to flip through it. This time I got a bonus just for doing that. I love old ads. Maybe it’s the nostalgia bit in me - I grew up circling my hopes and Christmas dreams in the annual Sears Wishbook. Now as an old crone, I definitely prefer ads in print rather than online. Print ads are a fun time capsule. As a collector of vintage sewing machines that pre date me, it is fun to see the original release promo information the manufacturers released.
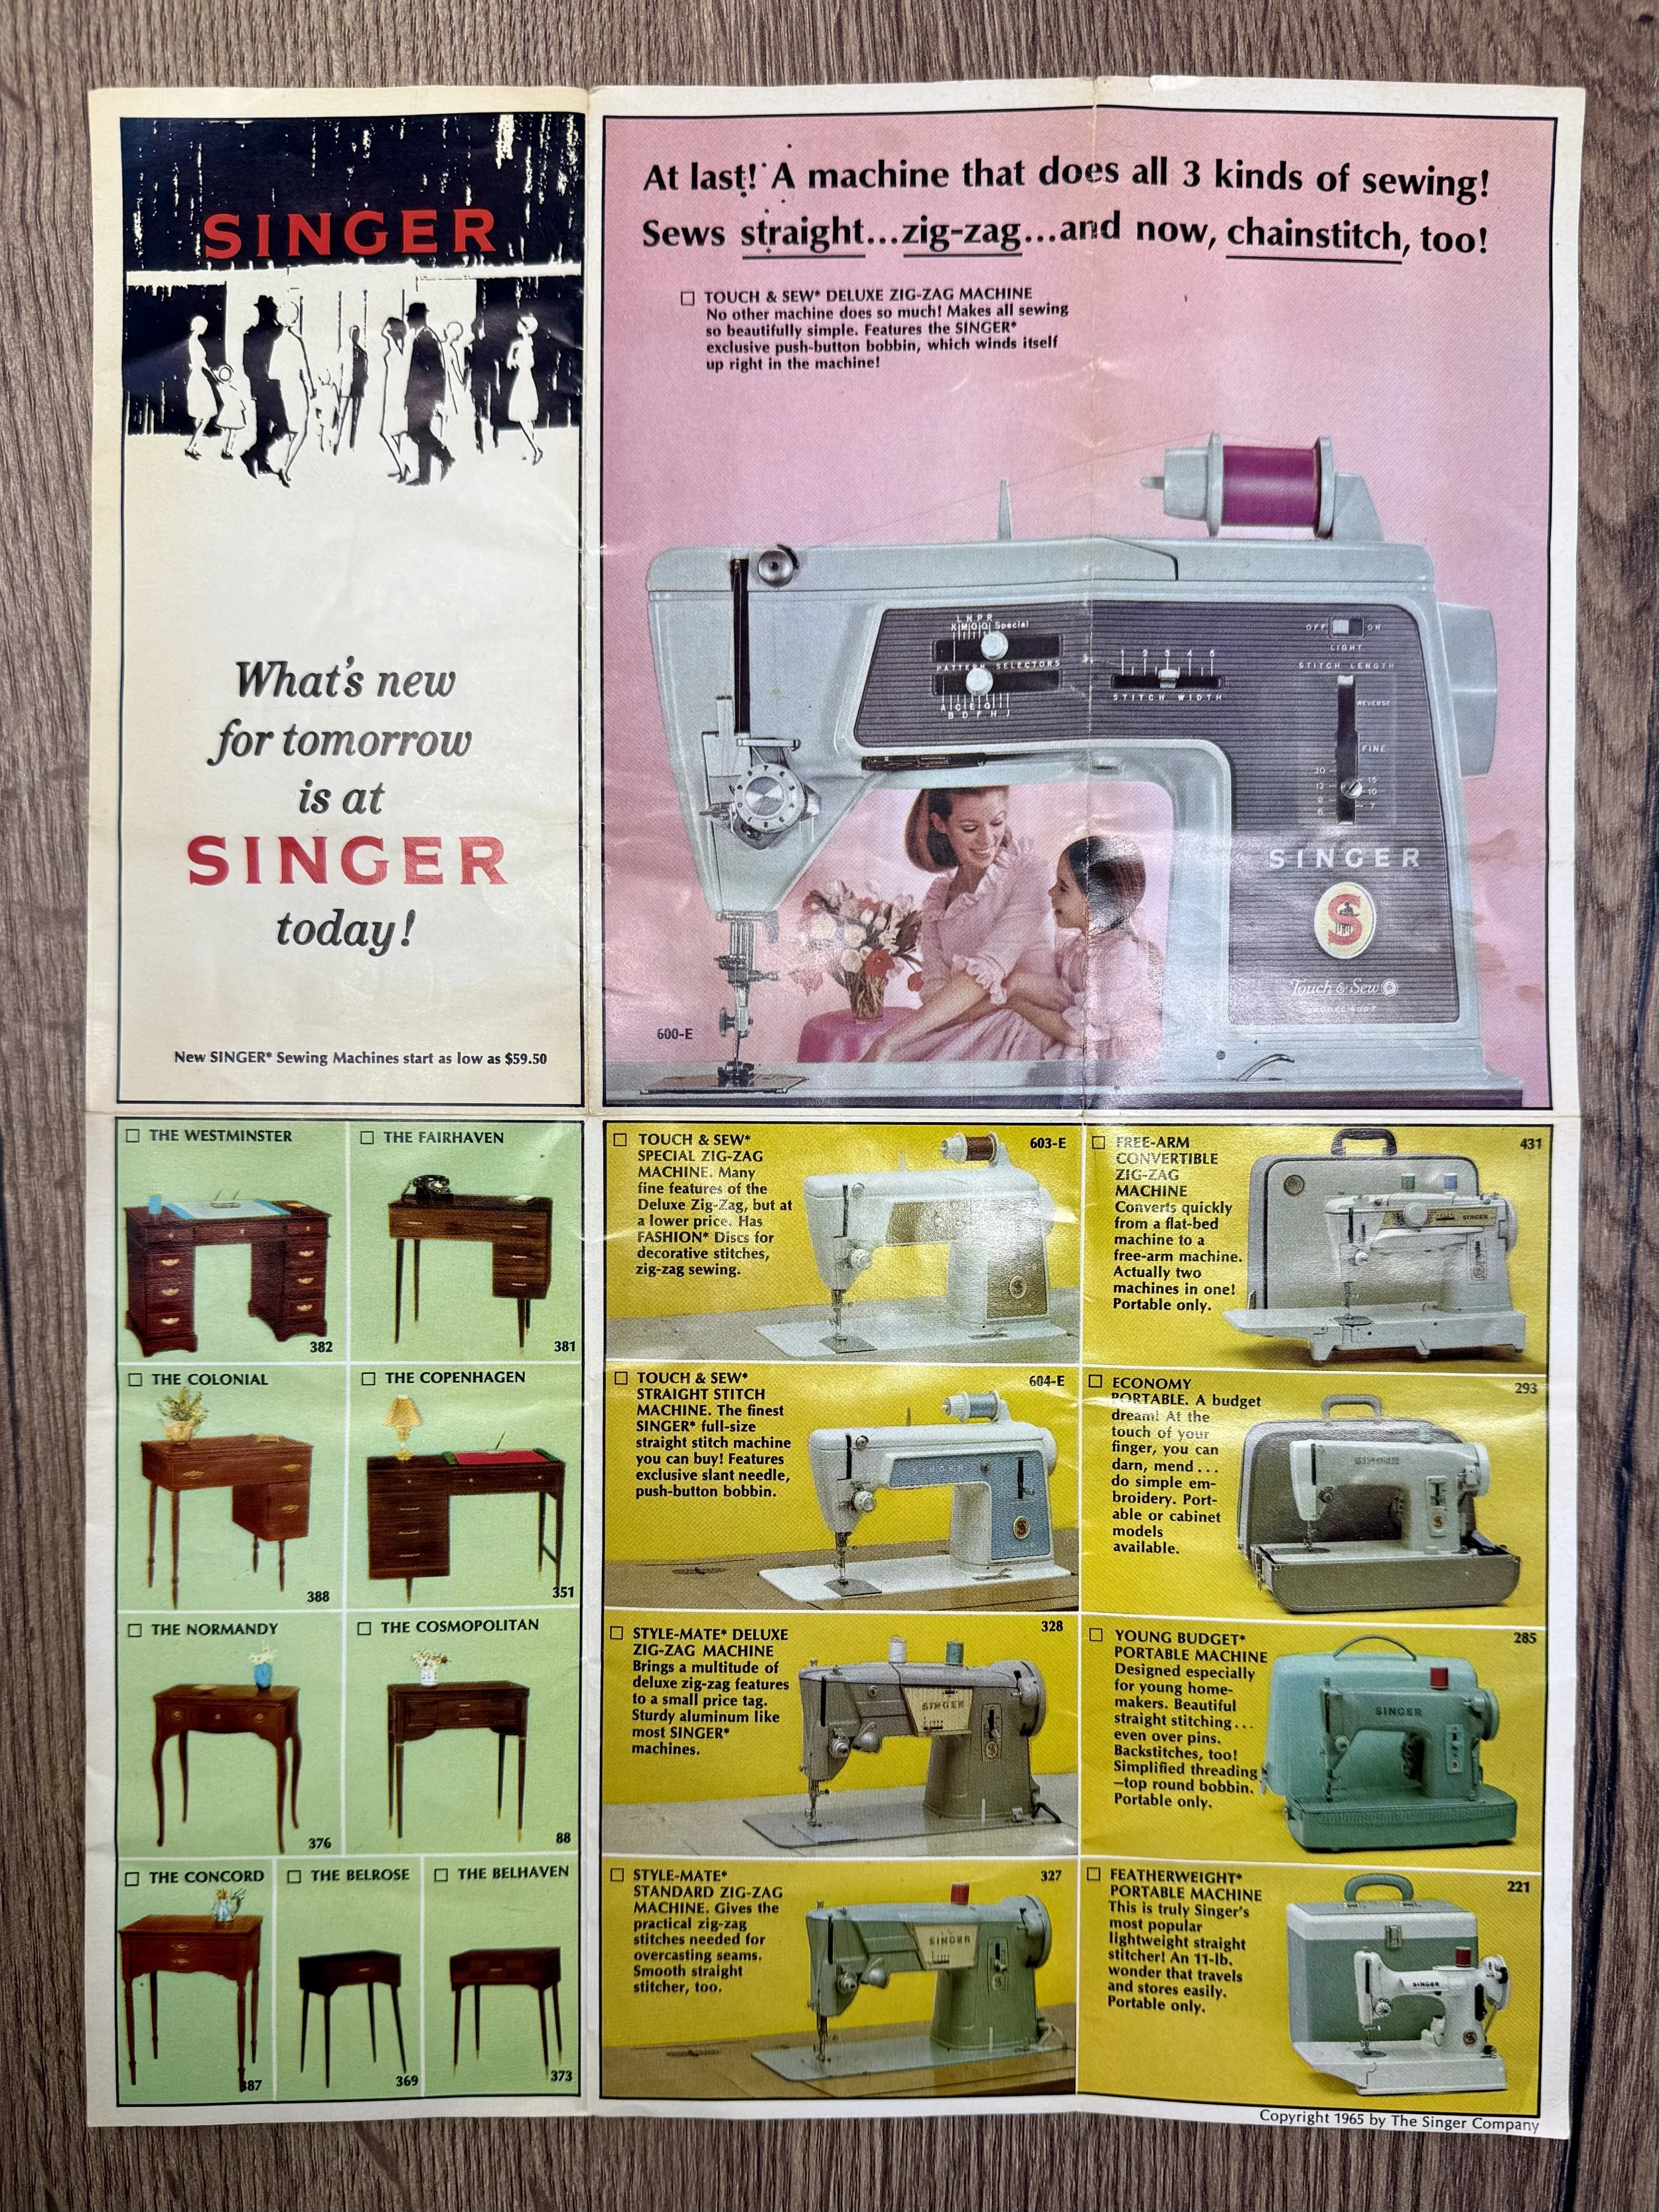
Singer Ad from 1965

Up close on the White Featherweight
By today’s fandom standards for the more uncommon Featherweight colors, you’d think that the original ad would have holographic touches or something else just as glitzy on the pamphlet.
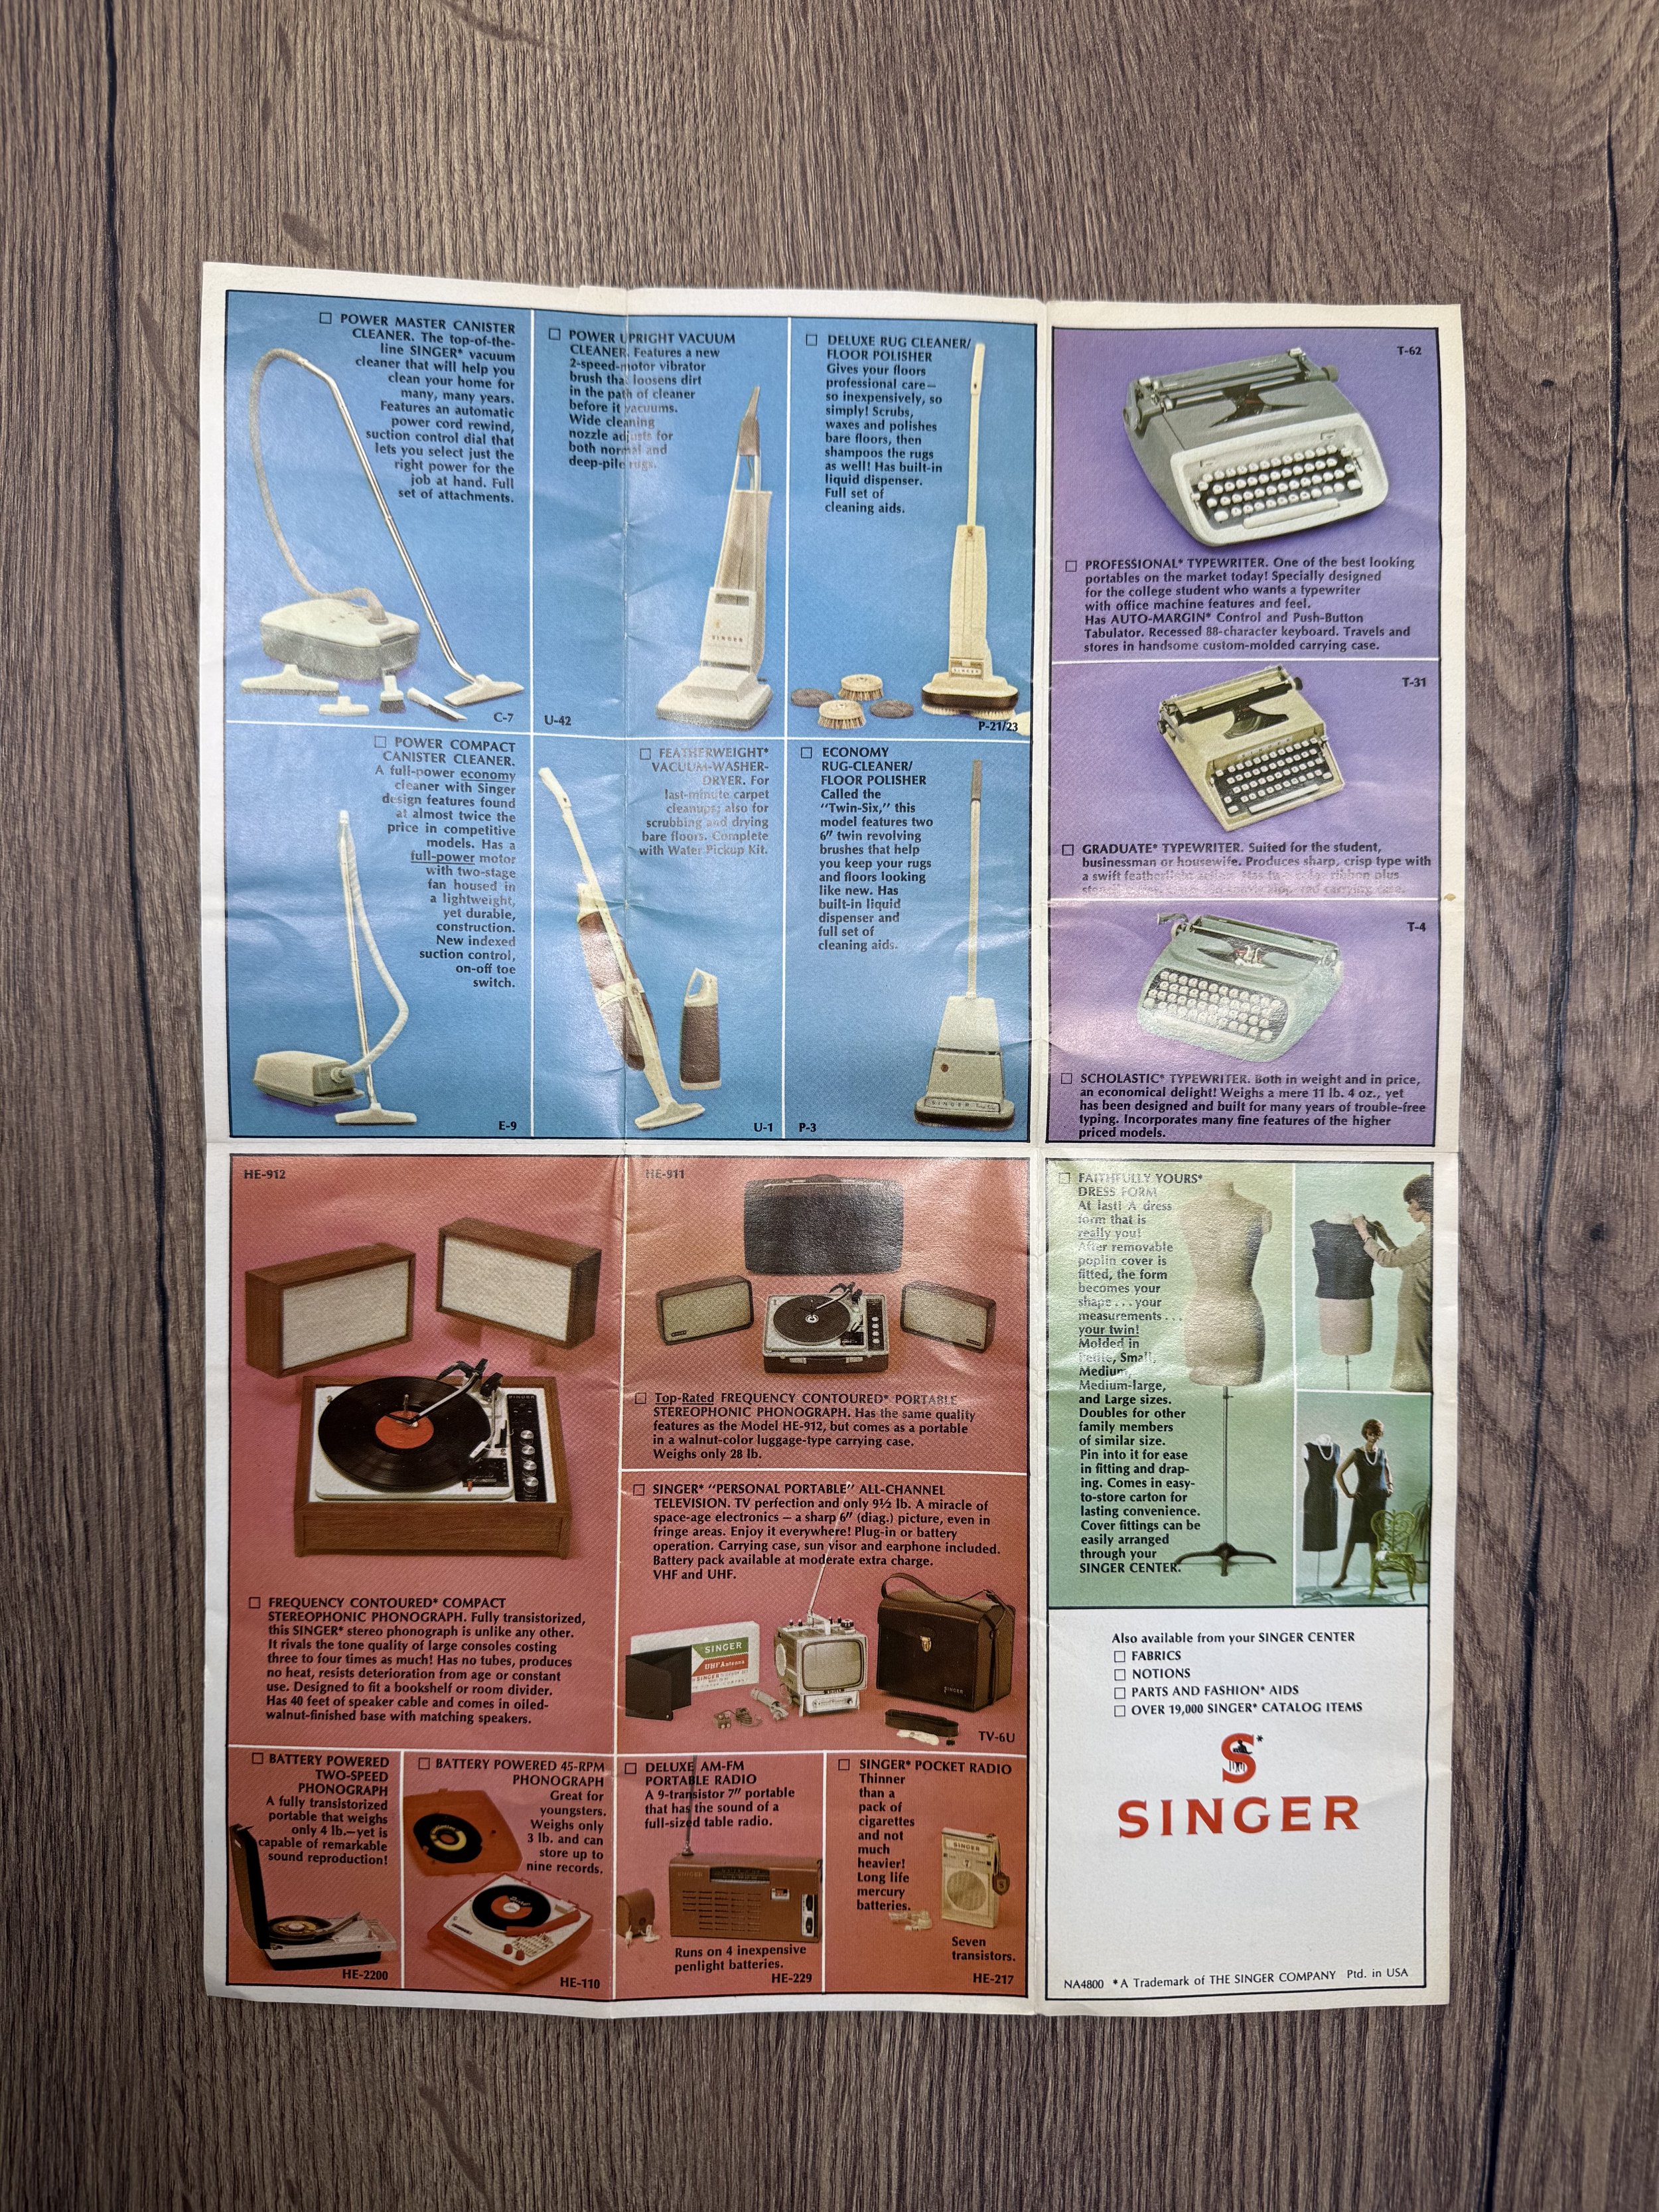
Singer made, record players, dress forms, typewriters, vacuums and more.
I especially love seeing ads for products that were made that are less known now. As mentioned in my Short about this ad, I have seen a Singer branded tv out in the wild at a thrift store. As well as a Singer brand projector. Both were priced very high or I might have considered grabbing them. One of the most collectible items Singer made is a pistol. They produced a run of 500 pistols in 1939-1940.
I wish I could visit a Singer Center now.
I hope I didn’t hype this up too much. I personally love this sort of stuff.
xo-Thea
Singer 328K (1964) - Another Side Quest

Remember this from yesterday? (Singer 328K)
Well, I didn’t anticipate to be able to report back so quickly on this one. Long story short: I needed a simple zigzag stitch machine for a project I am working on. I ended up grabbing this - a recent acquisition. I have other zigzag machines set up - but I try to use my entire collection.
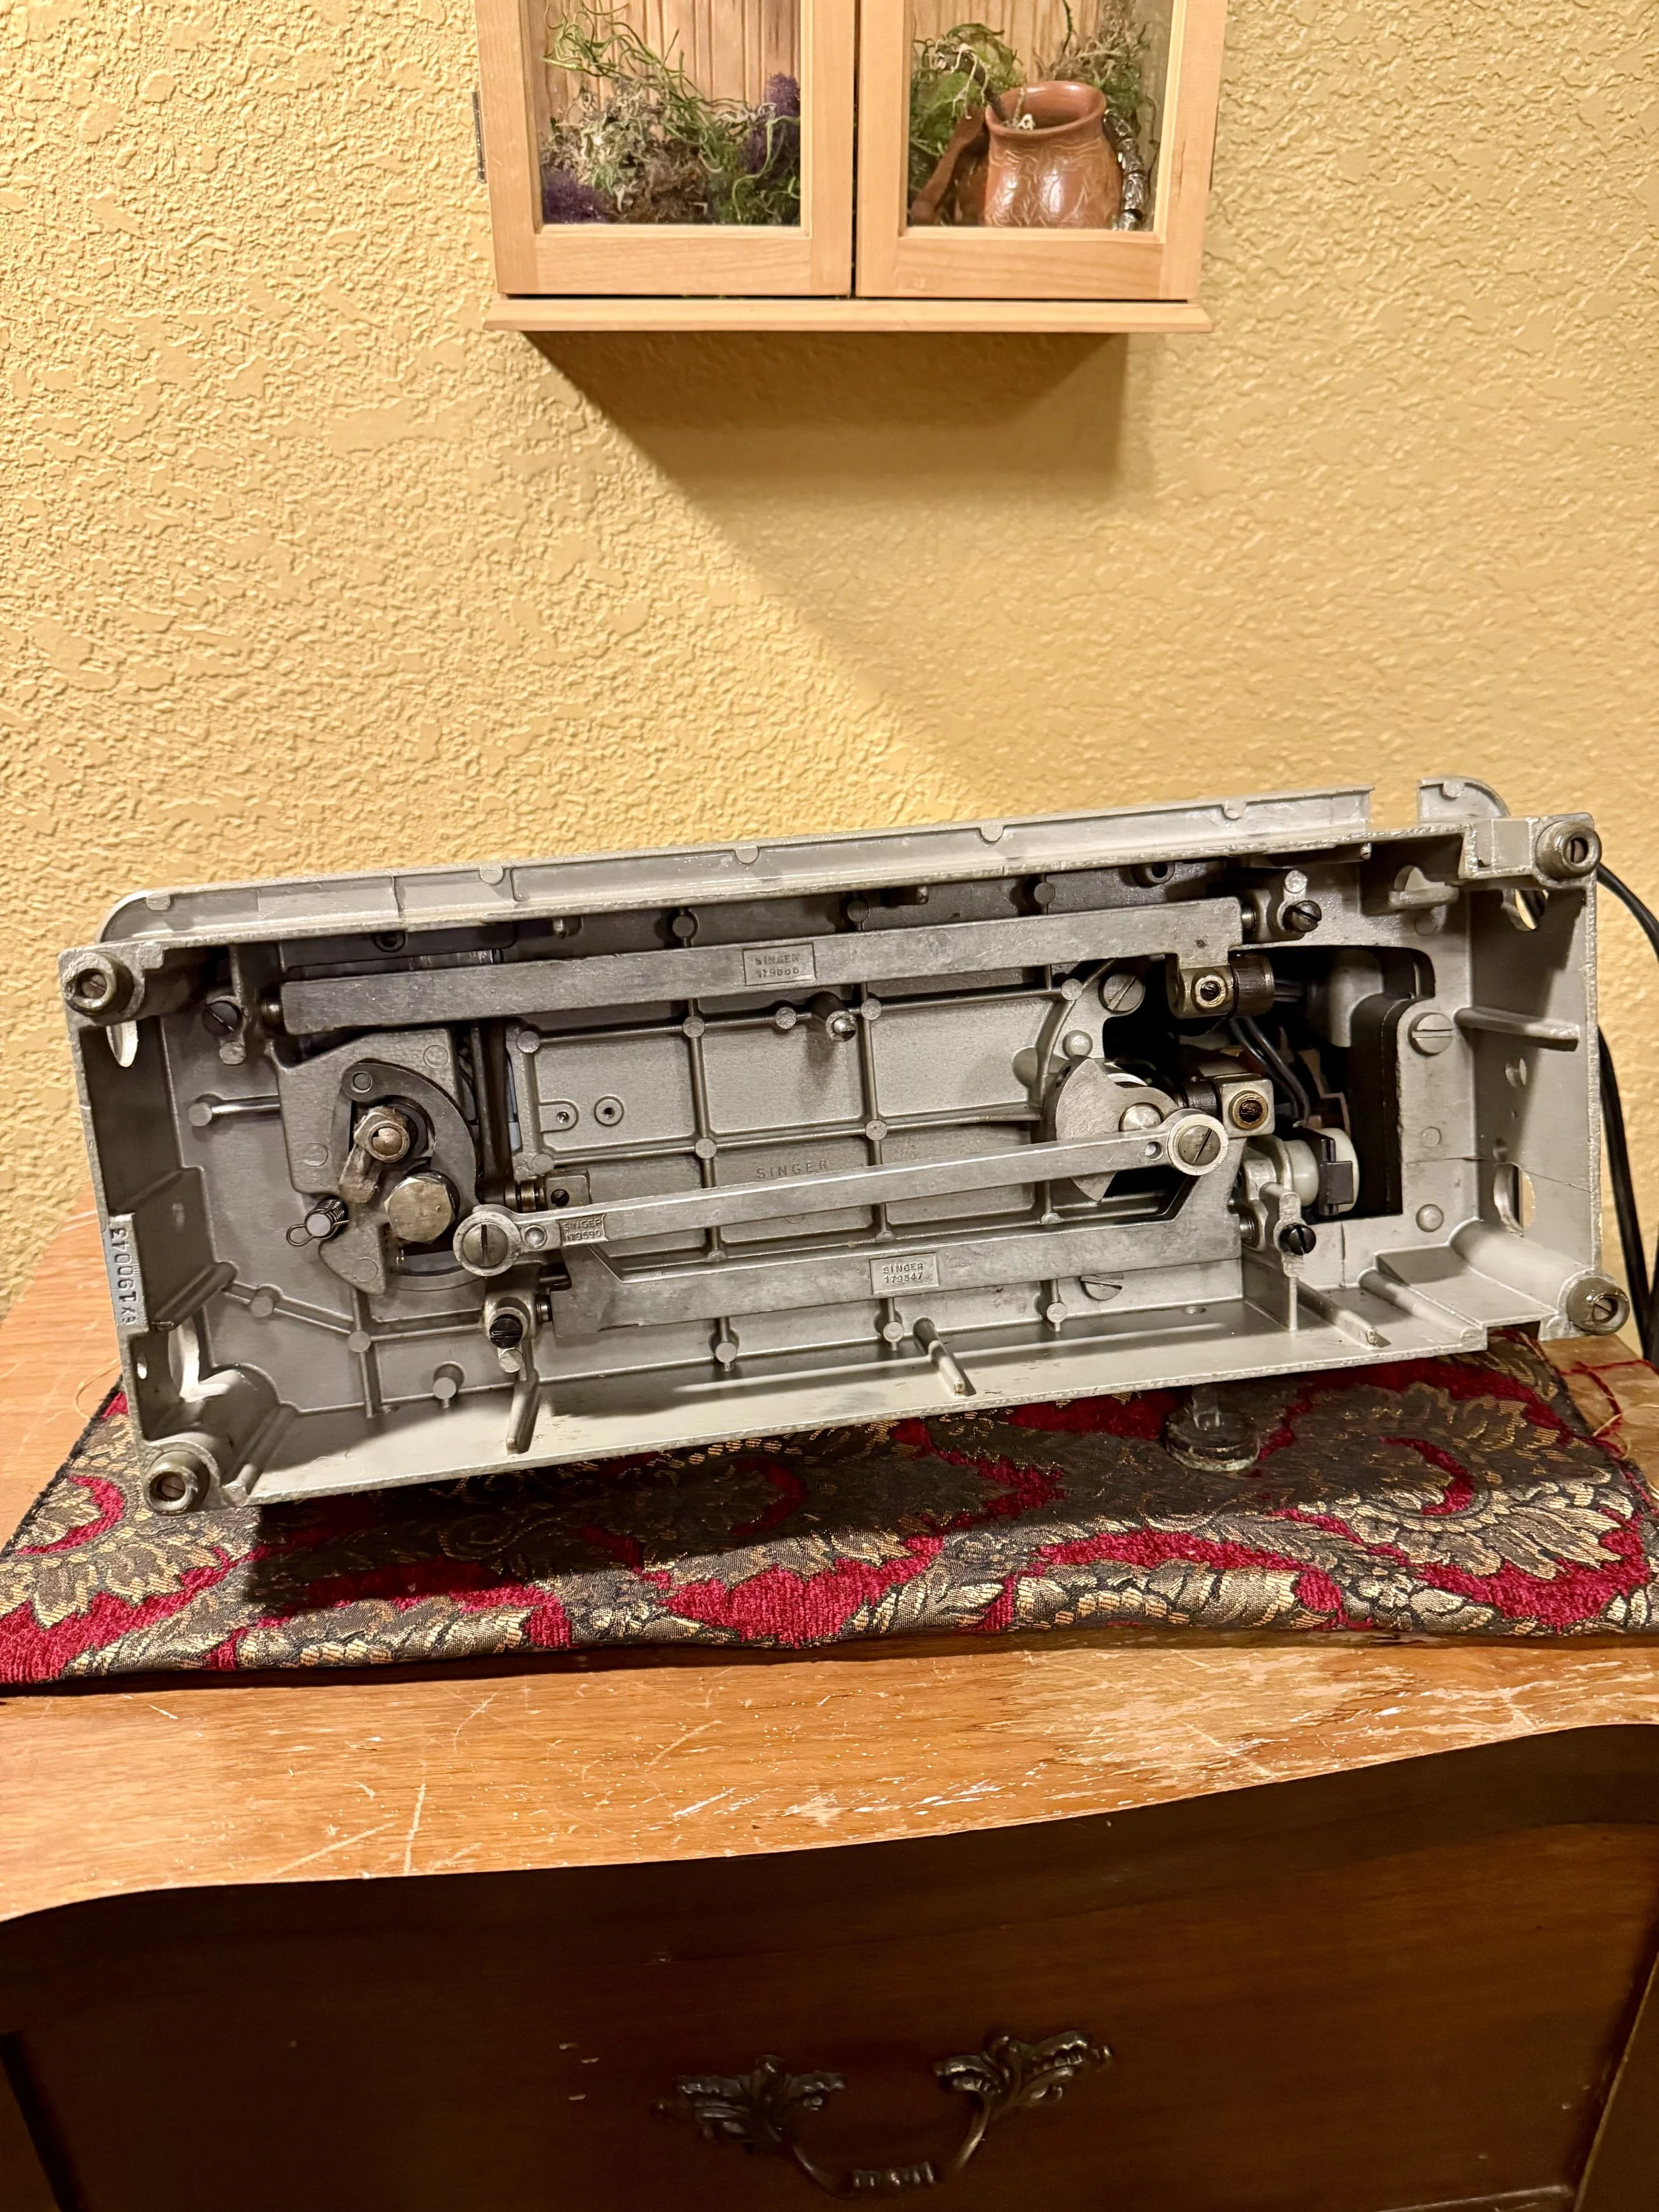
The underside of my Singer 328K
As with all of my machines, I do a basic cleaning, oiling and greasing before I fire them up. I did that with this one. Some lint build up here and there. Some globby old grease that was easily removed. I plugged here in and this is what happened:
Singer 328K
It was moving slower than a slug. When I purchased it, it was in a treadle cabinet. At one point someone used it in “treadle mode”. This was honestly a cool feature that Singer did. You could drop this model into a treadle cabinet, attach the long treadle band to the flywheel and sew with it that way. But this also had the standard belt on as shown in the video. It is old and most likely needs replacement. That alone might solve the slow movement. OR - or and ALSO - it could be a foot controller issue. Which is super common in general. I don’t have time to do a deep dive on this machine. I wanted it for my collection but didn't have plans to use it frequently. In instances like this though, I make note of the things (parts) I need and the issues that I noted and will swing back around to them when I have replacements or time to invest.
I wanted to share this just in case there is someone out there trouble shooting this machine. Maybe it will help.
As mentioned in my YouTube short on this machine, this and the Singer 403 I was originally trying to use were budget machines. The high end model during this time was the Singer 401. Which is a much more robust machine baddie. I have two of them. :) I personally have only seen two 403s out in the wild and just the 328K you see here out in the wild. But being budget models, I assume that there were a good handful sold and are still out there.
I am glad I went on this side quest because I did end up finding something really fun in the 328K’s manual. It deserves its own post though. Check back in tomorrow!
-Thea
Side Quest : Ribbons On Display
I couldn’t find the power cord for a Singer 403 I wanted to use last night. (I just need to find the box that it’s still packed in. - No cabinet or case with this machine.) I gave up and did a little organization project to feel that I accomplished something.
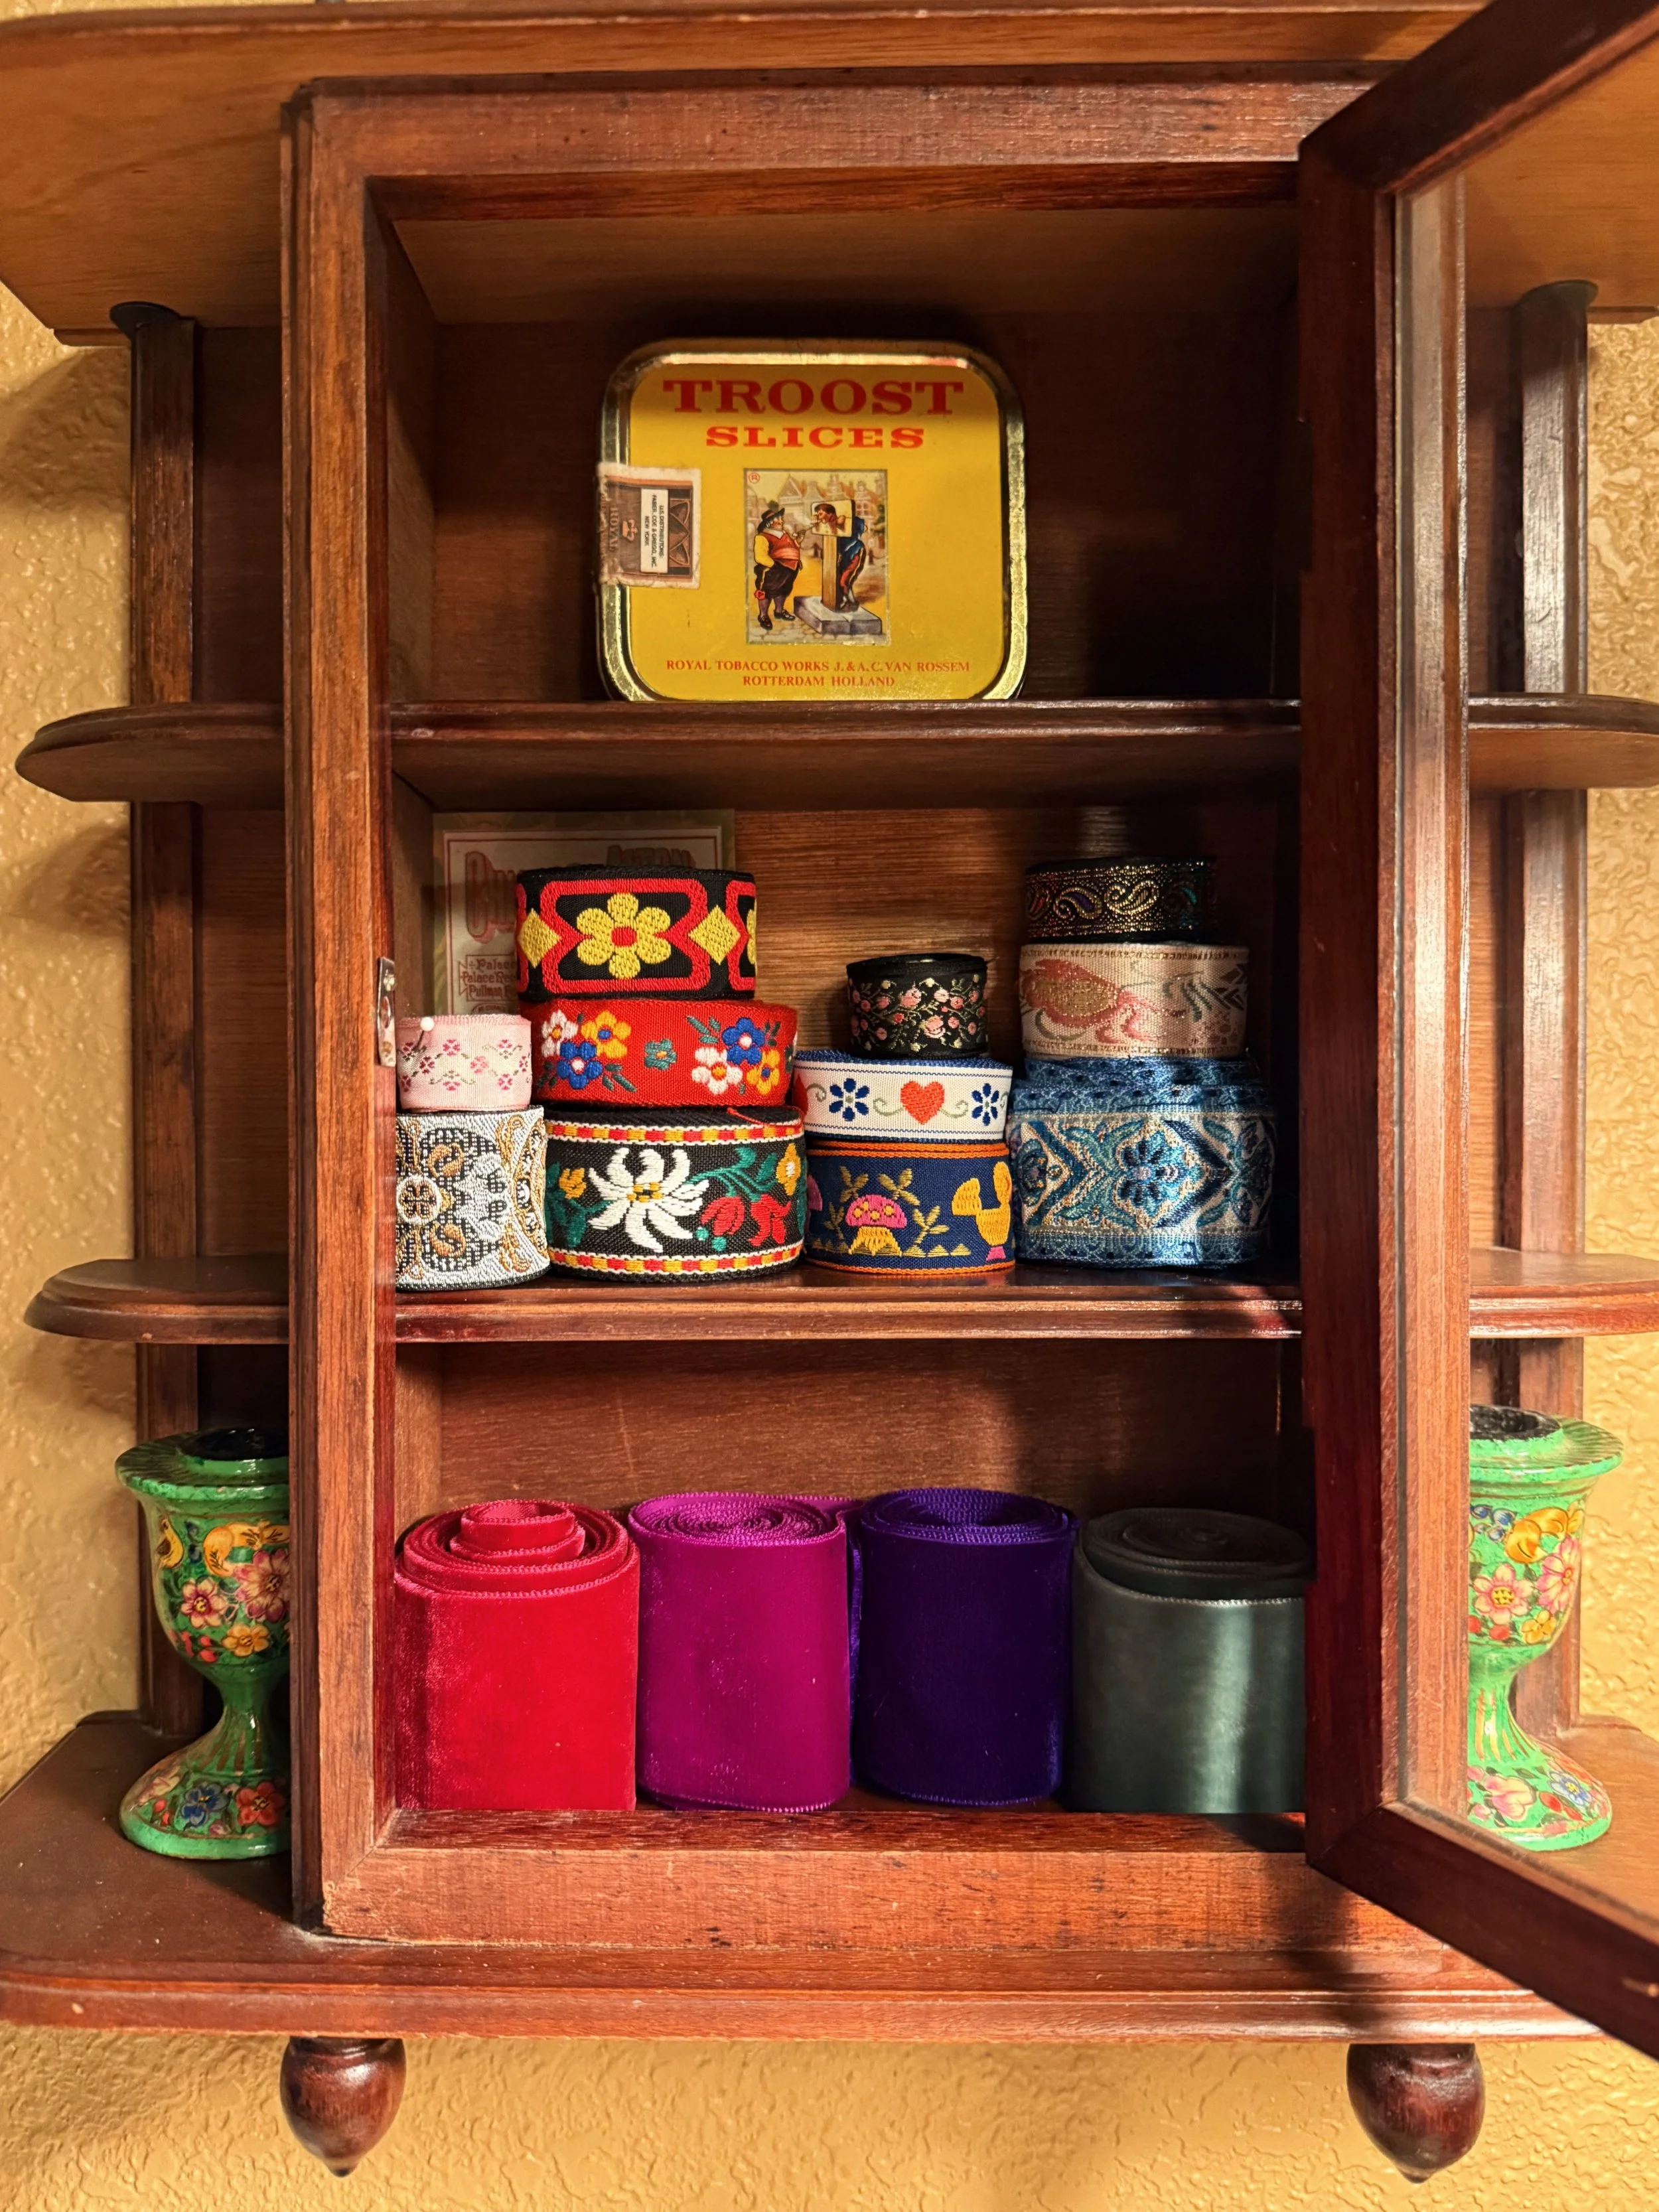
A vintage curio display cabinet that is hanging in my sewing room.
I don’t like to look at all of my fabrics. I feel that it’s overwhelming for me. I prefer to think of the project and then go looking in my stash for something suitable. Having it all out on display creates chaos for me mentally.
“Ooooh that would be great as summer dress.”
“I can make a lap quilt with that.”
“I bet that would make an interesting pajama set.”
These are all real conversations I've had with myself. Then my sewing WIP pile on my table consumes all the space on my sewing table and nothing gets done. Not the case with trims though. I have quite a few that I’ve collected over the years. I love to add a bit of trim to a pocket or hem to an otherwise plain piece. I think will be helpful to have them out on display to inspire me to do actually use them. I filmed a little short of me filling it up and its up on my channel if you’re interested.
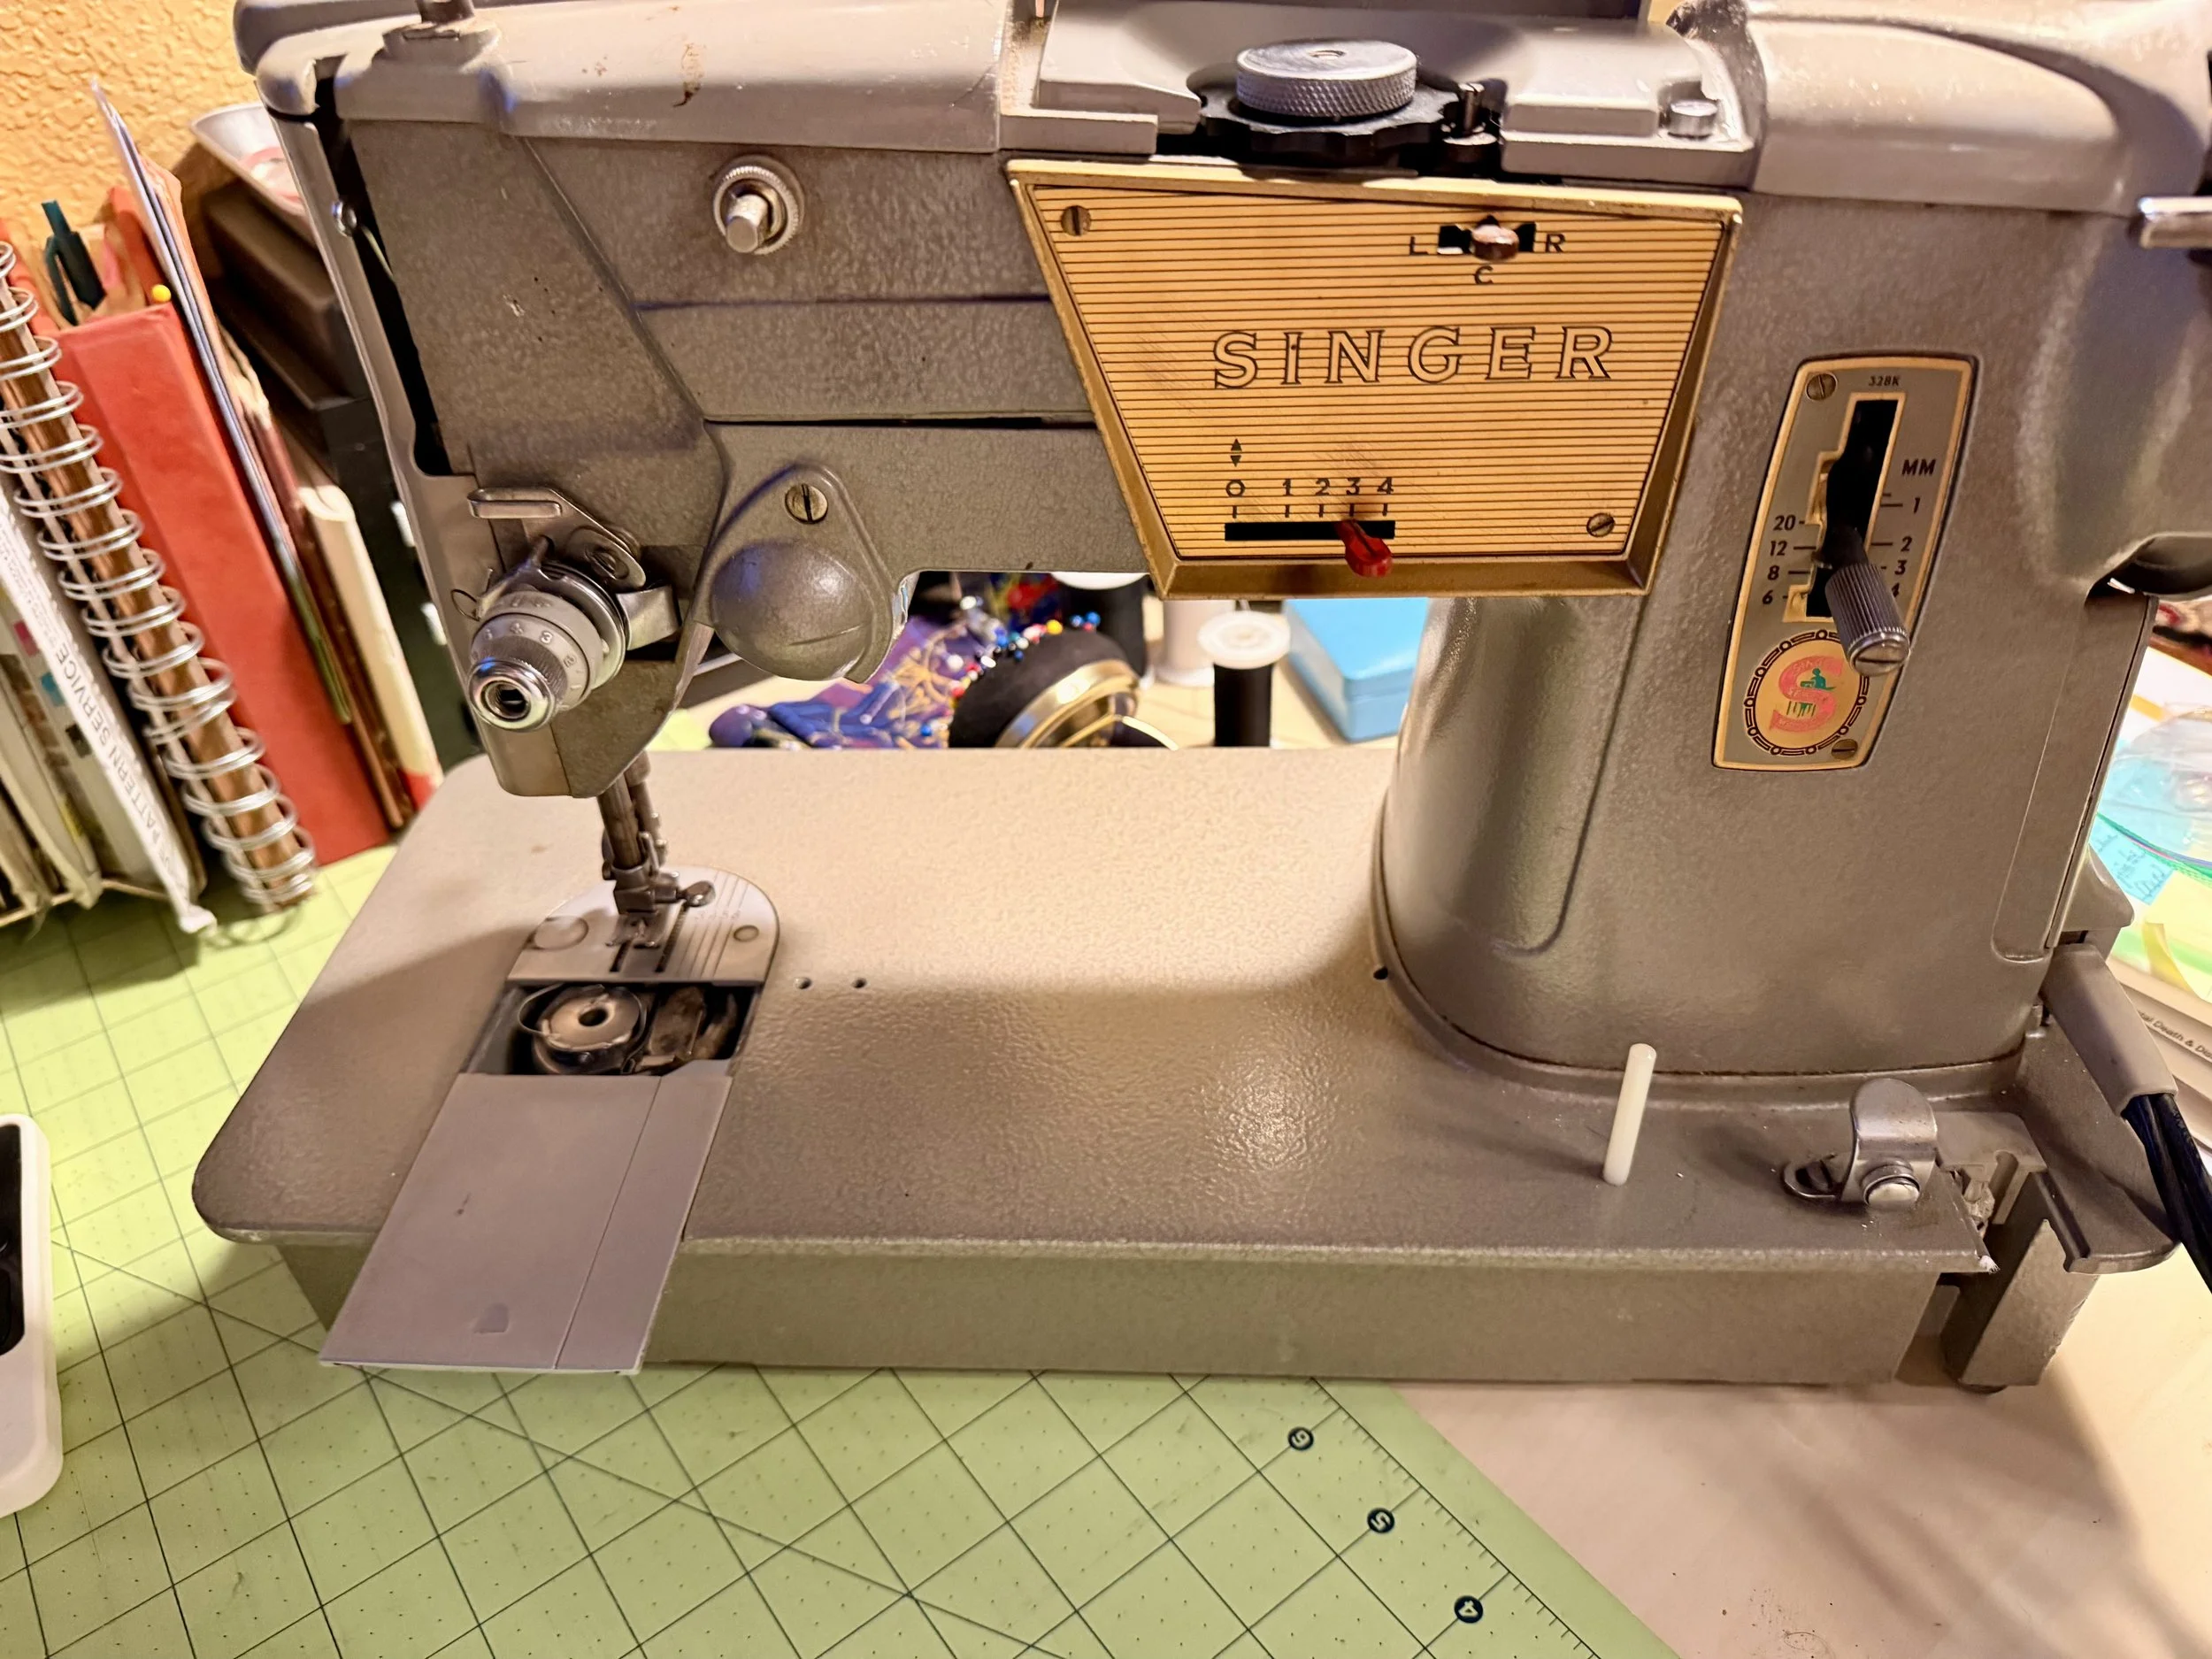
Singer 328K (1964)
Since I wasn’t able to locate the power cord for the 403 I have (Its a two pronger and my 401 is a three). I benched her for now and started to look over this gal. It’s a Singer 328K. The Singer 403 and Singer 328 were “budget” machines. The Singer 401 was the higher end model with all of the bells and whistles. As a collector, while I do have preferences for machines - I do like to review them all. Because someone might have inherited one and would like to know more about it and see it in use. I think it's important to know what all the models do and how they run. I will of course report back on this one once I am more acquainted with her.
-xo Thea
Late Night Sewing
I’m a night owl. Night time sewing hits different.
Thea Starr sewing with a vintage Singer 301 sewing machine.
I haven’t loved a couple things that I’ve made recently, so I haven’t shared them. The fit is off or I screwed something up. You know how it goes. The past few days I’ve been sewing on my favorite 301 after sewing on my 201 for a bit. Both are superb machines. However, that 301 slant needle just adds a little magic to sewing for me. I figure I could use a little magic for my projects and maybe something will turn out as I want it to.
I have been enjoying tossing a show on the tv in my sewing room and going through the motions of working on a project. Cutting, ironing, sewing. The vibes are good even at 12:30 am. I feel super productive. Do I wake up at 7:30 every morning to go feed my chickens? Yes, I do. But I’ll keep staying up late to sew though.
I’ve uploaded a little 10 second video I took last night here. The machine is a workhorse and just wants to sew. I love it so much. I have a few more videos planned for the Signer 301s, so stay tuned for those. I basically want to exhaust all that I know and can do with the 301 and share with everyone. Because Featherweight - schmeatherweight - go for the 301 instead.
I’m working on a dress from a 1940s pattern and I’m using some vintage 1990s rayon fabric. Hopefully, I’ll be sharing the finished product next week.
I just wanted to do a random check in here to get into the habit of posting here. :)
xo-Thea
Vintage Singer Buttonholer Attachments
Yesterday I uploaded a video of a tour of a few of my vintage Singer Buttonholer Attachments up on my channel.
It's an easy to use attachment. But if you’ve never used one or seen one before, I get that they can be a bit confusing. Most modern machines have a buttonhole capability built in. So, this sort of attachment is a bit of a relic. However, if you are into using these old machines, you’ll definitely want one in your arsenal.
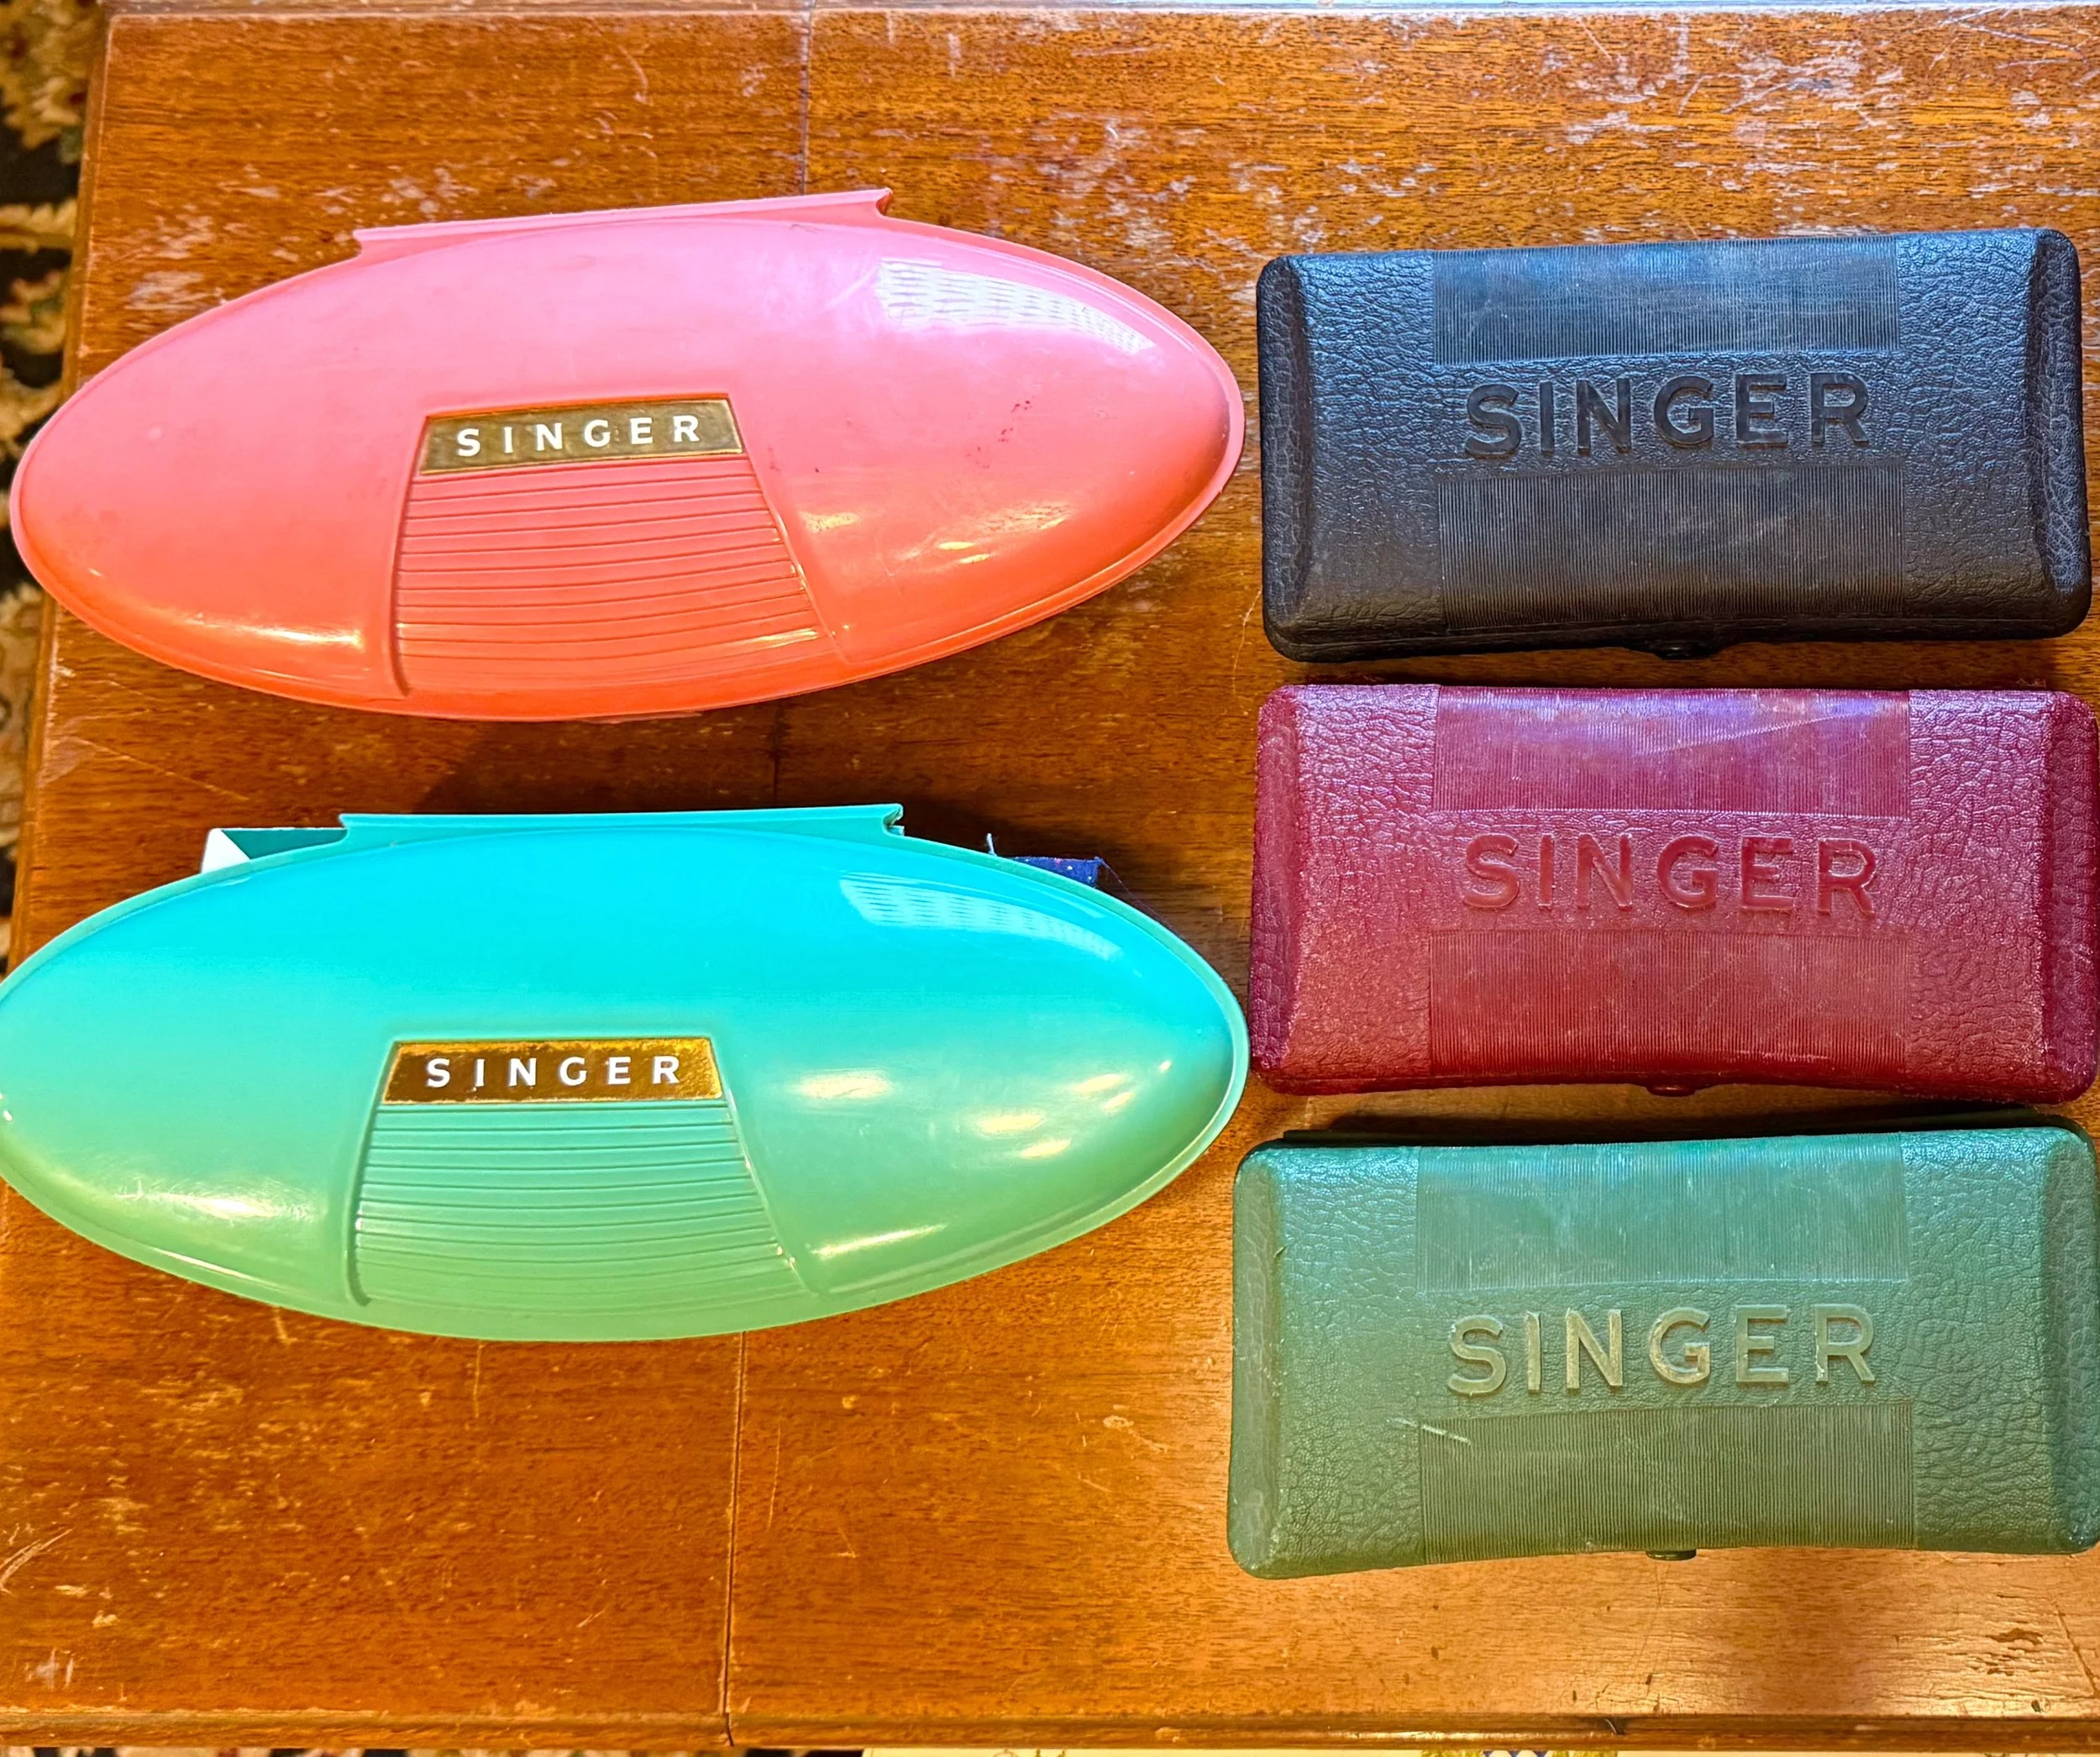
I do need to do a follow up video on this one because I used an older model (1940’s low shank in the green rectangle snap case) on a 1951 Singer 201-2. My attachment did not come with a feed dog cover. I was advised by an older long time sewist, that I could still use it. It might cause my buttonholes to warp a little, so I am mindful of that when sewing. I was told this information prior to posting videos online and I have been doing this for quite a few years now. I decided to post the video as I’ve always done it on that machine. Here’s your reminder to always weigh the information you consume online. I expect someone to come at me and tell me that I’ve shared bad information. For me, I was told personally by an older and much more experienced sewist and decided it was worth trying. So far so good for me. You make your own decision on what to do with your machine. I will say if your attachment does come with a feed dog cover, you should use it. I didn’t even know that existed until I was told it did- because like I said, mine did not come with one.
I do typically use one of my Singer 301’s to do buttonholes now - which I can drop the feed dogs on. I plan do a follow up video showing that as well as using the feed dog cover on a Singer Featherweight.
xo-Thea
Let’s Try This Again
Hi friends! I’m historically terrible at keeping up with my blogging. However, as of late I think I have driven my friends and family nuts with my sewing interest. (And chicken content too.)
So, I’ll give this a try again. I am currently uploading a new video on my channel. Living rurally the internet speeds can sometimes be a bit slower than I was used to in the suburbs of Seattle. No complaints, because I’d rather have slower internet than having to deal with actually traffic on the roads.
I have a few current projects on the work table at the moment (still):
I’ve been slowly working on this 401A. I’ve got a couple of these going now since I started rehabbing machines. I have to admit, they are not my favorite. While it is such a great machine, it has all the bells and whistles - I just prefer the 500A (Rocketeer) which is similar to the 401A. Technically the 401A is better built than the 500A though. We’ll see, I might change my mind on this after more time spent with the 401A.
My first Elna Supermatic.
I’ve also been working on the Elna Supermatic. This is my first Elna machine. I know it’s missing somethings and it does have a very common problem with it. I’ve read up on a couple of ways to fix it. I just need to decide how I want to handle it.
Lastly, I’ve revisited my Tan Featherweight (Singer 221 J) . I have a couple videos available about that already.
No Sewing Only Treasure Hunting
Hi friends! I took a little summer break so to speak. Lots of family events and little local fun things here and there. That hasn’t allotted me with much sewing time, but plenty of time to treasure hunt.
My husband recently started a new job, so we had a little down time to hit garage sales and thrift stores around our area. I picked a couple machines and tons of vintage sewing notions. I added some examples of my in the wild finds.
With my life into a new groove, I’ll be working on some new projects ASAP.
xo-Thea
Recent Finds & What To Work On Next
Tis’ the season for deals apparently. I’ve had a little lucky streak at thrift store and garage sales recently. Unfortunately, I haven’t really been motivated to actually sit down and sew much in my hot sewing room. (As an old timer PNW gal - we just don’t have A/C). Projects are lining up and I’ve hit a bit of a hump of what to work on next.
Here’s a closer look at the 401A’s cabinet.

I tried in vain looking for the model number on this vintage MCM Singer sewing cabinet that came with the 401A.
Sewing machine cabinet knowledge is a struggle bus for me. While there are some resources and groups out there. I haven’t found one really comprehensive spot yet. So, if you’re wondering what cabinet model this is - I don’t have an answer. Mahogany wood, side door swing, MCM style for a 401A cabinet thingie. Hahaha.
So far, folks want me to tackle that 401A first. I’ll probably do that. I do intend to have videos on all four of those items I show in the video, as well as a couple more already in progress. Once I get over my heat aversion that is.
Stay cool friends, xo-Thea
The Un-stinkening of the Super Stinky Vintage Sewing Machine Case
My recent dream machine purchase came with an unwanted surprise. A super stinky case. I have never in my vintage sewing machine collection come across something so horrid smelling. I mentioned that unfortunate bit in a recent video and I got a few recommendations on what to do.
I took that advice after trying a couple easy things first. See the video below to see what I did.
What I used: https://tinyurl.com/msn3fyrp (not an affiliate link).
Thanks to a couple subscribers who recommended this blog post that has deep dives into the problem: https://tinyurl.com/2hk849as
I appreciate you and I’m just sharing the wealth of knowledge. And boy is it nice to not want to barf every time I walk by that case now. :)
xo-Thea
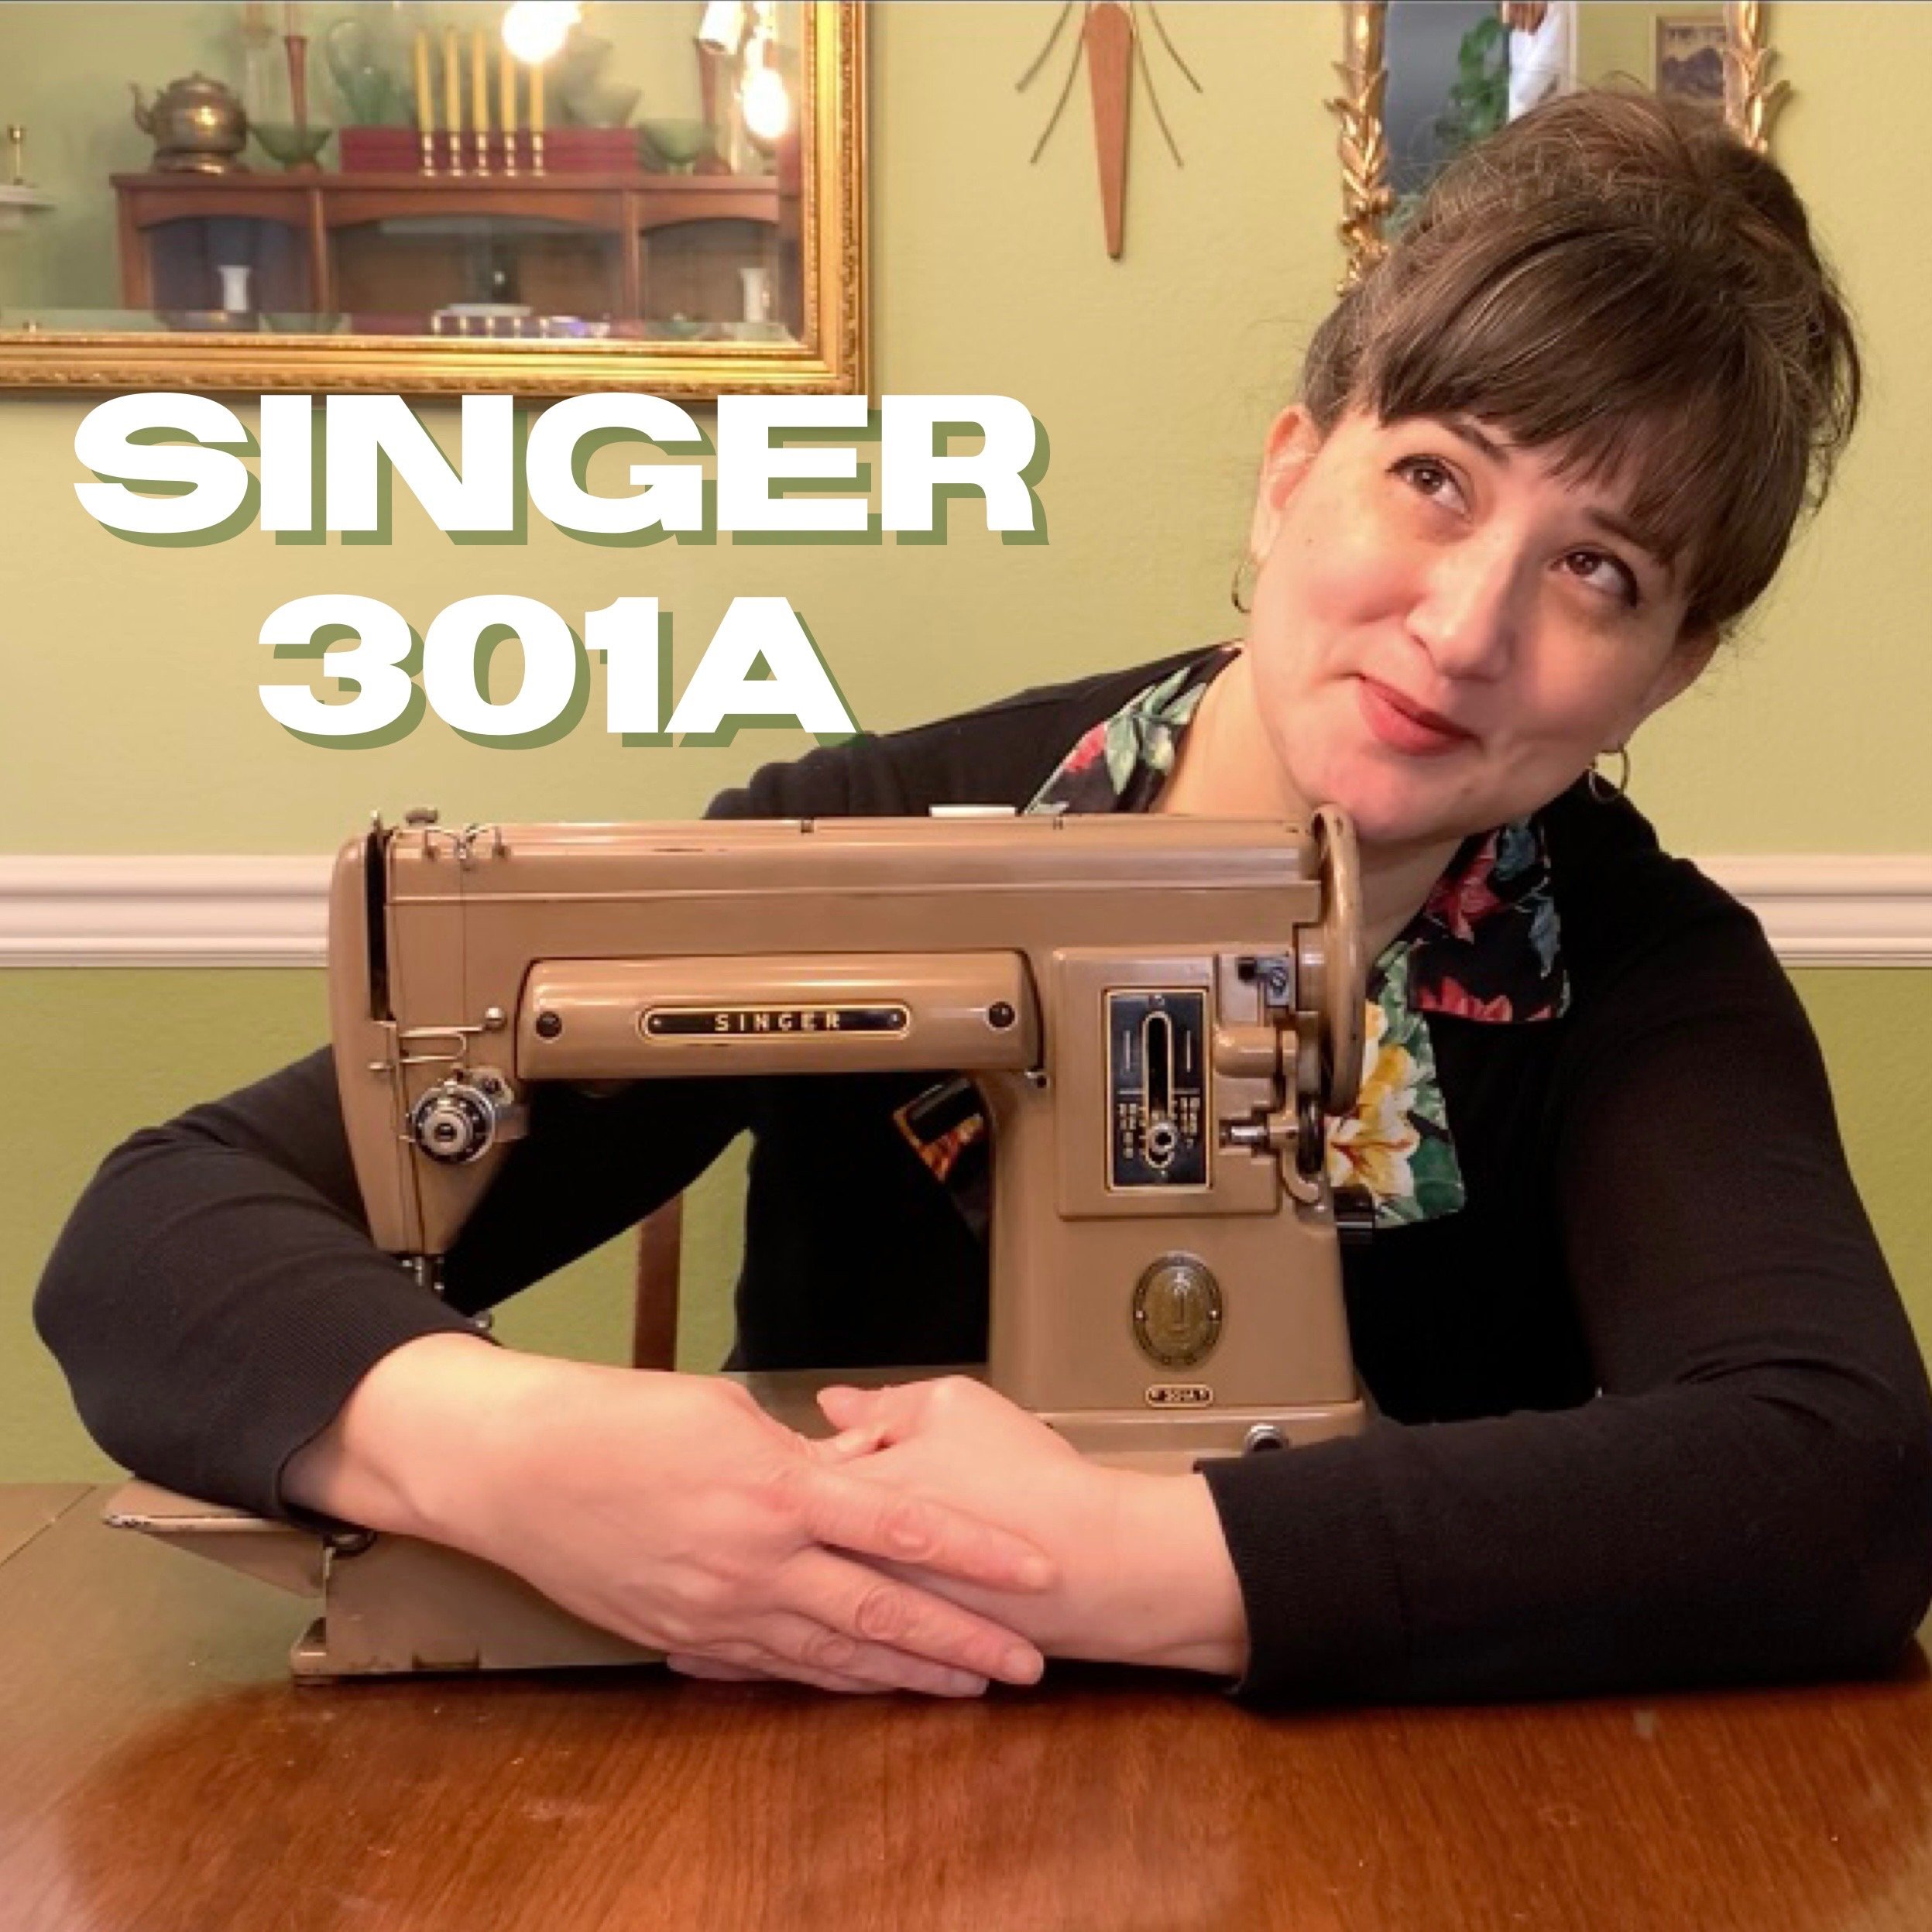
Singe 301 - The Black Long Bed

Not too long ago I fell in love with a 1954 Singer 301A that I picked up at my local Goodwill. I have a YouTube video all about here: (Click)
We became best friends and I took a deep dive into this model of Singer machines. I recently admitted to being a Pfaff girl. I just love all of my Pfaff machines, I’ve owned one my entire adult life and I often prefer to sew on them over my Singers. The 301A made me change my mind on that.
The stitching that the 301 produces is incredibly fine and dare I say perfect. That slant shank, boy howdy it whispers sweet nothings to my sewing mojo. Don’t get me started on my baby steps in my free motion sewing, that the 301 entices me with its drop feed capability. With all that said my personal deep dive led me to read the history of the machine and all the wonderful things about this model. You can too via www.Singer301.com.
I read up on the different color ways, bed lengths and special editions. I instantly fell for the black long bed version. Of course I want to collect all versions, but I was smitten with that black long bed. After using the 301A for a while now, I could see how having a bit longer bed would be handy. I started poking around online to see if I could price one out. I ended up finding this 1952 Grand Introduction model.
Maybe I paid too much, I definitely made a mistake, but I sure love that machine.
I hope you’ll check out the video embedded and subscribe for more sewing/sewing machine videos. xo-Thea
Destashify - An Online Fabric Resource

A sample of what I have available in my Destashify shop.
Because I spend an egregious amount of time in online sewing groups, I learned about Destashify through a fabric resource discussion.
It’s an online platform that caters to sewists. (There’s a yarn section too that I dare not look at yet.)
First, this isn’t sponsored. They just started following me on my Instagram last Friday. They have no idea who I am. However, I know what their platform is all about. A place to sell and destash your fabric, yarn, patterns and more. It’s perfect for someone like me that just wants to look at sewing stuff. It has the vibe that the early days of Etsy had. Things are limited from the selling point of view. Again. think early days of Etsy. There are limited selections for descriptors and you can only upload 10 photos. So, you’re kinda hoping that your title and photos grab some attention. But as a buyer, one massive plus is $5.00 USD Flat Rate Shipping and $20 CAD/UK when you purchase from a single shop.

I decided to give it ago and in my first month of being a seller I had pretty good sales. They pay you a day or two after you ship your order. You do have to use an off site shipping service like Pirate Ship. You’ll also need your own postage scale if you’re not someone who ships orders normally. It’s super easy. The only thing you need to account for is with the flat rate shipping, you’ll want to pad the price. See Destashify’s FAQs for more information.
I am a seller that likes to ship as soon as possible personally. We unfortunately live in the time of the Amazon shipping style as our base for most things. Being a fellow fabric junkie, I know I am excited to receive my orders of fabric, so I like to provide that for those who buy from me.

Again, this isn’t sponsored at all. I’m just old fashioned and like to share good resources my fellow artists/crafters.
So if you happen to be staying home for the 4th of July and need a new place to scope out from any special sewing projects you might have, check it out.
xo-Thea
Sewing With and For Chickens | A Chicken Crop Bra
A little while back, I needed to show the portability of a couple of my sewing machines. Since I am a proud homesteading homebody these days, I had to get creative with showing how one can take the machines to places. Rather than the norm of being fixed to a cabinet in a sewing room.

Piggy and I sewing on my Singer 301A. She’s my little velcro chicken that loves to be cuddled and held.
My husband built a beautiful chicken coop and we have an area where we have a table and chairs to sit down at right in front of the coop. Obviously that was a brilliant spot to show a sewing machine’s portability.
The unfortunate thing is that area is in the “chicken zone”. Fellow chicken tenders (lulz) know what I mean. Chickens can be cute, cuddly and just overall amusing. However, they do poop on everything. So, to sew anywhere near them is a little risky.
I mention it in my 221K vs 301A video that I set a brick/paver down under my foot pedal when I sew in the chicken zone. What a nightmare it would be to clean off any ick off an original bakelite foot pedal. Aside from that protective measure, I don’t do much else to protect my machines from them. I do wear a pincushion on my wrist when I sew, which makes me a little nervous. I have one chicken in particular that likes to be held and I worry she might try to get my attention by nipping at me and accidentally grab a pin. So, I’m very cautious with that.
While they are interested in my activities (hopeful I have treats) and are definitely familiar with the sounds that my machines make. They just do their normal exploring of the yard while they are out. My girls are not free rangers, they are only out freely when we are out with them as well with our two large dogs.
Sewing for chickens - I’ve known for a long time that there are “extra” chicken people out there that make clothing for their chickens. I had a friend that wrote a book on free range chickens over a decade ago and I got to meet some very fanatical chicken folk while attending some of her book signings. But there are practical items that chickens do need sewn for them. Saddles from being picked on or mated with too much by roosters. Or in my case, I have a girl that had continuous sour crop issues. (A pendulous crop.)

Red Chicken (Her name - long story.) Wearing the second iteration of my homemade crop bra.
I decided to sew her a bra. While I was worried about my girl and desperately wanted to do whatever I could to relieve her discomfort. I did find it completely comical that sewing a chicken bra has been one of my more difficult sewing projects to date. I had three iterations before I got it just right for her. I sacrificed a couple old bras for the elastic straps and closure and a twill skirt to construct it. She hated it for one whole day. She hasn’t had sour crop since.
Honestly, that was something I never thought I would ever have to do. Thankfully I had machines, supplies and patience to make it happen. However, I prefer to have my girls flock around me while I sew rather than sewing for them.
xo-Thea
Singer Featherweight 221K vs. 301A | The short bed versions.
When I started to get into collecting vintage sewing machines, I immediately heard the word “Featherweight” as a machine I needed to check out. A quick Google search gave me a plethora of information about it and more importantly a noticeable higher price point. Granted, I thrift 90% of my sewing machines and prices are in the $14-$125 range and “higher price point” is relative to what you’re looking for in your area. I personally rarely pay over $100 for my machines. I am an avid thrifter/secondhand buyer so I am constantly on the lookout for deals and often spot them in the wild. I know not everyone is as passionate as I am about that so I might see a higher content of price ranges than the average person.

Want to skip my post and just watch the comparison video? Click here.
My immediate question was why were they higher in price? Did they perform better than most machines in the land? Do they do something special?
I had a bout of luck when a neighbor gifted me a Singer 221K. (I did a whole video on that and you can watch it here on my channel. I know how lucky I am with that gift and I am extremely grateful. It is such a cute machine. Since, it is a 221k rather than the standard 221 I know there are a few differences. I have yet to compare those personally aside from the searchable price. The 221K and the 221J tan colored models are higher priced here in the United States. The 221K (White/Celery/Teal) models were made in Scotland so they are harder to come by here. I understand the same is for the 221J, which were made in Canada. With all of that said, they tend to have a price that is in the $1,000 - $1,400 (USD). Whereas the regular 221 black short bed Featherweight made post WW2 is typically $200 - $400 in my area. Condition, original bobbin housing, accessories, original box, manuals are considerations to the price as well.
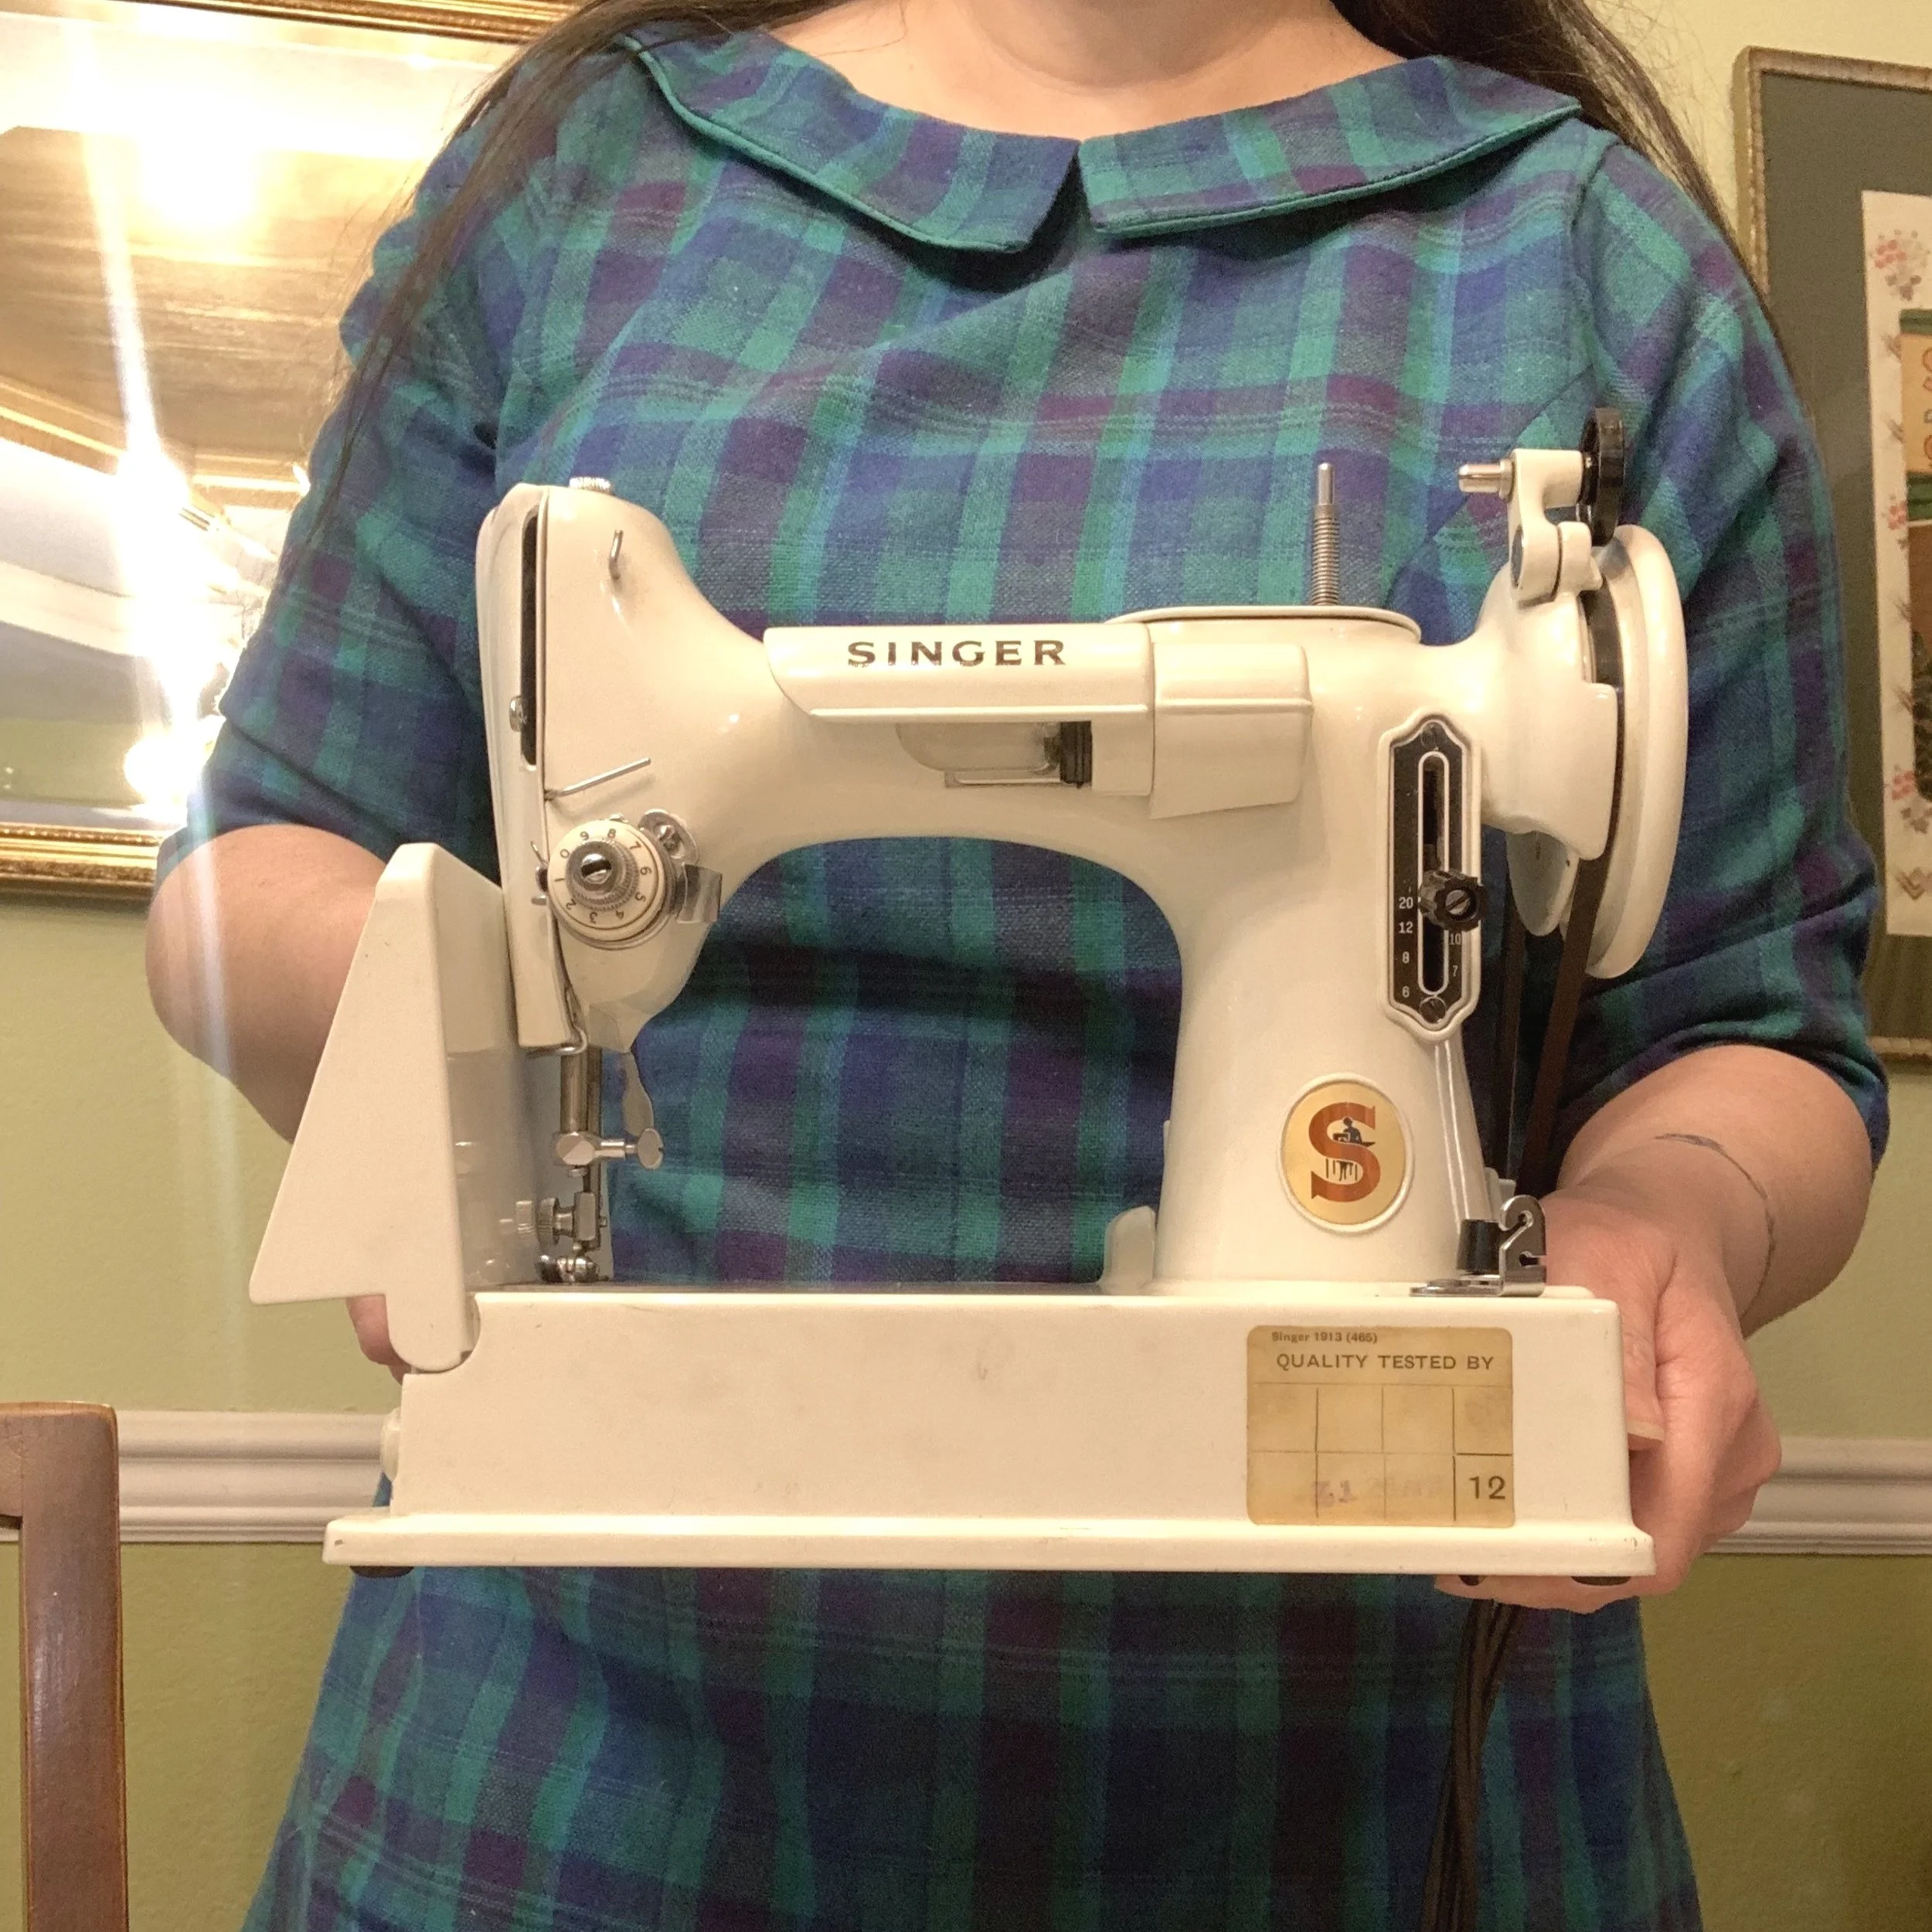
After price consideration, does it perform better than my beloved 301A? The 301 model is often called “the big sister” the Featherweight. Or a “Featherweight on steroids”. That second one really made me laugh, but I don’t personally agree with either nickname. I thrifted a 301A at my local Goodwill awhile back. Fixed her up and we became best friends. You can watch my video on that on my channel too.
I absolutely love my 301A. Excellent stitches, the slant needle shank for more viewable area, the general oomph, of the motor. I love, love, this machine. So, when I had the opportunity to compare the two models personally I was extremely excite about it. Please watch the video below or watch it here on my channel.
The battle of the smalls. The wee ones that sew really well. The little sewing machines that can do it. It was fun to talk about them side by side as a user and not just a wannabe repair lady.
Let me know if you have both models of the machines and which one you prefer and why. Or do your machines serve specific needs for a type of sewing/project you do. I feel that is also an important consideration too. I’m still deep into my apparel sewing journey, but I am beginning to dabble very lightly into quilting. My love affair with fabric just gets bigger and bigger.
Time to sew and more from me real soon.
xo-Thea
Happy National Sewing Machine Day!

These days, most of you come here via my other social media outlets looking for more sewing machine information. Instead of my handmade flowers. With that said, I am currently transitioning the content here to reflect that.
That doesn’t mean that I’m saying goodbye to my handmade flowers. In fact, I just did a surprise listing yesterday in the shop. However, I want to make sure that those of you who come here looking for more information about vintage sewing machines can find it.

Singer 221K and 301A - video coming soon!
In the mean time, please subscribe to my fledging YouTube channel where I am currently sharing all of my sewing machine content.
Today happens to be National Sewing Machine Day. There’s a day for everything isn’t there. While I might be biased, I do think having a National Day for the sewing machine is completely warranted. What and absolutely cultural changing invention. I do love a good hand stitching session. It is truly an art. Adding a sewing machine to the mix of garment construction not only streamlined production but it put an incredible tool into homes. Allowing home sewists (I prefer sewist. The blend of sew and artist as I am not qualified to call myself the professional name seamstress.) the power to produce clothes, quilts and more at home not only in a functional manner but a new creative one too. When I got the hang of sewing on my treadle I imagined how my great grandmother’s life was changed with this invention. I personally appreciate my sewing machines particularly after a long hand sewing the hem on a circle skirt. Oof.
I am quite the sewing machine fan girl and I’m an intermediate user as best if you ask me. Hang around long enough here and I’ll try to persuade you to fall in love with a vintage sewing machine.
Bye for now!
-Thea
Annual Shop Small Guide - 2023
Hey howdy friends,
I’ve been deep into expanding my sewing knowledge through vintage machine repairs. It’s a sickness really and I have yet to gain control over it. So, I haven’t made any kanzashi or spent time here to connect. I hope you all are connecting with me on other platforms though. (IG & YouTube).
However, you must know that I am passionate about my long time maker community and showing support for them during the holidays seasons.
First, I too would love to have a discount on groceries, utilities and gas rather than a brand new tv or the like from a big box store. Things are TOUGH. A thing that you can do for free is send out links of recommendations to your own social circles to spread the word. It really is appreciated and does truly help.
So let’s get down to it.
Personal Care Goods:
Render Skincare - PNW Made Tallow Skincare Goods. Your skin will love you for this.
Seattle Sundries - Seattle brick and mortar store location open by appointment. Online shop too.
Handmade LaConner - For my Whidbey Island friends be sure to stop in to the shop! Online shopping is available as well.
Estrella Soap - A long standing family favorite of ours. I cannot recommend them enough.
Home Decor & Entertainment Goods:
Vinyl Devotion - For my vinyl collecting fans, if you want superb customer service and high quality vinyls - shop here. They have some band tees too.
Candy Relics - I use their “paper cups” everyday. I love them and highly recommend.
Monster - A bit of everything for some who might be hard to shop for. DIY kits, local classes and wearables.
The Handmade Showroom - Another beautifully curated store in Downtown Seattle with wide selection of gifts. Including gift bundles that can be mailed directly to your recipient.
Wearables -
Slow Loris - Guemes Island based brand and my all time favorite illustration designer (Jessica Lynch). I get compliments every time I wear their pieces.
Backstitch Bruja - Year round spooky wearables plus bags and more. I love her stuff.
elSage - A Mount Vernon, WA based shop. The owners are wonderful people and they make some beautiful high quality designs in shop.
Sun Rae Dolls Vintage - Plus sized cottage core themed attire and goods handmade by a fellow sewist I’ve befriended through my sewing journey.
Craft Supply and Kids:
Smile Mercantile - Adorable craft supplies and miniatures with a retro vibe.
Poison Grrls - Vintage style knitting sweater / top patterns.
Woven Wilde - Small California based company that makes the cutest rattan kid’s toys.
Mymy & Me - Felted toys. So adorable. (Canadian based company)
And of course I have shops too:
6 by 6 Arts - Pretty plant stands, PNW themed goods, wall and shelf decor pieces with a splash of profanity.
Darkness Drive - For the year round ghouls and goblins. Spooky home decor.
My Etsy shop - a place where I’ve typically listed my vintage fabric destash and some kanzashi as well.
Finally my shop here. (Use code SAVE25) at checkout here.
All of the above have 25% off orders of $25. *US only.
This is definitely geared towards my local area but I welcome recommendations from your local area in the comments below.
Please shop small this holiday season.
xo-Thea
PFAFF 262 - Stuck to sewing within a week!
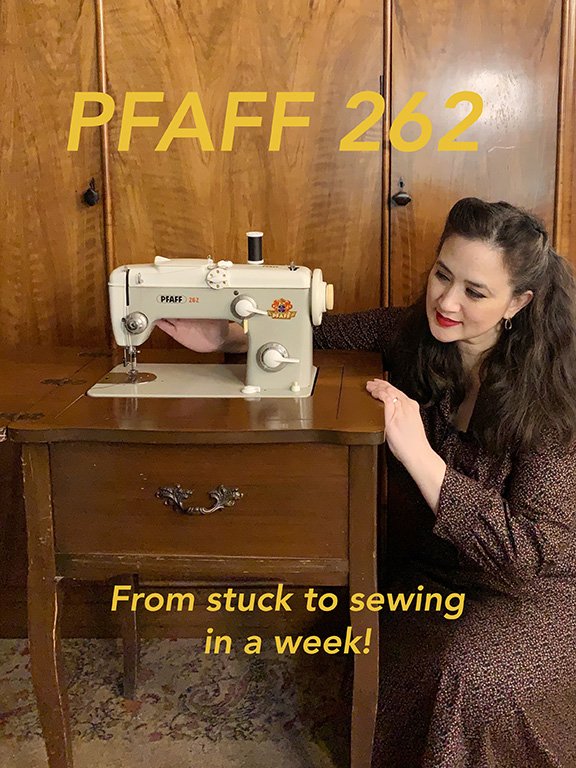
Recently while out thrifting with John, he spotted this Pfaff 262. (I have him on the lookout for me for older Singers & Pfaffs.) When I put my hands on it at the store, I couldn’t get anything to move. It was seized up and pretty dirty. It looked like it lived in a garage previously. Pfaff machines are my favorite. I have been sewing on one for the last 20+ years. With a price tag of $25 and hope in my pocket, I decided to take a chance on her.
Since I am in the deep rabbit hole of vintage sewing and vintage sewing machines, I decided to document what I did to just get her in a functioning state. Many videos and tutorials are geared to those with a bit more experience. I am a newbie. I need to take hands on baby steps and want to encourage others too.
*I do have small machine repair experience from when my dad was still alive. He ran an auto body shop and a small engine repair shop. Guess who got to tear apart a bazillion chainsaws and lawnmowers before the age of 13 and into high school.
This was a bit beyond a simple cleaning. That glue like varnish from the gasoline and Vaseline mixture was no joke. I did have to use a bit of physical force too. John only assisted me with reinstalling the pressure spring that I popped off when I took out the cam assembly.

I had to take this out to access points to oil to get rotation inside the machine.

Above, aside from the mandarin orange is everything I used to work on this. I stick with using only sewing machine oil to get things clean. I did use some 91% isopropyl alcohol to take off the stuck residue from the maintenance service company sticker on the front. Two soft head toothbrushes, lots of Q-tips, a couple napkins, a couple toothpicks and a rag for cleaning. Long bent nose tweezers, a flat head screwdriver that came with my “modern” Pfaff machine and John’s iFixit kit were the tools I used. The wire cutters and pliers were used for another machine I am working on too.
In the future I want to attempt retrobrighting (John will handle this process) some of the dials and hand wheel that have yellowed with age.
I am taking a brief break from fixing things to sew. But I am going to dive into getting the embroidery stitches working and I will post and update video when I do.

My hands are dirty but my stitches are good.
If you’re feeling handy and run into a situation similar to what I did. Give it a try! I’m feeling really good about bringing this gal back to life. I named her Diane after my sister (now known as The Living Miracle) who recently survived a very serious accident. (She was hit by a car at full speed while on a walk.) I feel naming this machine after her is appropriate.
That’s all for now friends. Be sure to connect with me on the outlets I mentioned above for more consistent updates.
xo-Thea
It's comical how bad I am at blogging here (Spooky Season 2022 Review)
If you’re at all interested in my work in general, please follow me on Instagram for frequent posts. I’m a picture poster and love the idea of Instagram and my all time favorite Flickr.
All I’m about to share was posted on those platforms.
With my preference for more time spent on creating things, I tend to forget to complete this step (blogging). My brain thinks “Post it on social and then throw your phone at the couch a leave it there until bedtime.” Which is what I do 99% of the time.
But here’s what i’ve been up to this month: (Just the hits here.) Links included in the captions

Pouring John a glass of poison. Link

Said poison. Link

My favorite make this month. Link

I love how out of context this is.
Spooky Dollhouse Decor (YouTube Link)

Here’s a full view of the dollhouse along with my final 2022 Spooky Season make. 1940’s style pajamas.
I will definitely do a dedicated post on the dollhouse renovation. I know there were a few questions about it outside of what I shared on YouTube.
I know there are a few of you who subscribe to this blog and I super appreciate you!
Happy Halloween (Blessed Samhain)
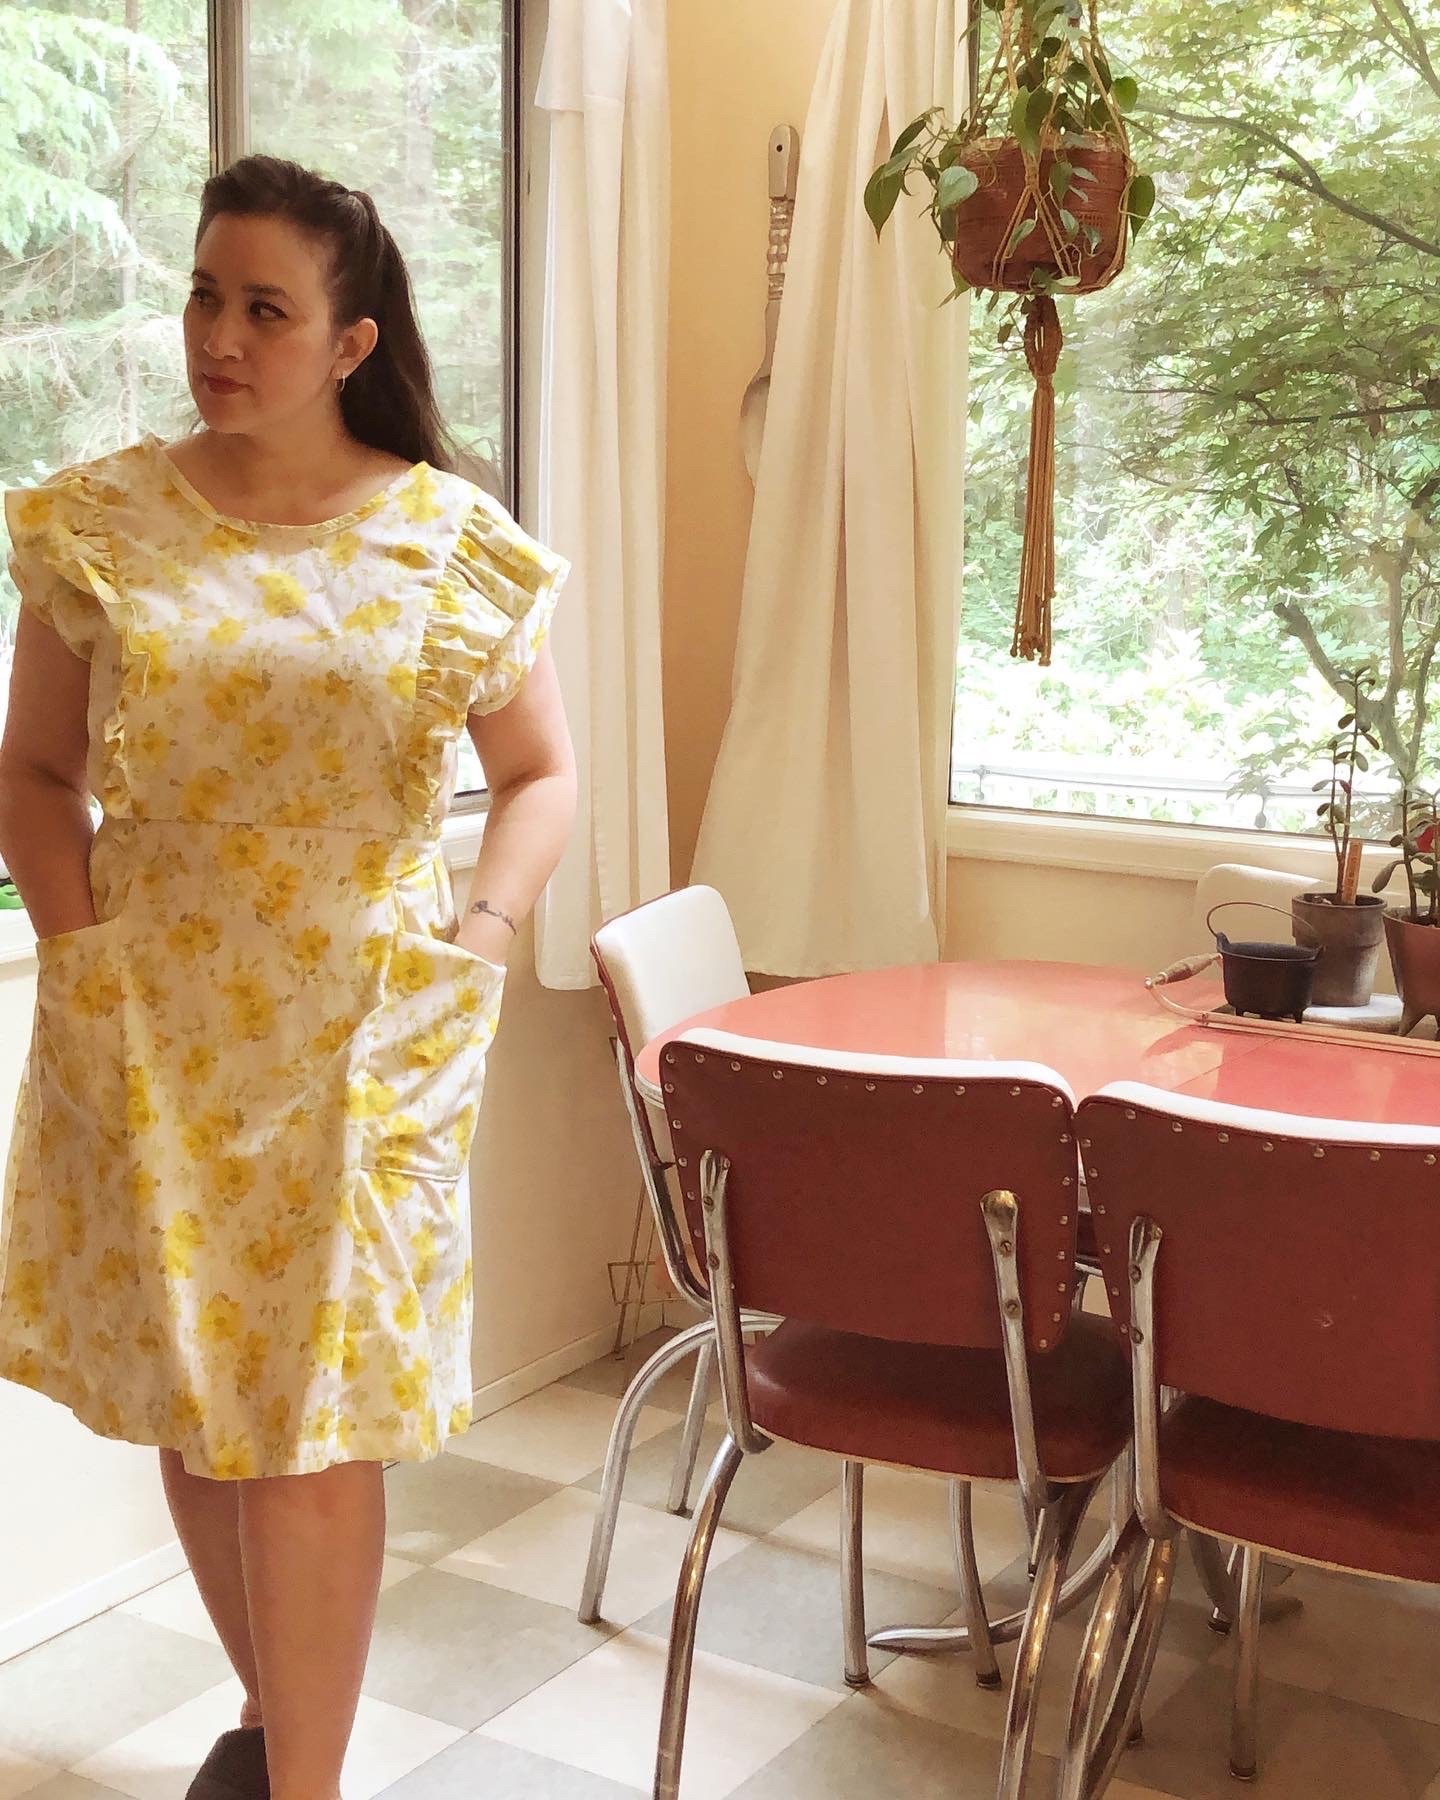
Cobbler Dress by Charm Patterns (Patreon)

My favorite vintage Pyrex pieces, both 404s.
Even though my kids are grown, after years of habitual weekend bulk baking/cooking I still do it. Just on a smaller scale.
This past weekend I did a bunch of bulk baking and cooking for the week/month. I wanted to get it done before the heat came in this week. I become a lethargic slug in really hot weather and will live on seltzer water, tortilla chips and vegan ice cream unless there is easy healthy alternative available. I was an early adapter to clean eating (at least mostly and my kids are now thanking me 20 years later) and I just hate how I feel when I eat like crap. It’s also expensive to eat convenience foods, so I like to plan ahead.
For kitchen days, I like to be comfortable and okay with getting stuff on what I am wearing. This dress is perfect for that. It’s a pullover dress. No buttons or zippers. Deep pockets and ties at the sides. I’ve also make the top and pants version of this too. But pants are my enemy in hot weather.
I get ask about my vintage chrome and formica dinette set. It was purchased for under $500 in Helena Montana about 20 years ago. It is true vintage and has survived my children and all of their friends for many meals.
Fabric: Vintage floral cotton bedsheet that I thrifted.
Pattern: Cobbler Dress by Charm Patterns (Patreon)
Alterations: No alterations. But I will size down next time. I think this pattern ran on the bigger size. I will also opt out of the ruffles. It gave me flash back to my church dresses from the 80s.
Bowls: My two favorite vintage Pyrex bowls. A primary yellow 404 (I think. Pyrex collectors know what I mean.) Also, my hefty true opal 404.
Stay cool friends. xo-Thea