Black Friday - Cyber Monday Sale!
The photo says it all!
I'm hosting a Black Friday - Cyber Monday Sale!
Get 20% off orders over $15.00! November 24-27, 2017.
Enter coupon code: 20%OFF at checkout.
xo-Thea

The photo says it all!
I'm hosting a Black Friday - Cyber Monday Sale!
Get 20% off orders over $15.00! November 24-27, 2017.
Enter coupon code: 20%OFF at checkout.
xo-Thea
I'm starting off June 2017 with a little press. I recently had that honor of being interviewed at my home studio for a day. I was asked questions, did a little show and tell about my process(es) and had a few pictures taken by 425 Business Magazine. 425 is our local area code and the publication focuses on businesses in our area. Everything from big international software companies that you've probably heard of to little old me.
The photographer and journalist that came to my home were absolutely amazing. It is always a little strange to invite customers, press and the like to my home to see how we run our companies. It is our home after all and we do have a Dr. Seuss mural on our "office" wall. We also had the pleasure of creating items for the cover. The creative artists at the magazine created a beautiful layout.
You can read more about us in the current issue available at newsstands right now. The article will be available online later this month and we'll be sure to share it with you all then.
xo- Thea

Thea Starr | Hand dyeing vintage kimono fabric linings for kanzashi.
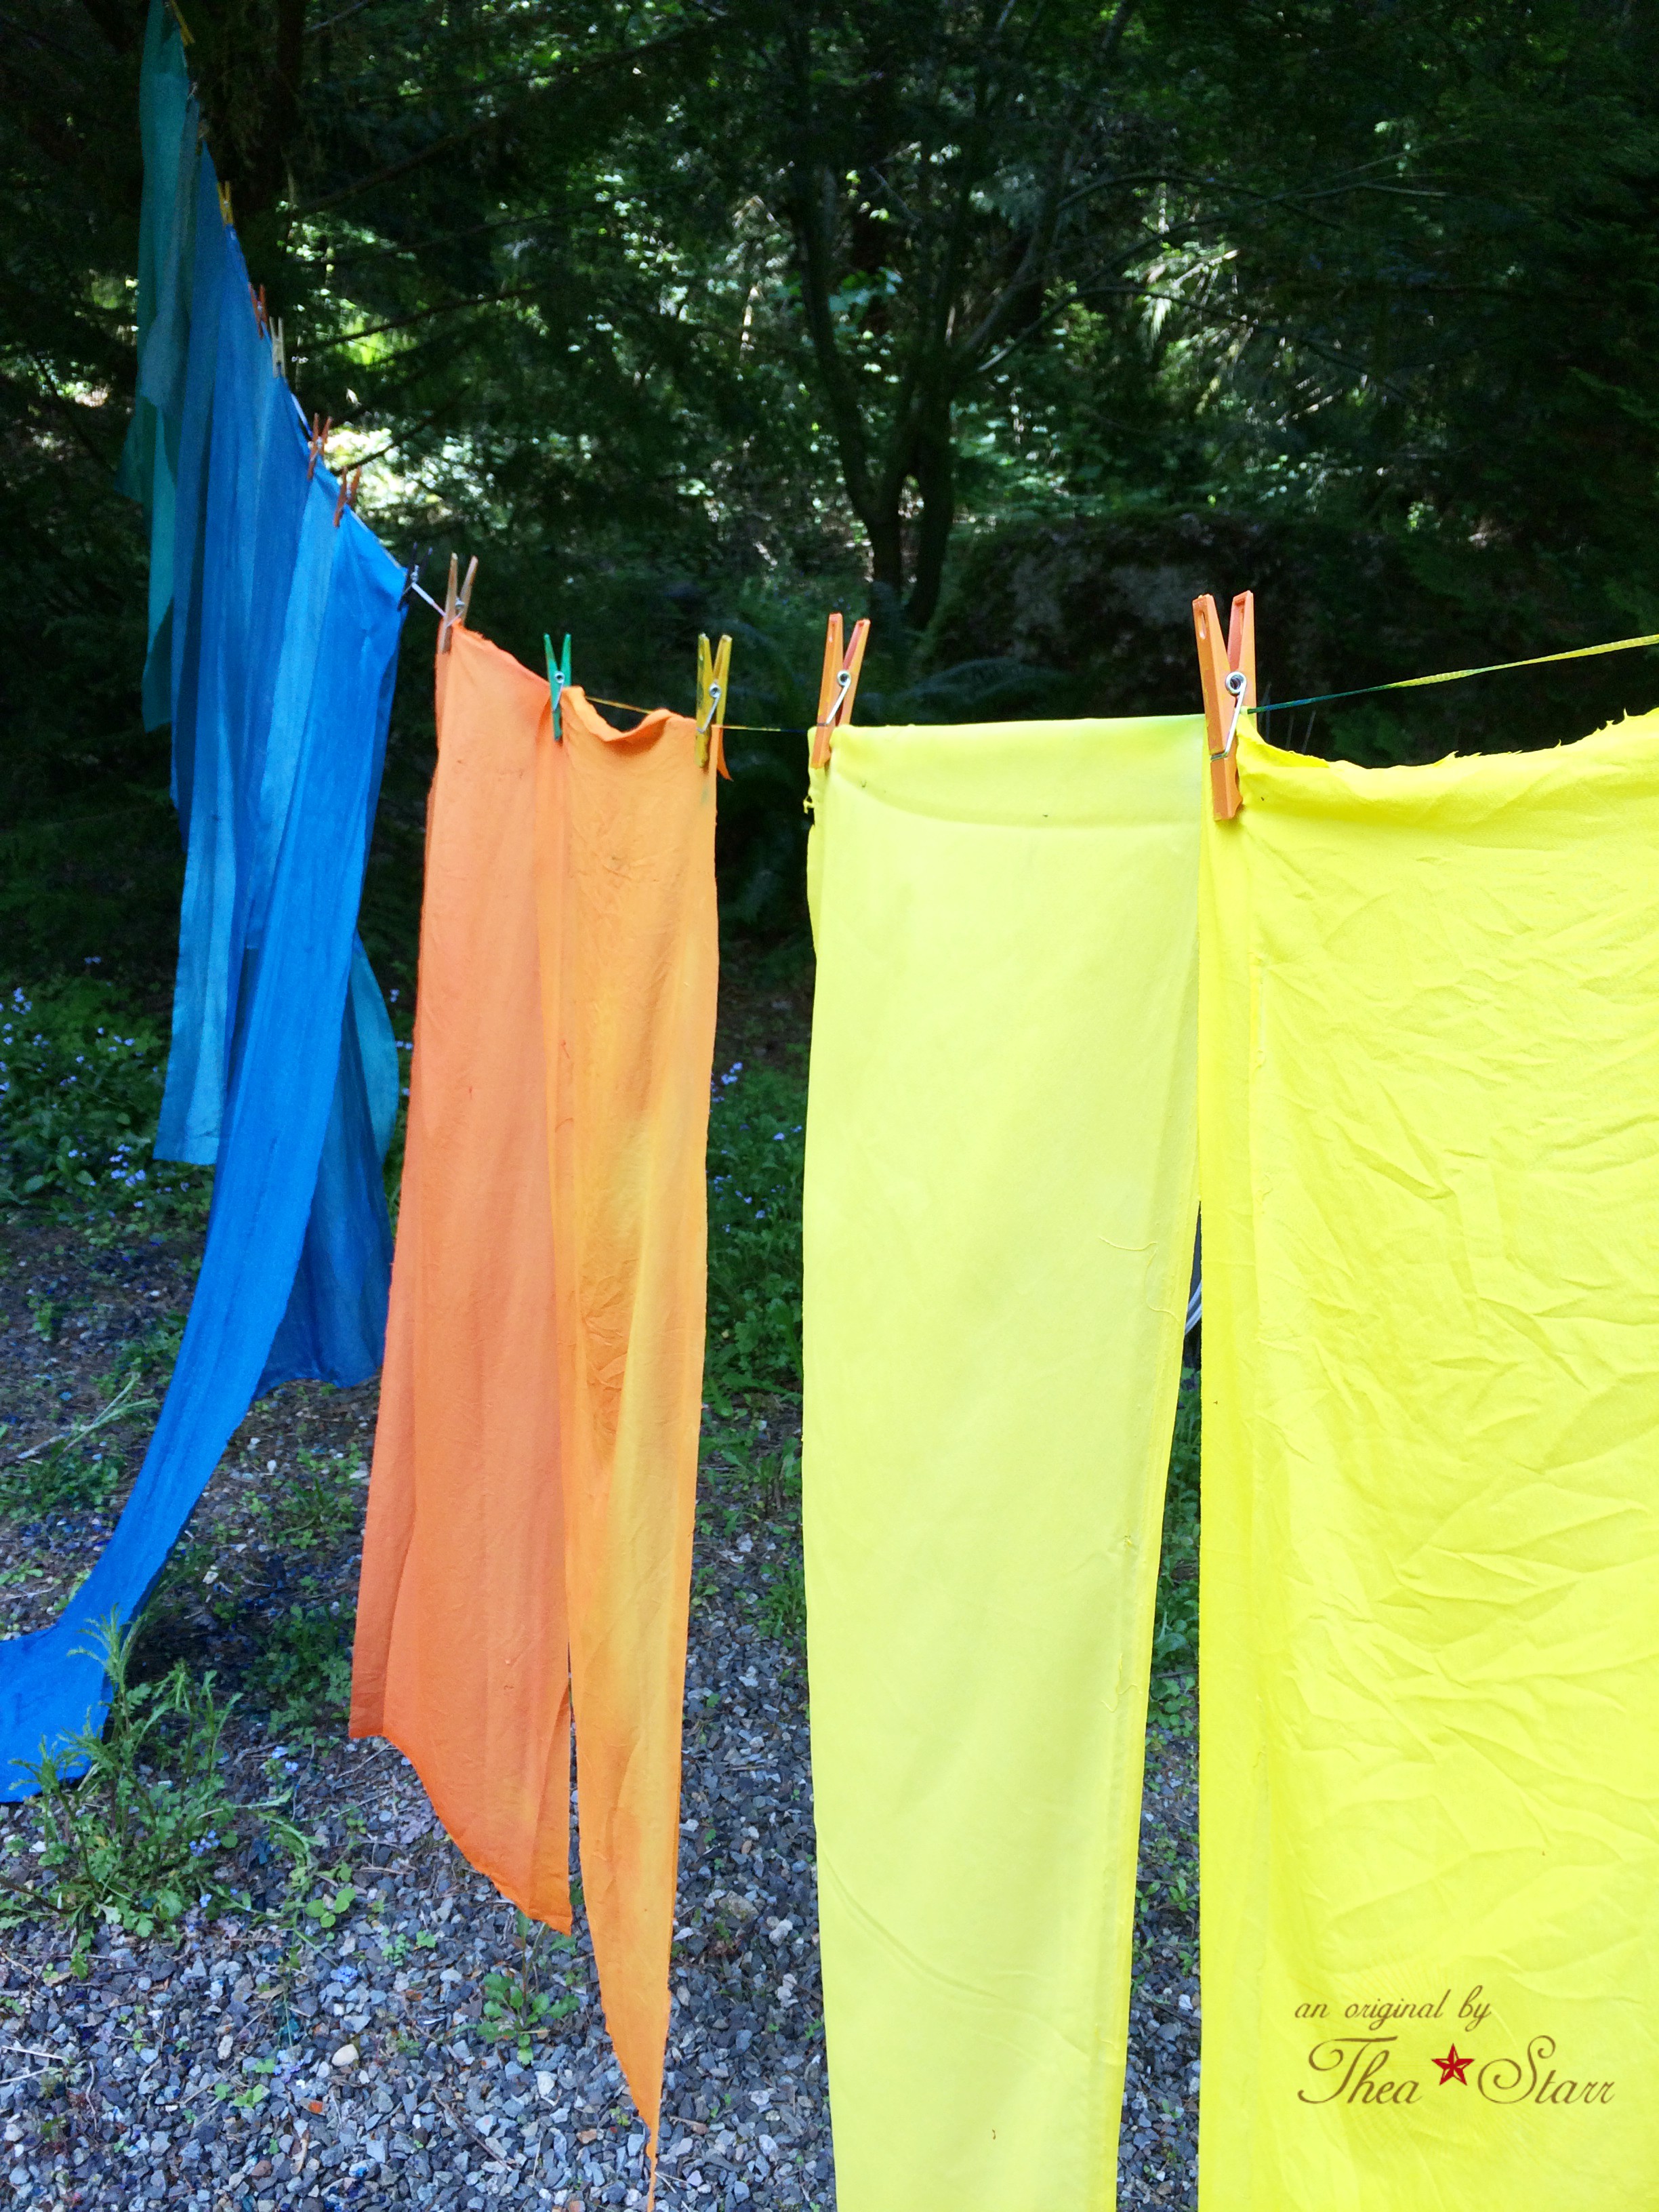
I recently shared the above photo on my Instagram account. It's just me in my backyard dressed like a regular mom on a Sunday afternoon at home, doing what I do ; hand dyeing my kimono linings. I received a few surprising comments about it. Some didn't realize that I dye some of my fabrics. Some wondered if I was doing a first time experiment with dyes. I've been doing this so long I guess I need to do refresher posts on my process every now and then to share my story with new folks that find me a long the way. While I do mix things up with my process and continuously build my craftswomen skills on my craft, my method has been consistent for the past 12-13 years. So I get comfortable and I forget to share what all I have to get to the end result of my work.

Vintage kimono linings.
Today I am sharing my dyeing process for my fabric. Technically, I should've started with the first two steps of my process; which is dismantling the vintage kimonos and then the processing of the fabrics. Since I happened to share some of my dye process on my Instagram, we'll just skip ahead to that.

I've been exclusively using vintage kimono fabric for my kanzashi for years. Many years ago, I purchased a huge amount from Japan at a bargain and I have been pulling from that for years. During the dismantling process of the kimonos, one discovers just how much fabric it takes to make one kimono. I once pulled over 14 yards of fabric from one kimono. That included the lining. When I first started, I immediate accumulated a surplus of linings. Most of them were aged stained, torn or has insect wear. I had been an art docent for a couple of my childrens' classrooms over the years and had some left over supplies, including tie dye. I decided to see what I could do with dyeing the linings to make them usable. After experimenting with silk paints, natural plant based dyes and water based acrylic dyes, I have perfected my dye process.

I owe a lot of my color mixing experience to my dad. He let me be creative with left over (very pricey) automotive paints. He let me mix them to blend paints for small projects like, a welder's cart we made. I learned a lot about ratios and how to be in control of a pneumatic paint mixer even before I was able to drive.
I love bright vibrant colors. I am to create them during my dyeing process. The bolder colors also help hide blemishes in the fabrics. Each fabric takes to the dyes differently. So patience and experimentation is key to figuring what works best.


You'll notice in the photos that I do not wear gloves. I use non toxic and natural dyes so I feel comfortable not wearing them. I prefer to be able to touch and work in the dyes into the fabrics with my bare hands. I try to plan to do my dyeing when I do not have to be anywhere serious for a few days. Unless I feel comfortable explaining why hands are various colors.

Thea Starr's Hands
I usually dye my fabrics outside in my backyard when I can use the garden hose to clean things up as I go. I will however, facilitate my bathtub in a pinch if the weather is bad. I do live in the Seattle area after all. Everything is hung up to dry in the sun and then I bring them in, heat set the dye by ironing them with appropriate heat temperature for the type of fabrics. Then I cut everything up on my cutting table. I'll share that process in another post.
That's about it for my dyeing process. Did I miss anything? Do you have a question you'd like to ask me about my process? Are you wondering if I do yoga because of the position that I am in, in the first photo? I don't, I'm just a really flexible person and I do have the "Asian Squat" ability thanks to my mom.
xo-Thea

Fresh cut lilacs from my garden adorning my kitchen table.
Today is one of my favorite days of the year! The day I get to cut a bouquet of lilacs and bring them inside. I LOVE the way they smell. I had a lilac bush in front of my bedroom growing up as a kid on Whidbey Island. I used to love to open my window and the smell would fill up my house. The ones I have now, are too far from my windows so I bring them in. I stop to smell them every time I walk by.
Although lilacs are my favorite flower, I haven't made a kanzashi piece in the style of one. I haven't had a desire too. Maybe I think they're too sacred to me. Maybe I might attempt a piece in the future. Do you have a special flower? Does that sound weird?

Peach Summer Kanzashi Flower | Thea Starr 2017
Mother's Day is upon us. It means a lot to some, others like myself, its not a huge deal. Since I was 18 years old, it's been Mother's Day. I'm very proud to be a mom to my offspring. Even if they do turn my hair white some days. I think if you're close to your momma, you should let her know more than just one arbitrary day of the year. If you've been following along for a bit now, you know I lost my parent 13 years ago. I miss my dad every day I wake up. I wish I would've reminded him more often how much I loved him and was grateful for all he did for me. But I do like to refer to an older blog post of mine, "Know your mother" when it comes to "special days". Maybe your mom needs more than words and a hug. I have many mom friends that feel love through gifts in the most not materialistic way. I think it's the thoughtfulness behind the gift. We're dipping into "know your love language" territory here, but moms are people not just the ladies that drives to practices and makes dinner every day.
Thanks to those who purchased one of my pieces for their moms. All shipments have been sent this week. I truly hope they enjoy them and am honored you chose my work to share with them.
xo-Thea
With a few days of sun, it seems as if everything is in full bloom right now. Even here in my shop!

I'm a true Pacific Northwestener, so I don't mind the long fall/winter gloom. But it is nice to see things come alive outdoors. I took that inspiration and created a few pink items to celebrate!
I hope you all have enjoyed the spring renewal a little so far! There's more to come from me and for a limited time I am accepting custom orders for summer and fall weddings/events. Please contact me for more information.
xo-Thea
I laughed out loud at myself when I was editing photos and noticed my dry skin on my fingers in the above photo. Its not meant to gross anyone out, but I found it funny because I went to great care ensuring that this piece would look it's best in the photos. And I go and wreck it with my hands that created that piece. Life of a handmade artist...
Kanzashi making is definitely a hands on process. After 15 years of making them, my hands have aged a bit. Totally worth it though. Recently, I've revisited a few of my older designs. Some of which, still are making the rounds around Pinterest. It has been fun to appreciate my own work and development of my craft, especially since I am completely self taught. It's inspired me to make some new pieces, especially for my shop here, not just my wholesale accounts.
There are two fresh items in the shop! Check them out, there's more to come!
xo-Thea
P.S. Today is my husband's birthday. He's awesome and I'm glad he was born.

Well, hello. It's seems that I have hibernated for the winter. I've actually just had to take time to focus on 6 by 6 Arts. The majority of this business has always taken place during the spring and summer months, for obvious reasons. Things are about to start blooming again around here since spring is upon us.
I finally have time to sit down and just make. It feels so good.
I still owe you all a blog post about my personal wedding bouquet from my wedding last September. It wasn't my most elaborate piece, but definitely one of my most creative and richly colored bouquets.
Many of the pieces above can be found at Momo Seattle. Many more will soon be popping up in my shop(s).
xo-Thea
I probably should have started with topic as the opener. If you're like most people, you have a wedding budget to work with.
We gave ourselves $5,000.00 to make it all happen. $5,000.00 is a lot, but not.
Fun Fact: Americans on average spend $32,461.00 on a wedding. While Europeans spend on average $5,495.00 on a wedding. WUTTTT...Now in all honesty, I am not sure if that applies to first time marriages only. *Full disclosure, my first wedding expenses could've purchased a top of the line luxury car. Having lived a little since my early twenties, I know the important places to spend money.*
There are probably a million and one wedding budget guides out there to use. I looked a few over and saved a couple to my wedding Pinterest board to reference. But most didn't apply to us. So I took some basic information that the guidelines had and created my own.
Expenses that didn't apply to us: venue fees, officiant fees, florist fees, catering fees, the rehearsal dinner, photographer and DJ fees. Sounds like we got married at the justice of the peace right? I assure you that wasn't the case, let me break it down for you.
Our ceremony site decorated with pieces of the tree that fell down onto the house. I stood pieces on end and hung a small flower back drop off of a few large branches that had pinecones on them.
Venue - After we found out that the venue we wanted was sold and we tried contacting them to make arrangements without success. We decided to host our wedding in the backyard of some family property that we own. It is modest but had everything we needed. The house was small and we had to plan to have the ceremony and reception outdoors. We had both on site. Which made it easy for our guests, they only had to park once. We purchased two large event tents on sale for $200.00. They were fantastic! White with windows built into the sides, fancy enough for us. We used some other pop up tents that I have purchased over the years for outdoor shows too. Other things we purchased for our venue, blankets for our guests (we live in the PNW where it can rain at any time - and it did the day before), lighting, decor items - like vases, large tablecloths, materials to build long tables and event insurance.

Our very good friend Chris and our eldest son Calvin setting up the tents and the long tables.
The tables all set up with food for the guests to have right away.
We lucked out on a few items that we got for free or at a bargain price through Craigslist and our local Buy Nothing Group. We scored 70 chairs for free from a local country club that was remodeling. They weren't perfect but they were fancier than rental chairs and they happened to be our wedding color - burgundy. We also got an outdoor standing propane heater at a crazy great price. All said and done the cost for our venue - $2,000.00
John waiting at the beginning of the ceremony.
Ceremony - John's best friend came up from California to be our officiant. It made it special for us to have someone close do us that honor. Although he was nervous, he was fantastic. He announced us "Carbon based lifeforms". We had our children give us away to each other and that was our only wedding party. We purchased wedding clothes for the kids and ourselves. I did my own hair and make up as did our daughters. And as you can guess, I did my own kanzashi and keepsake wedding bouquet. I'll do a post dedicated to just that in the very near future. We asked my now mother in law to be our photographer. No one could've done a better job for us that she did. Miscellaneous fees include, the wedding programs that we had the content printed and our daughters assembled, wedding favors that we produced ourselves, wedding rings handmade by Foamy Wader, John's attire and my wedding dress that I bought in the off season. All said and done our ceremony cost us approximately - $1,000.00.
We did have some hurdles with the venue. About a month and half before the wedding, a large tree fell on the house. It caused a couple thousand dollars worth of damage AND since our budget was tight (we also had a surprise $3,000.00 car repair bill just before the tree fell on the house and we depleted our wedding account to pay for that) we couldn't afford to have the tree removal company actually remove the tree and the branches from the property after they cut the tree down. We had to do that ourselves, three days before the wedding. We also had to repair a broken pipe in the house that was unrelated to the tree damage.

Jina - my eldest daughter. Is not only a brainy boss babe - but an excellent cook too. I'm not sure how I got so lucky with this kid.
Reception - My eldest daughter and I personally prepared all of the food. Three of our kids did help with rolling some of the 700 pieces of lumpia that was made for the wedding. I asked a long time friend to actually cook the lumpia on site. Our entire family (that includes some very good friends that are like family) helped with setting up the reception area and bringing the food out onto the tables. From the beginning I wanted there to be food everywhere for guests to eat since everyone was traveling to attend the wedding. My nieces (who are adults) offered to bake our wedding cake. To this day, I still cannot believe what a fantastic job they did! It was absolutely incredible and that deserves it's own post. We provided beer, wine, hard alcohol, soft drinks, juices and water. We filled our little boat to the brim with drinks and ice for our guests to help themselves.
My sister and nieces bringing in the beautiful cake they made.
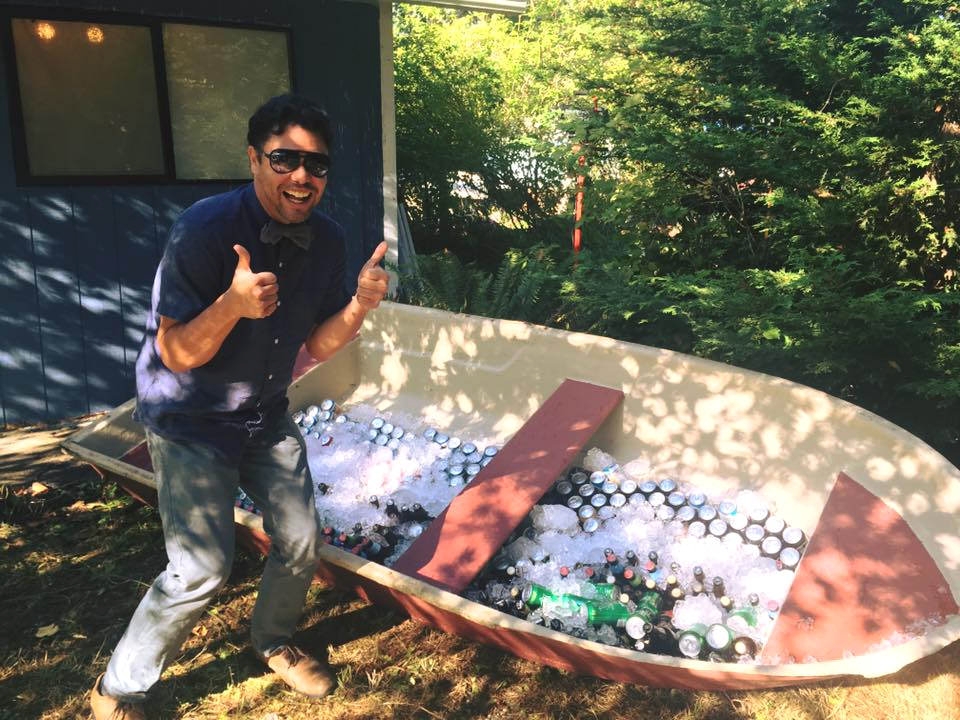
Our little beer boat. (Photo by M&K)
Costs include - food, drinks, chaffing dishes, deep fryers, coffee pots, service ware, biodegradable and recyclable utensils, plates and cups, Wet Naps, a very special cake topper and a karaoke machine. - $2,000.00
$5,000.00 - maybe a smidgen above that. I didn't keep a solid track on our clothing expenses and we did have some tools and repair costs that went in one ear and out the other.
I am personally still in shock almost a month later that we ALL made everything happen - so perfectly imperfect.
I'll dedicate posts to my kanzashi, our beautiful wedding cake and a couple other details that made the difference at our wedding.
xo-Thea
On September 3rd, 2016 at 5:30pm, John and I were married. It was an intimate yet festive affair. Somethings were traditional some were not.
Wreath art for our stickers was designed by Lisa Glantz
Our wedding was completely DIY and featured many handmade elements as any good makers would do.
Let me start with our invitations. Owning your our own laser cutting company had the perk of being able to make our own custom laser cut invitations. Invites can be expensive. Making our own added our own personal touch and helped us stay within our $5,000k wedding budget.
Our custom "homemade" wedding invitations. My formal name is Dorothya.
Let me back up for a moment and mention our save the dates. We are big fans of Unusual Cards (artist Francesca Berrini is a genius). We picked out our favorite postcard of hers and sent them out as our save the dates. If you know us, it's totally us.
Back to the invites, like our regular work process we handled the design very similarly. I came up with the schematic design and John made it actually happen.
Our wedding theme was Art Nouveau Evergreen. We knew we would have a lot of access to sword ferns and blackberries and wanted to incorporate them into our wedding decor. We used the ferns on our wedding invite design because we love them. I love the art nouveau stylized art and so it became our invites.
Laser cut fern themed invitations by 6 by 6 Arts.
Each card was laser cut and assembled by hand. We placed a piece of marbled paper behind our laser cut cards and inserted the colorful printed card in the art nouveau style. I won't post a photo of those since it contains personal information.

Hand addressed and sent off, much later than we wanted to. But there's a good story as to why they were late. To be continued...
Hopefully you'll enjoy my posts about my recent nuptials. I promise there will be a big post all about my personal kanzashi and keepsake wedding bouquet.
xo - Thea
Hi there! I've survived a wedding and a large show with my other company 6 by 6 Arts.
I'll have lots to post about in regards to our very DIY/handmade wedding in the very near future. But I wanted to share some information about the upcoming holiday season. For the first time in over a decade, I will not be at Urban Craft Uprising's Winter Show with my kanzashi.
Whoa.
It is a bit surreal after you're used to an annual event for so long it seems a bit weird to not have that on the list of upcoming events. Honestly, I didn't try very hard to get into the show. This company this year has taken a back burner to 6 by 6 Arts. Not because I'm not interested in my work or have a lack of business, I'm just branching and evolving into new works.
With that said, I will be at Urban Craft Uprising's 2016 Winter Show with my other company 6 by 6 Arts. For all of those who have asked me; "Where is my other stuff." Now is your chance! It will be 6 by 6's Seattle show debut. I'm very excited for the opportunity.
I will still be making and selling my kanzashi online and at my current stockists. So never fear, your forever flowers are still available, just let me know what you need.
For all of my long time customers, thank you so much for the continued support at the UCU show! I hope to see you all this winter, just at 6 by 6's booth this time.
xo-Thea
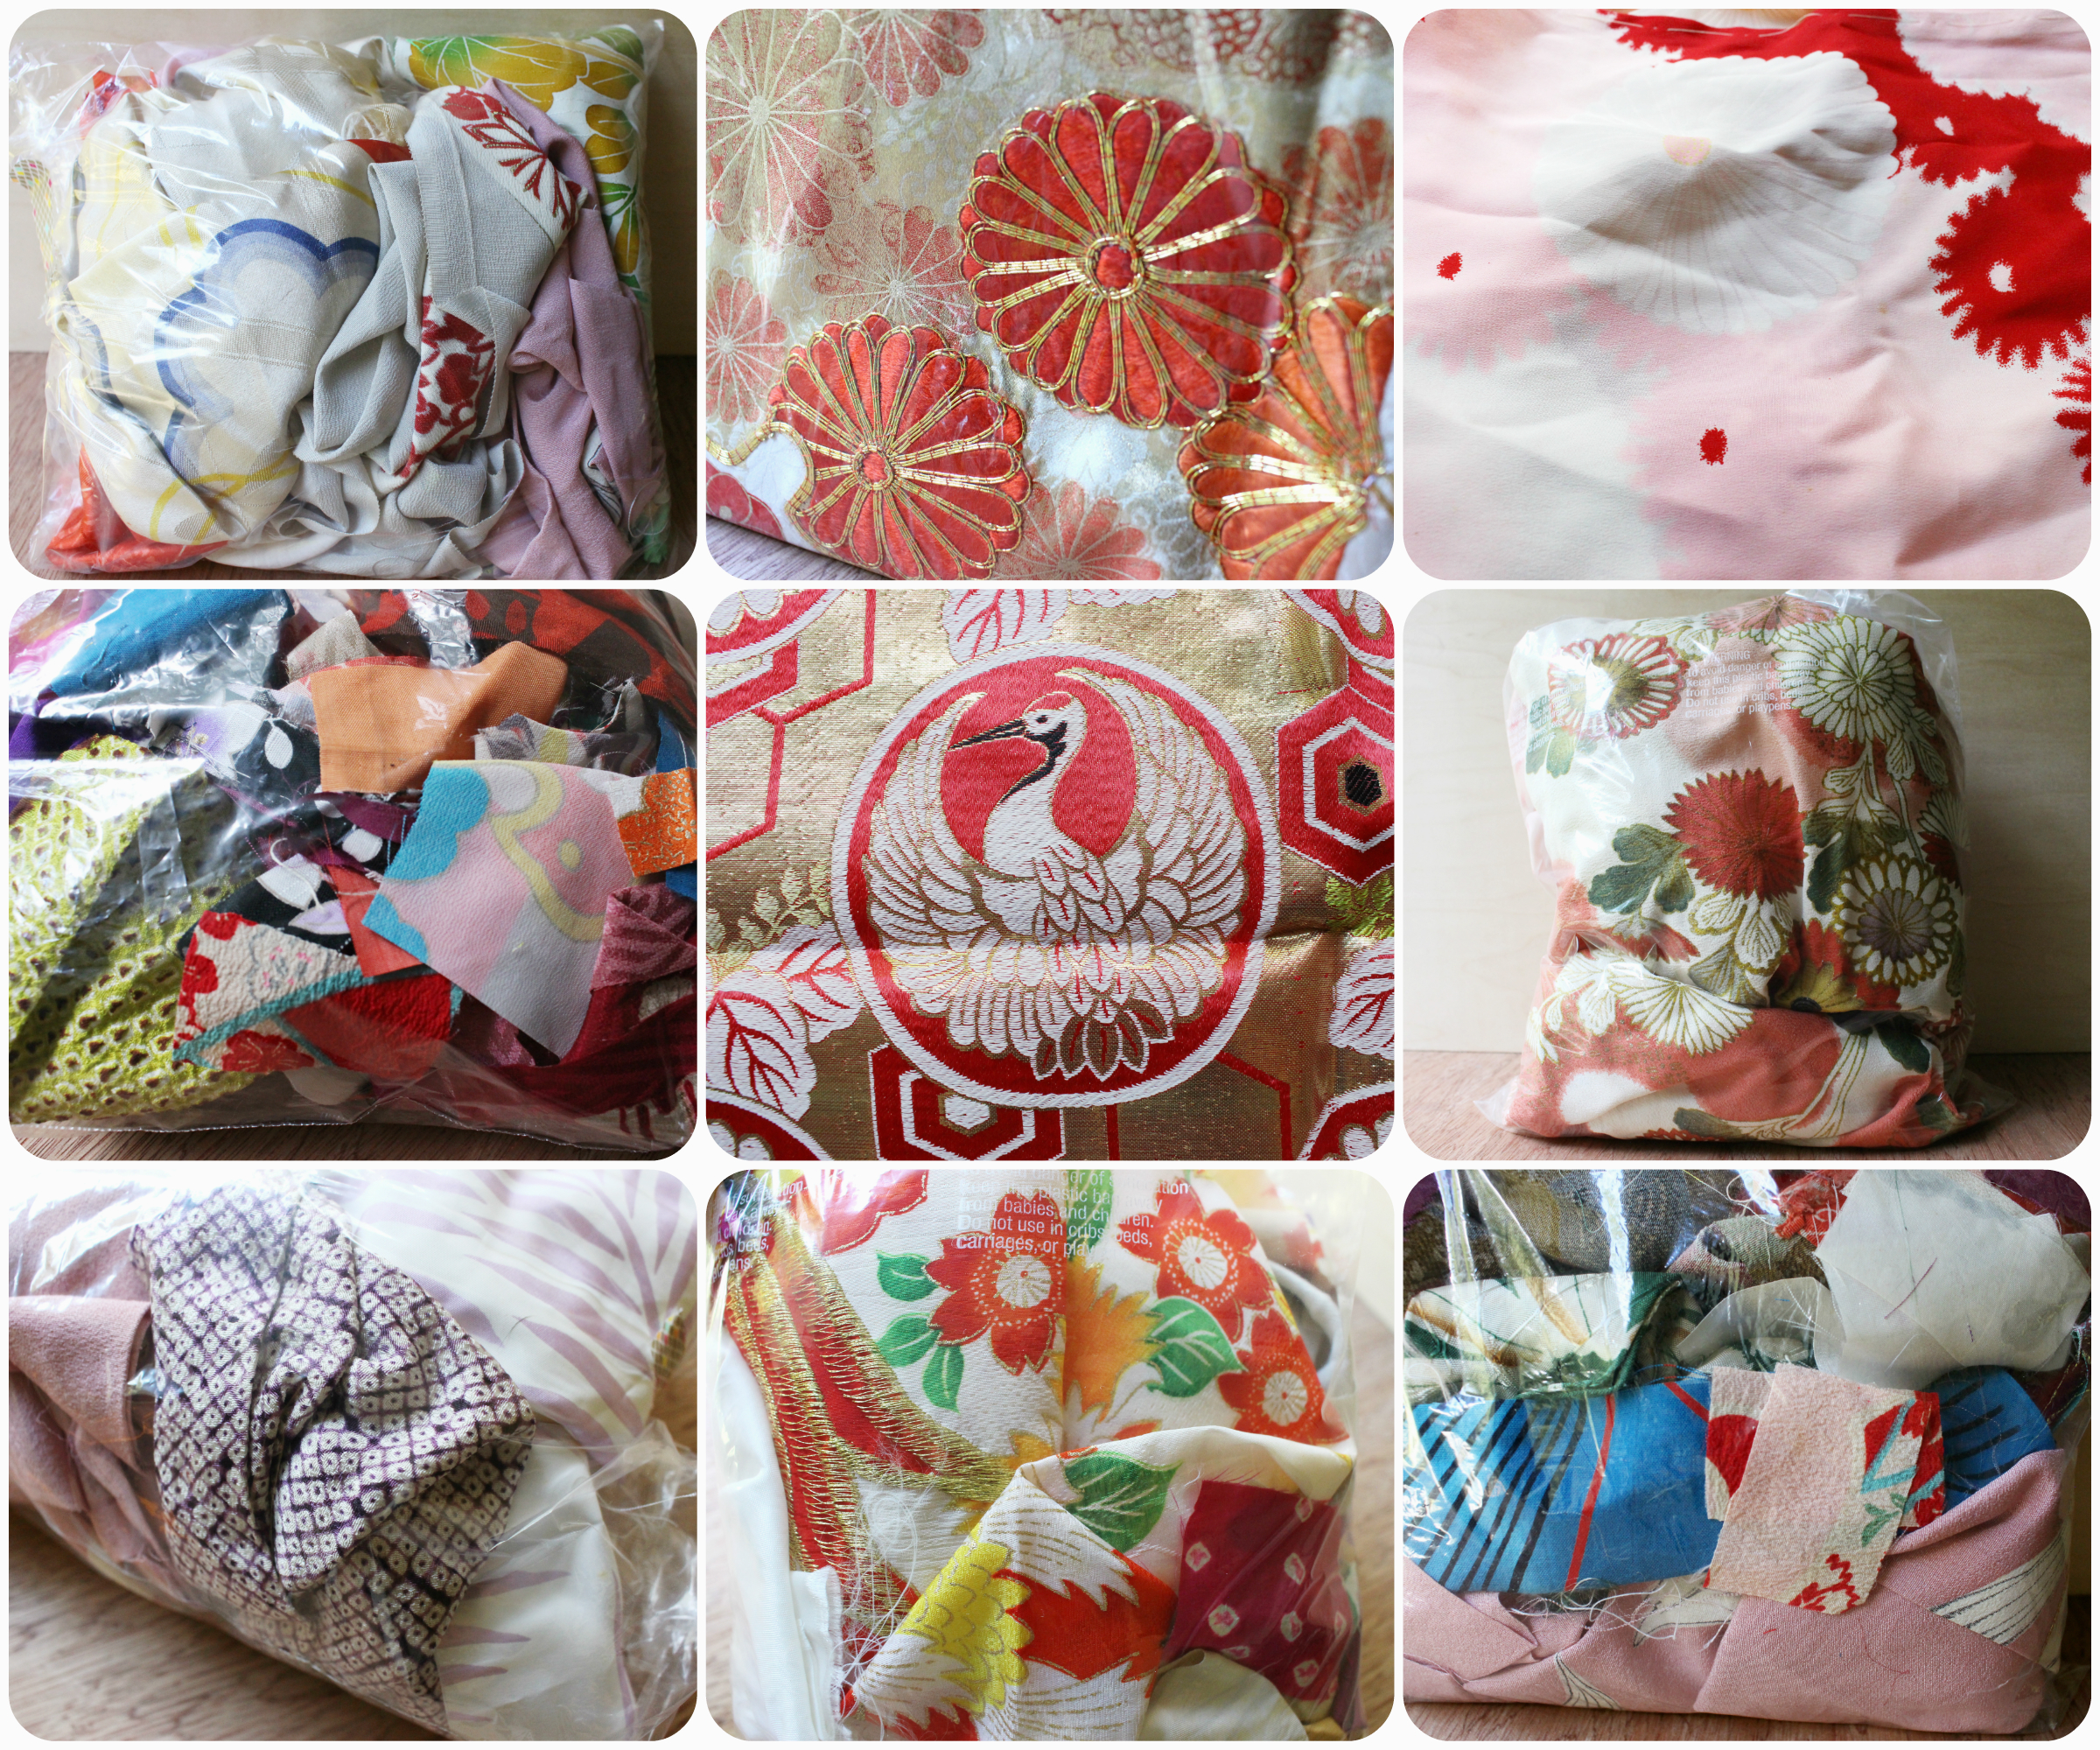
Yesterday, I spent the majority of the day going through piles of my kimono fabrics. I was looking for specific pieces for a bouquet that I am working on for a bride. I noticed while digging I had inadvertently set aside pieces that "I can let go of". Meaning that I've had them for some time and that they've been out of rotation or that they are just unusable for kanzashi making. So I decided to do a "blue moon" thing and list a handful of random grab bag mixes.
Perfect for small projects, doll making, practicing making your own kanzashi or just general stash building. I typically only have these grab bags available at local craft shows. So grab them while you can! All the listings are available exclusively in my Etsy shop:
I am happy to pass on the fabric love. (Because it justifies purchasing more soon!)
xo- Thea
This weekend the Bon Odori festival is happening in Seattle.

Seattle Bon Odori Flyer at Momo Seattle
I dropped off fresh new inventory along with some special kanzashi pieces at MOMO Seattle - 600 Jackson Street in Japantown/International District.

Momo Seattle
Those special kanzashi pieces are only going to be there for a limited time. So be sure to get them while you can!
While you're there in the neighborhood, be sure to explore the shops, restaurants and other notable places of interest (Thank you Pokemon Go!)

The Historic Panama Hotel

Walking up Jackson Street in the International District
Xo- Thea
Dreamy Pastels - Thea Starr 2016
I'm a lover of bold colors. But I can absolutely appreciate softer more neutral tones and pastels.
I recently made this bouquet to have on display at Urban Craft Uprising Summer Show. My family and friends all noted that the color palette was not a usual one for me.
I tend to avoid the "basic" wedding color palette. I love being able to offer custom colors for brides who want something out of the ordinary. Even with this pastel arrangement, I incorporated a succulent grey green, with a perfectly pale pink both fabrics are cotton and come from the same kimono. Along with a soft cream ro kimono silk fabric.
Soft, subtle and timeless. A perfect heirloom keepsake for your special day.
This bouquet is now available in my shop.
xo -Thea


